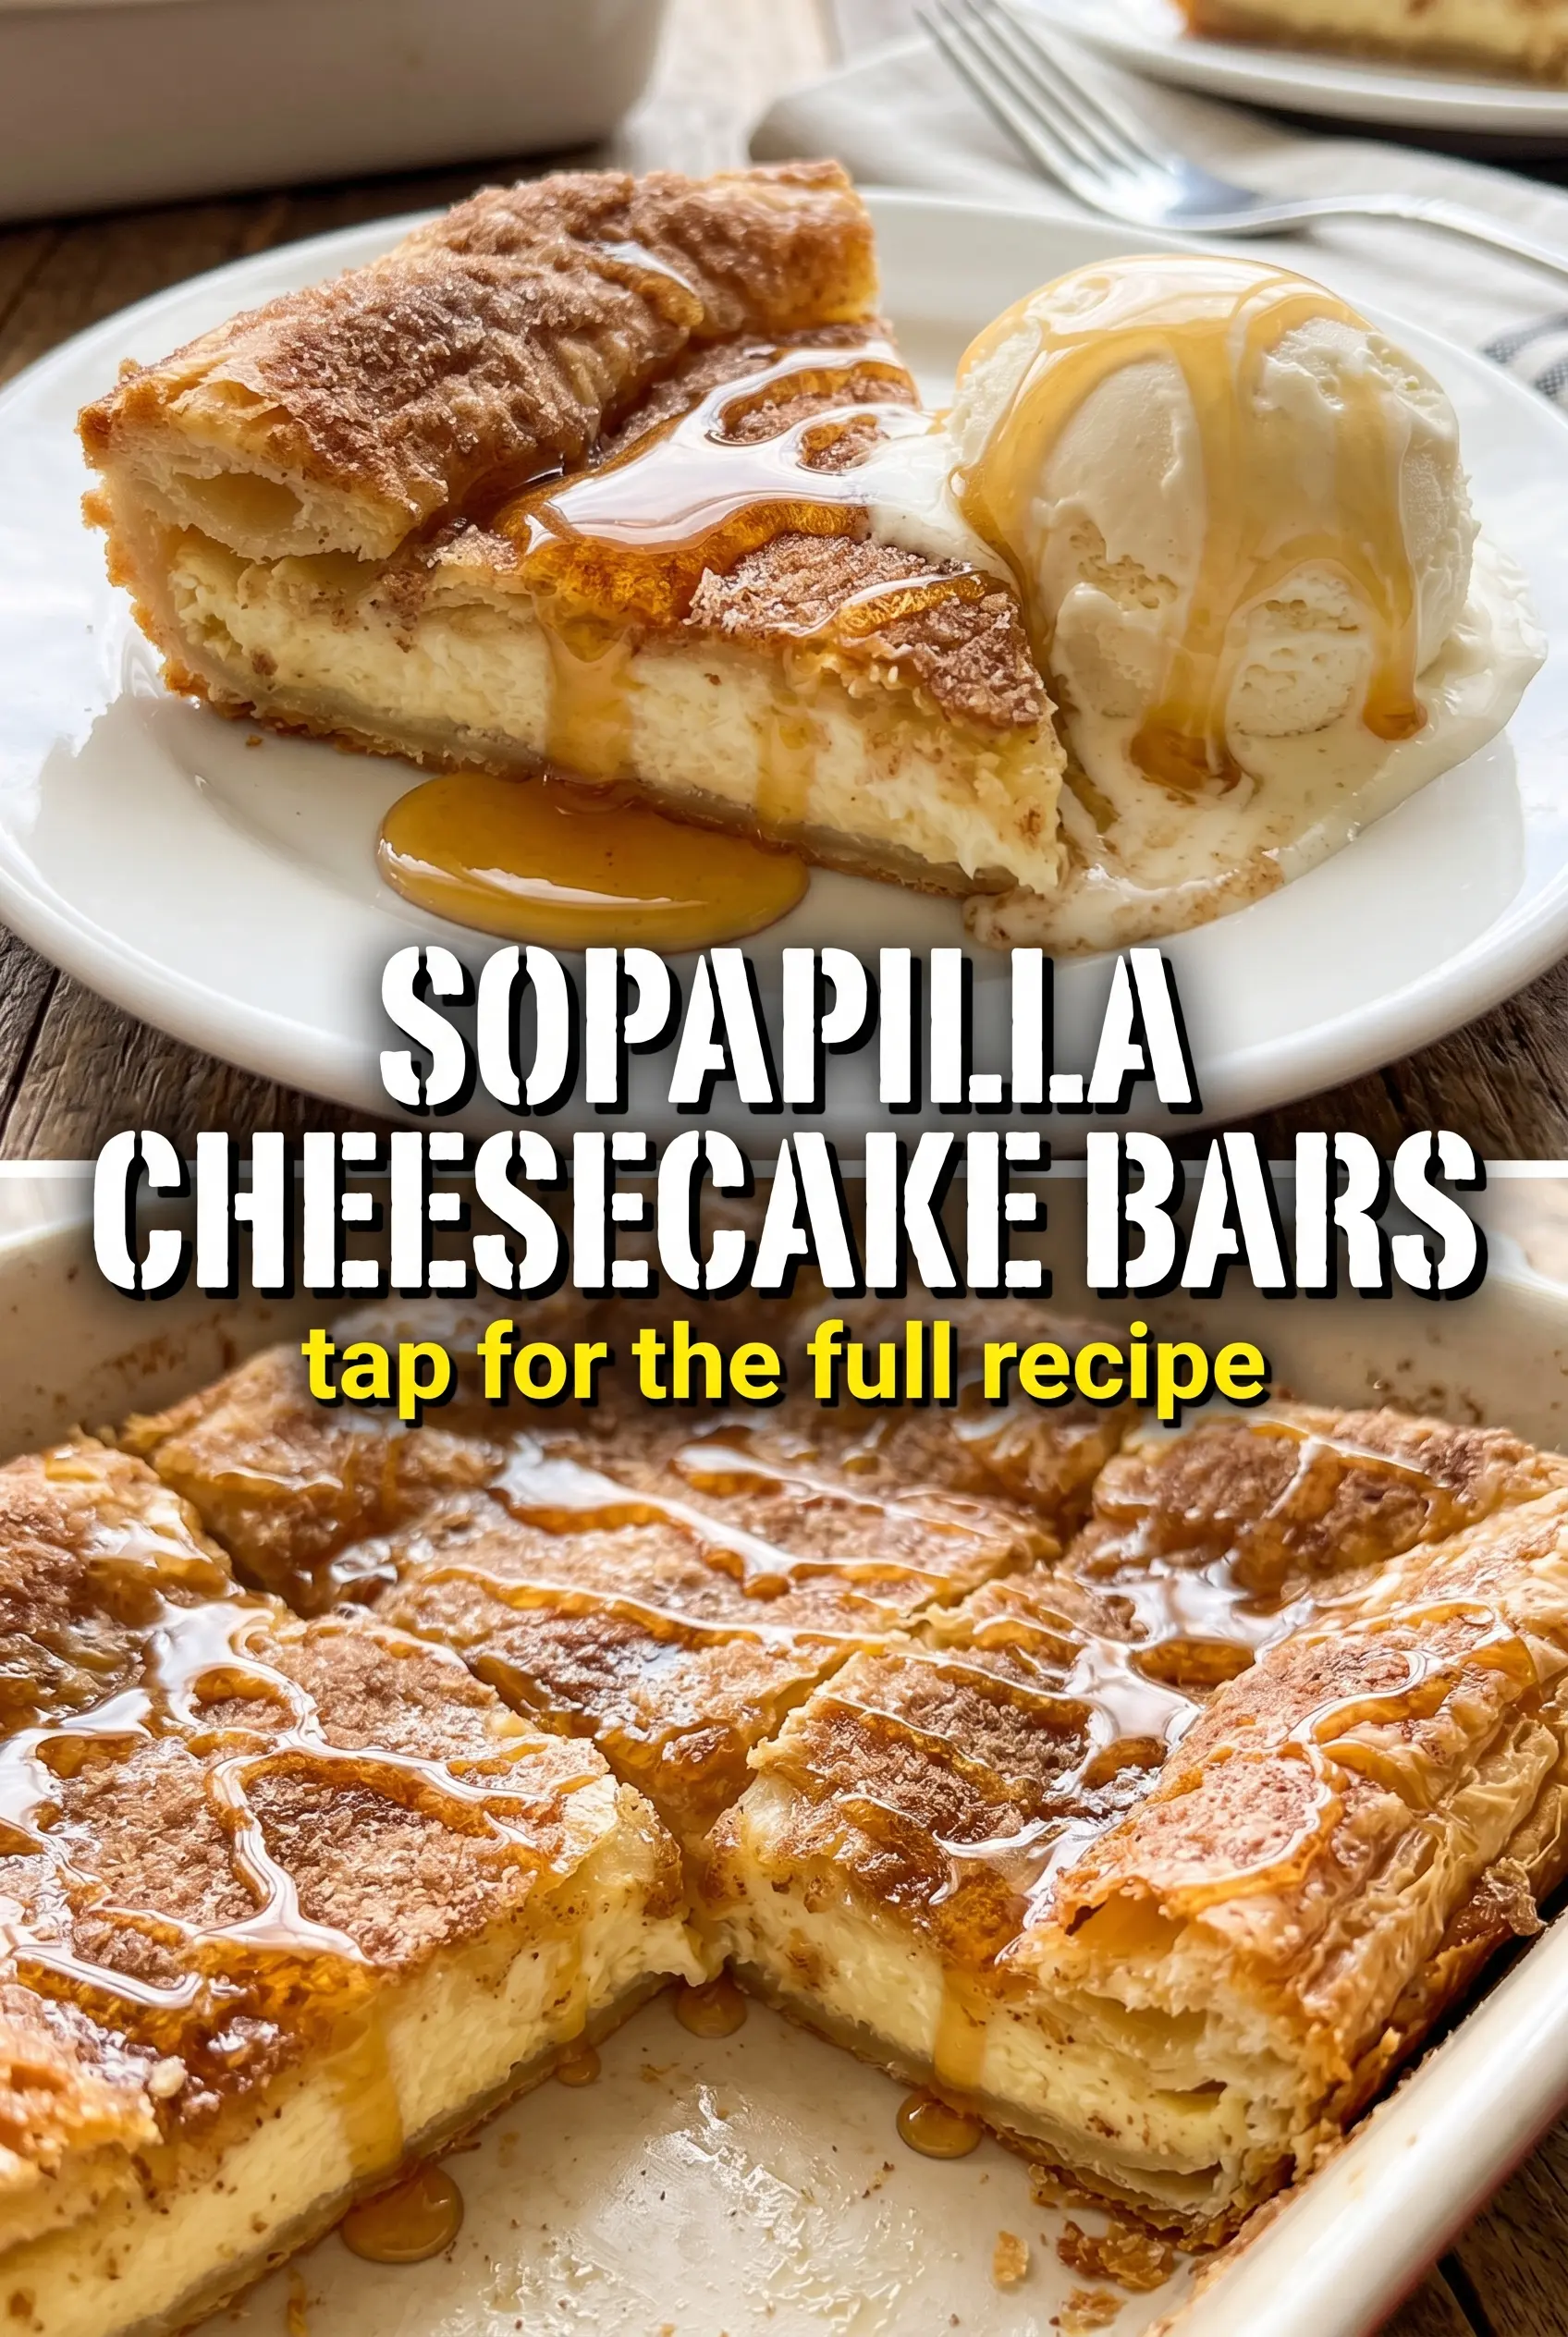
Creamy cheesecake filling, warm cinnamon sugar, and a golden crescent dough topping make these Sopapilla Cheesecake Bars the kind of dessert people keep cutting “just one more square” from. The edges bake up crisp and caramelized while the center stays soft and rich, and that contrast is exactly what makes the bars worth repeating. The caramel sauce on top pulls the whole pan together and gives each bite a sticky, bakery-style finish.
What makes this version work is the balance between structure and softness. The bottom layer needs to be pressed in evenly so it bakes into a stable base, and the cheesecake filling has to be beaten until smooth before the eggs go in one at a time. That keeps the texture creamy instead of lumpy. The top layer of crescent dough doesn’t have to look perfect — it just needs to cover the filling well enough to bake into a craggy, buttery lid.
Below you’ll find the trick to getting clean squares after chilling, plus a few easy swaps and storage notes so you can make these ahead without losing that crisp-topped, creamy-center contrast.
The cheesecake layer set up perfectly and the top stayed crisp even after chilling. I used the caramel sauce and cinnamon sugar exactly as written, and the bars cut cleanly after 2 hours in the fridge.
Save these Sopapilla Cheesecake Bars for the nights when you want a creamy dessert with a crisp cinnamon-sugar top and a caramel finish.
The Reason the Bottom Layer Doesn’t Turn Soggy
The biggest mistake with layered cheesecake bars is rushing the fill-and-bake process. Crescent dough is soft and ready to overwork, but if the bottom isn’t pressed into a thin, even layer, it can bake up patchy and leave the filling sitting in uneven pockets. That leads to a soft center with gummy spots underneath instead of a clean slice.
Two things protect the texture here: a properly softened cream cheese mixture and a hot enough oven to set the eggs without drying out the top. The filling should look smooth and thick before it goes into the pan. If you see little cream cheese lumps, they don’t disappear in the oven — they stay there.
- Even dough coverage keeps the base sturdy enough to hold the filling and the top layer without collapsing in the middle.
- Softened cream cheese beats into a smooth batter much faster than cold cream cheese, which is how you avoid a grainy filling.
- Eggs added one at a time help the filling emulsify, so the texture bakes up creamy instead of curdled.
What Each Ingredient Is Doing in These Bars
- Crescent roll dough is doing the structural work here. It bakes into a tender, buttery layer that tastes close enough to sopapilla pastry without making you roll and fry dough from scratch. Use the full can for both the bottom and top layers, and don’t stretch it so thin that it tears.
- Cream cheese is the backbone of the filling. Full-fat blocks give the best texture because they set firmly after chilling. Low-fat cream cheese can work in a pinch, but the bars won’t be as rich and the center may stay softer.
- Caramel sauce adds the sticky finish that makes the bars taste complete. Warm it slightly before drizzling so it spreads without tearing the top layer. A thicker jarred caramel sauce clings better than a thin ice-cream topping style sauce.
- Cinnamon sugar isn’t just garnish here. It gives the crust and top layer that classic sopapilla flavor and keeps the buttery dough from tasting flat. Fresh cinnamon matters because stale cinnamon can taste dull once baked.
The Order That Gets You Clean Layers Instead of a Mess
Pressing the Base Without Overworking It
Grease the pan well, then press the first layer of crescent dough into an even sheet across the bottom. Seal the seams enough to prevent obvious gaps, but don’t fuss over a perfect rectangle. Once the dough starts warming up, it gets harder to move cleanly, so get it in place before it becomes sticky. A light sprinkle of cinnamon sugar over the base gives the bottom layer a little extra character and keeps it from tasting plain.
Mixing the Filling Until It’s Smooth
Beat the cream cheese and sugar until the mixture looks completely smooth and fluffy before adding anything else. If the cream cheese is still cool in the middle, stop and scrape the bowl because hidden lumps will show up in the finished bars. Add the eggs one at a time and beat just until each one disappears. Overbeating at this stage traps too much air, which can make the center puff and crack as it bakes.
Finishing the Top So It Bakes Crisp
Lay the second crescent dough layer over the filling, then brush it with melted butter and scatter the cinnamon sugar over the top. The butter helps the top brown instead of drying out, and the sugar gives you those crispy edges that taste like the best part of a pastry shop version. Bake until the top is deeply golden and the center still has a small jiggle when you nudge the pan. If the middle looks completely firm in the oven, the bars will be overbaked once they cool.
Cooling Before the First Cut
Let the bars cool all the way at room temperature before they go into the refrigerator. That step matters because cutting warm cheesecake bars turns the filling loose and smears the layers. After chilling, use a sharp knife wiped clean between cuts for the neatest squares. The caramel sets up enough to stay on top instead of running into the pan.
How to Adapt These Bars for Different Pans and Preferences
Gluten-Free Version With the Same Creamy Center
Use a gluten-free crescent dough or pastry-style dough that bakes in a similar sheet. The filling itself is already gluten-free, so the swap is all about finding a dough that browns well and can hold the cheesecake layer without turning crumbly. Expect a slightly different top texture, but the bars will still slice and chill nicely.
Make Them a Little Less Sweet
Cut the filling sugar back by a few tablespoons if you prefer a lighter dessert, but don’t reduce it too much or the cheesecake layer loses its classic flavor and structure. You can also use a thinner drizzle of caramel instead of a heavy pour. The bars will taste less candy-like and a little more balanced against the cinnamon.
Add a Little Citrus for a Brighter Finish
A small amount of finely grated orange zest in the filling gives the bars a subtle lift without pulling them away from the sopapilla profile. Lemon zest works too, but keep it light or it can fight the caramel. This is the best variation when you want the bars to taste a little less heavy after a big meal.
Storage and Reheating
- Refrigerator: Store covered for up to 4 days. The top softens slightly after day one, but the bars still slice well when chilled.
- Freezer: These freeze well without the caramel sauce. Wrap individual bars tightly and freeze for up to 2 months, then thaw in the refrigerator overnight before topping.
- Reheating: Serve cold or let a bar sit at room temperature for 10 to 15 minutes. Microwaving warms the filling, but it also softens the pastry layer fast, so use it only for a few seconds if you want the center a little less firm.
Answers to the Questions Worth Asking
Sopapilla Cheesecake Bars
Ingredients
Equipment
Method
- Preheat the oven to 350°F. Grease a 9x13 baking dish and press the first can of crescent roll dough into the bottom to form an even layer.
- Mix sugar and cinnamon, then sprinkle lightly over the dough for a cinnamon-sugar crust layer.
- Beat the softened cream cheese and sugar until smooth and creamy. This should look lump-free before adding eggs.
- Add eggs one at a time, beating well after each addition. Stop to scrape the sides so the mixture stays evenly blended.
- Stir in vanilla extract and cinnamon until fully combined. Pour the filling over the prepared crust.
- Press the second can of crescent roll dough over the cheesecake filling to cover it. Aim for full coverage so the top bakes up golden.
- Brush the top with melted butter and sprinkle with the cinnamon-sugar mixture. You should see a speckled coating across the surface.
- Bake at 350°F for 30-35 minutes, until the crescent topping is golden and the cheesecake is set but slightly jiggly in the center. Look for a firm edge with a gentle wobble in the middle.
- Drizzle warm caramel sauce over the bars right after baking. Cover the top evenly so the caramel seeps into layers.
- Cool completely, then refrigerate for at least 2 hours before cutting into squares. Chill until the bars slice cleanly and hold their shape.


