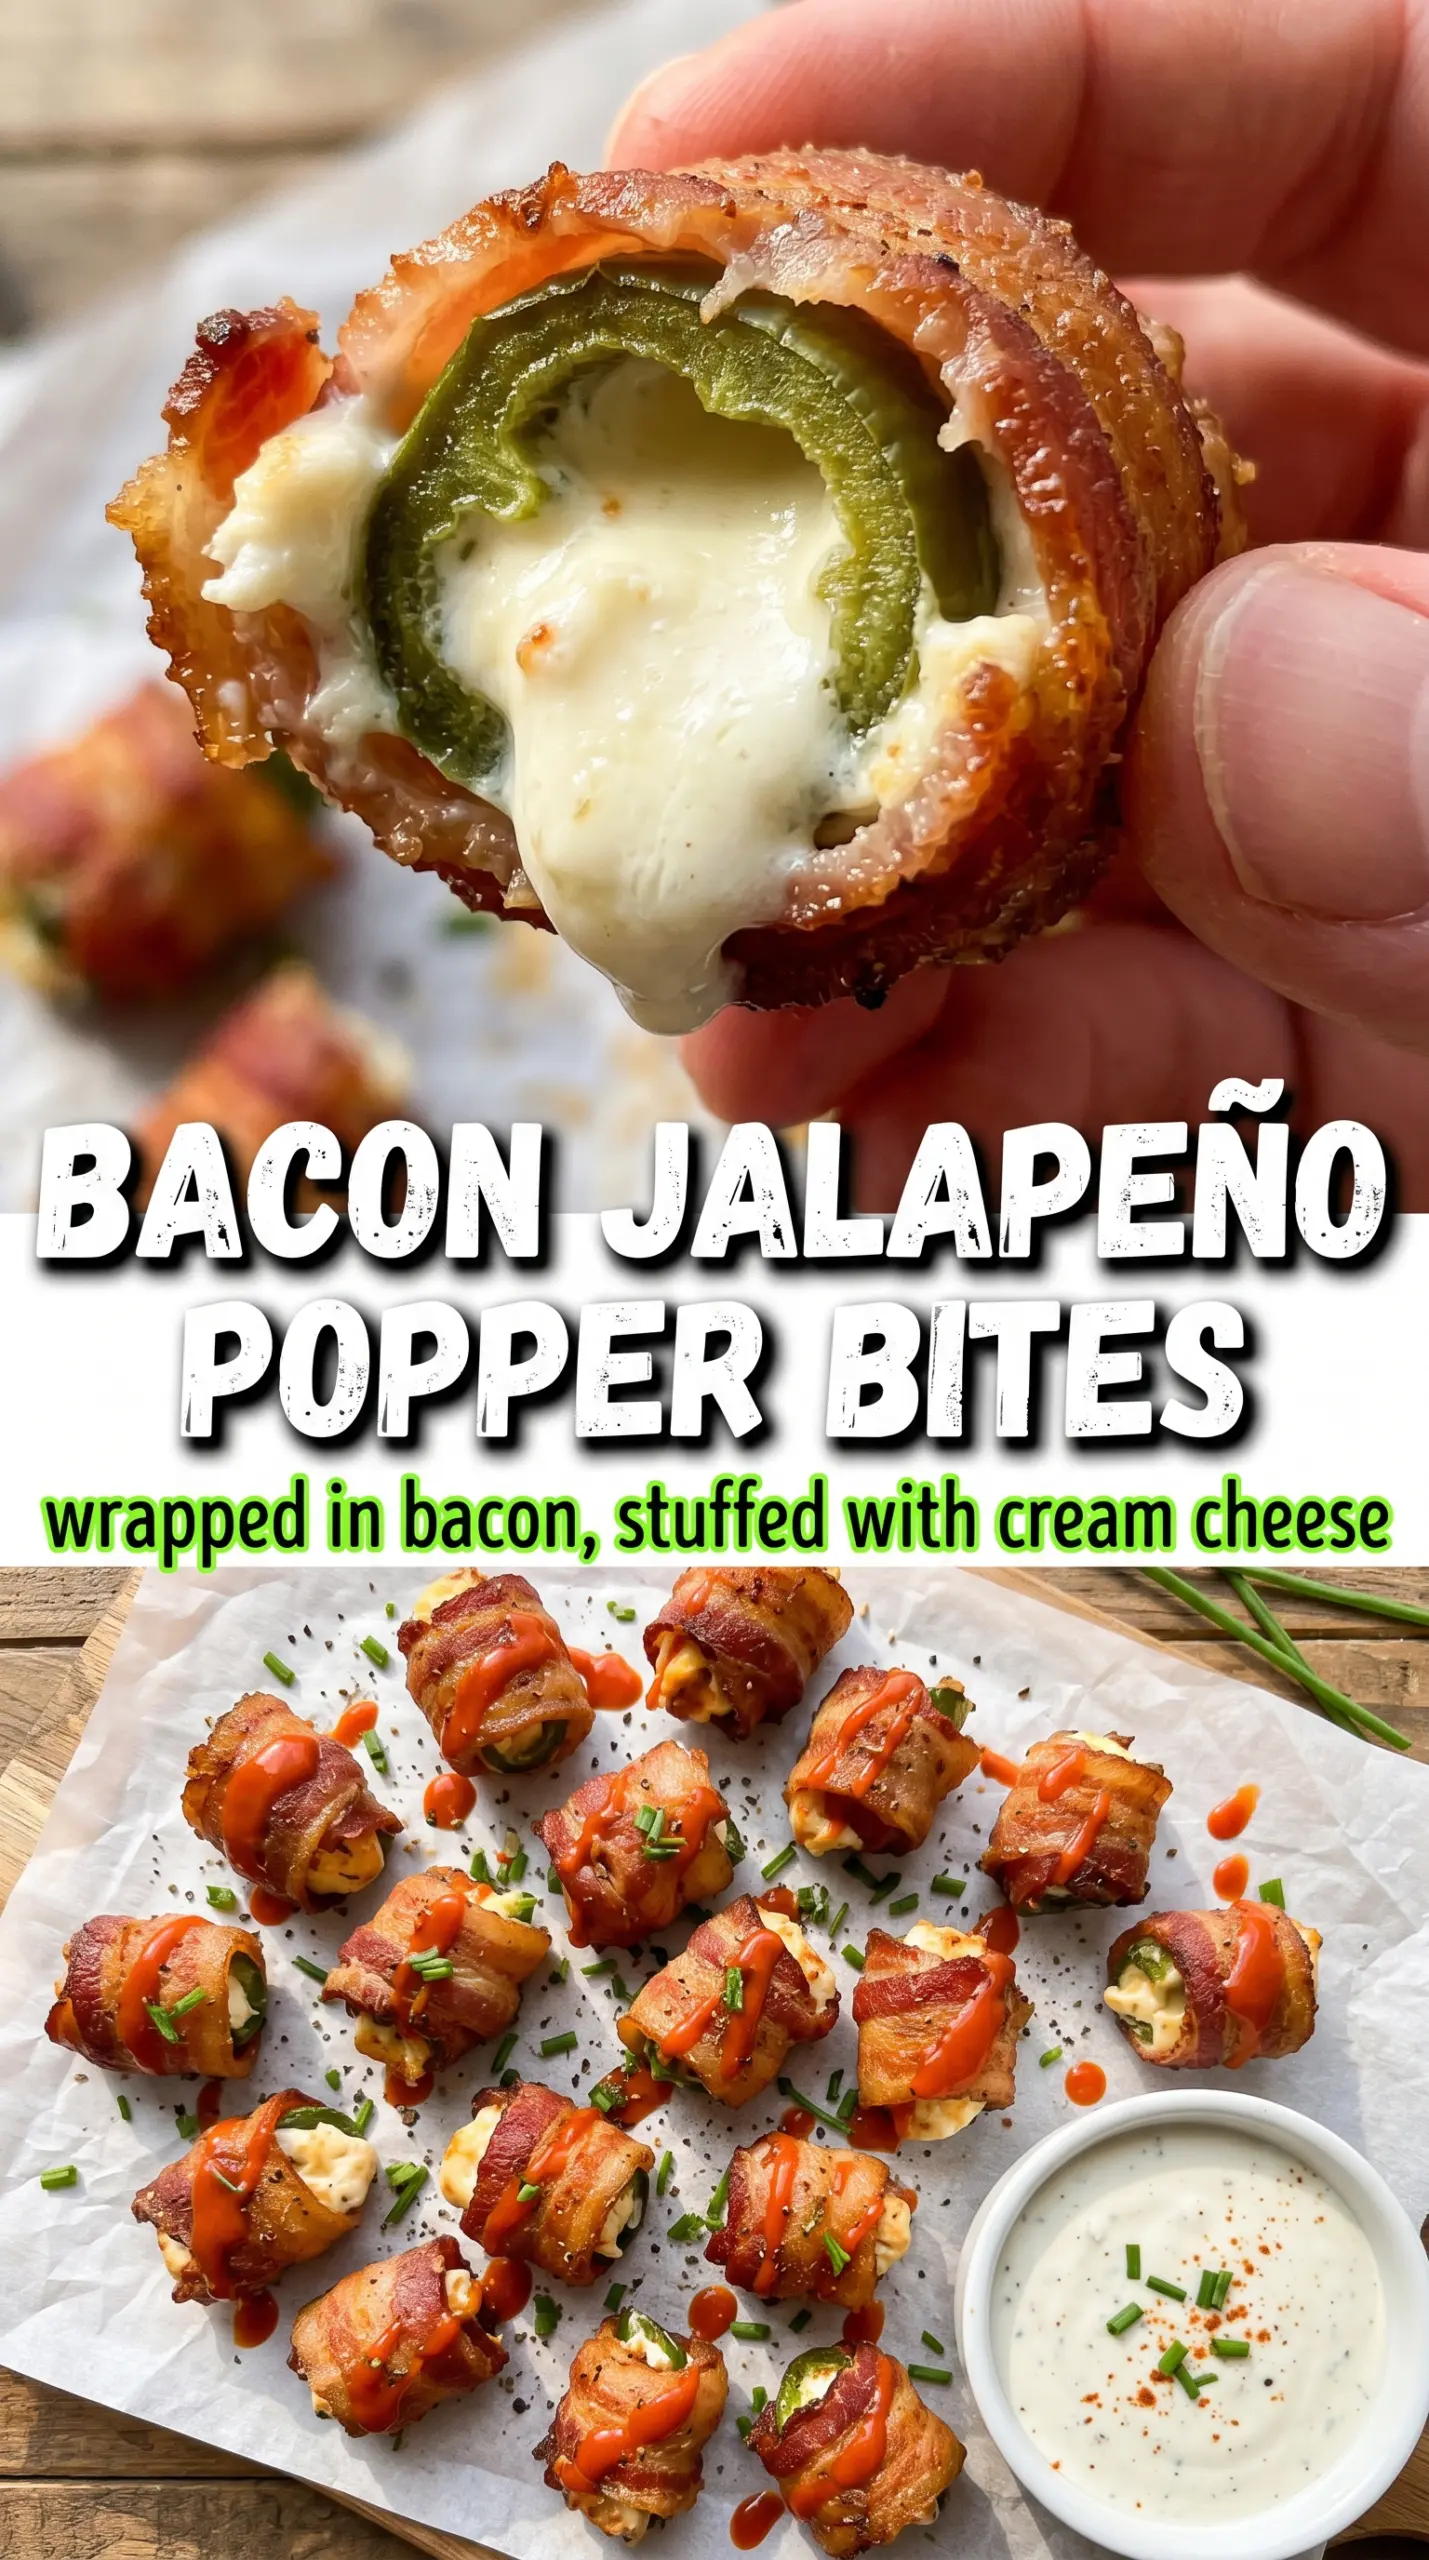
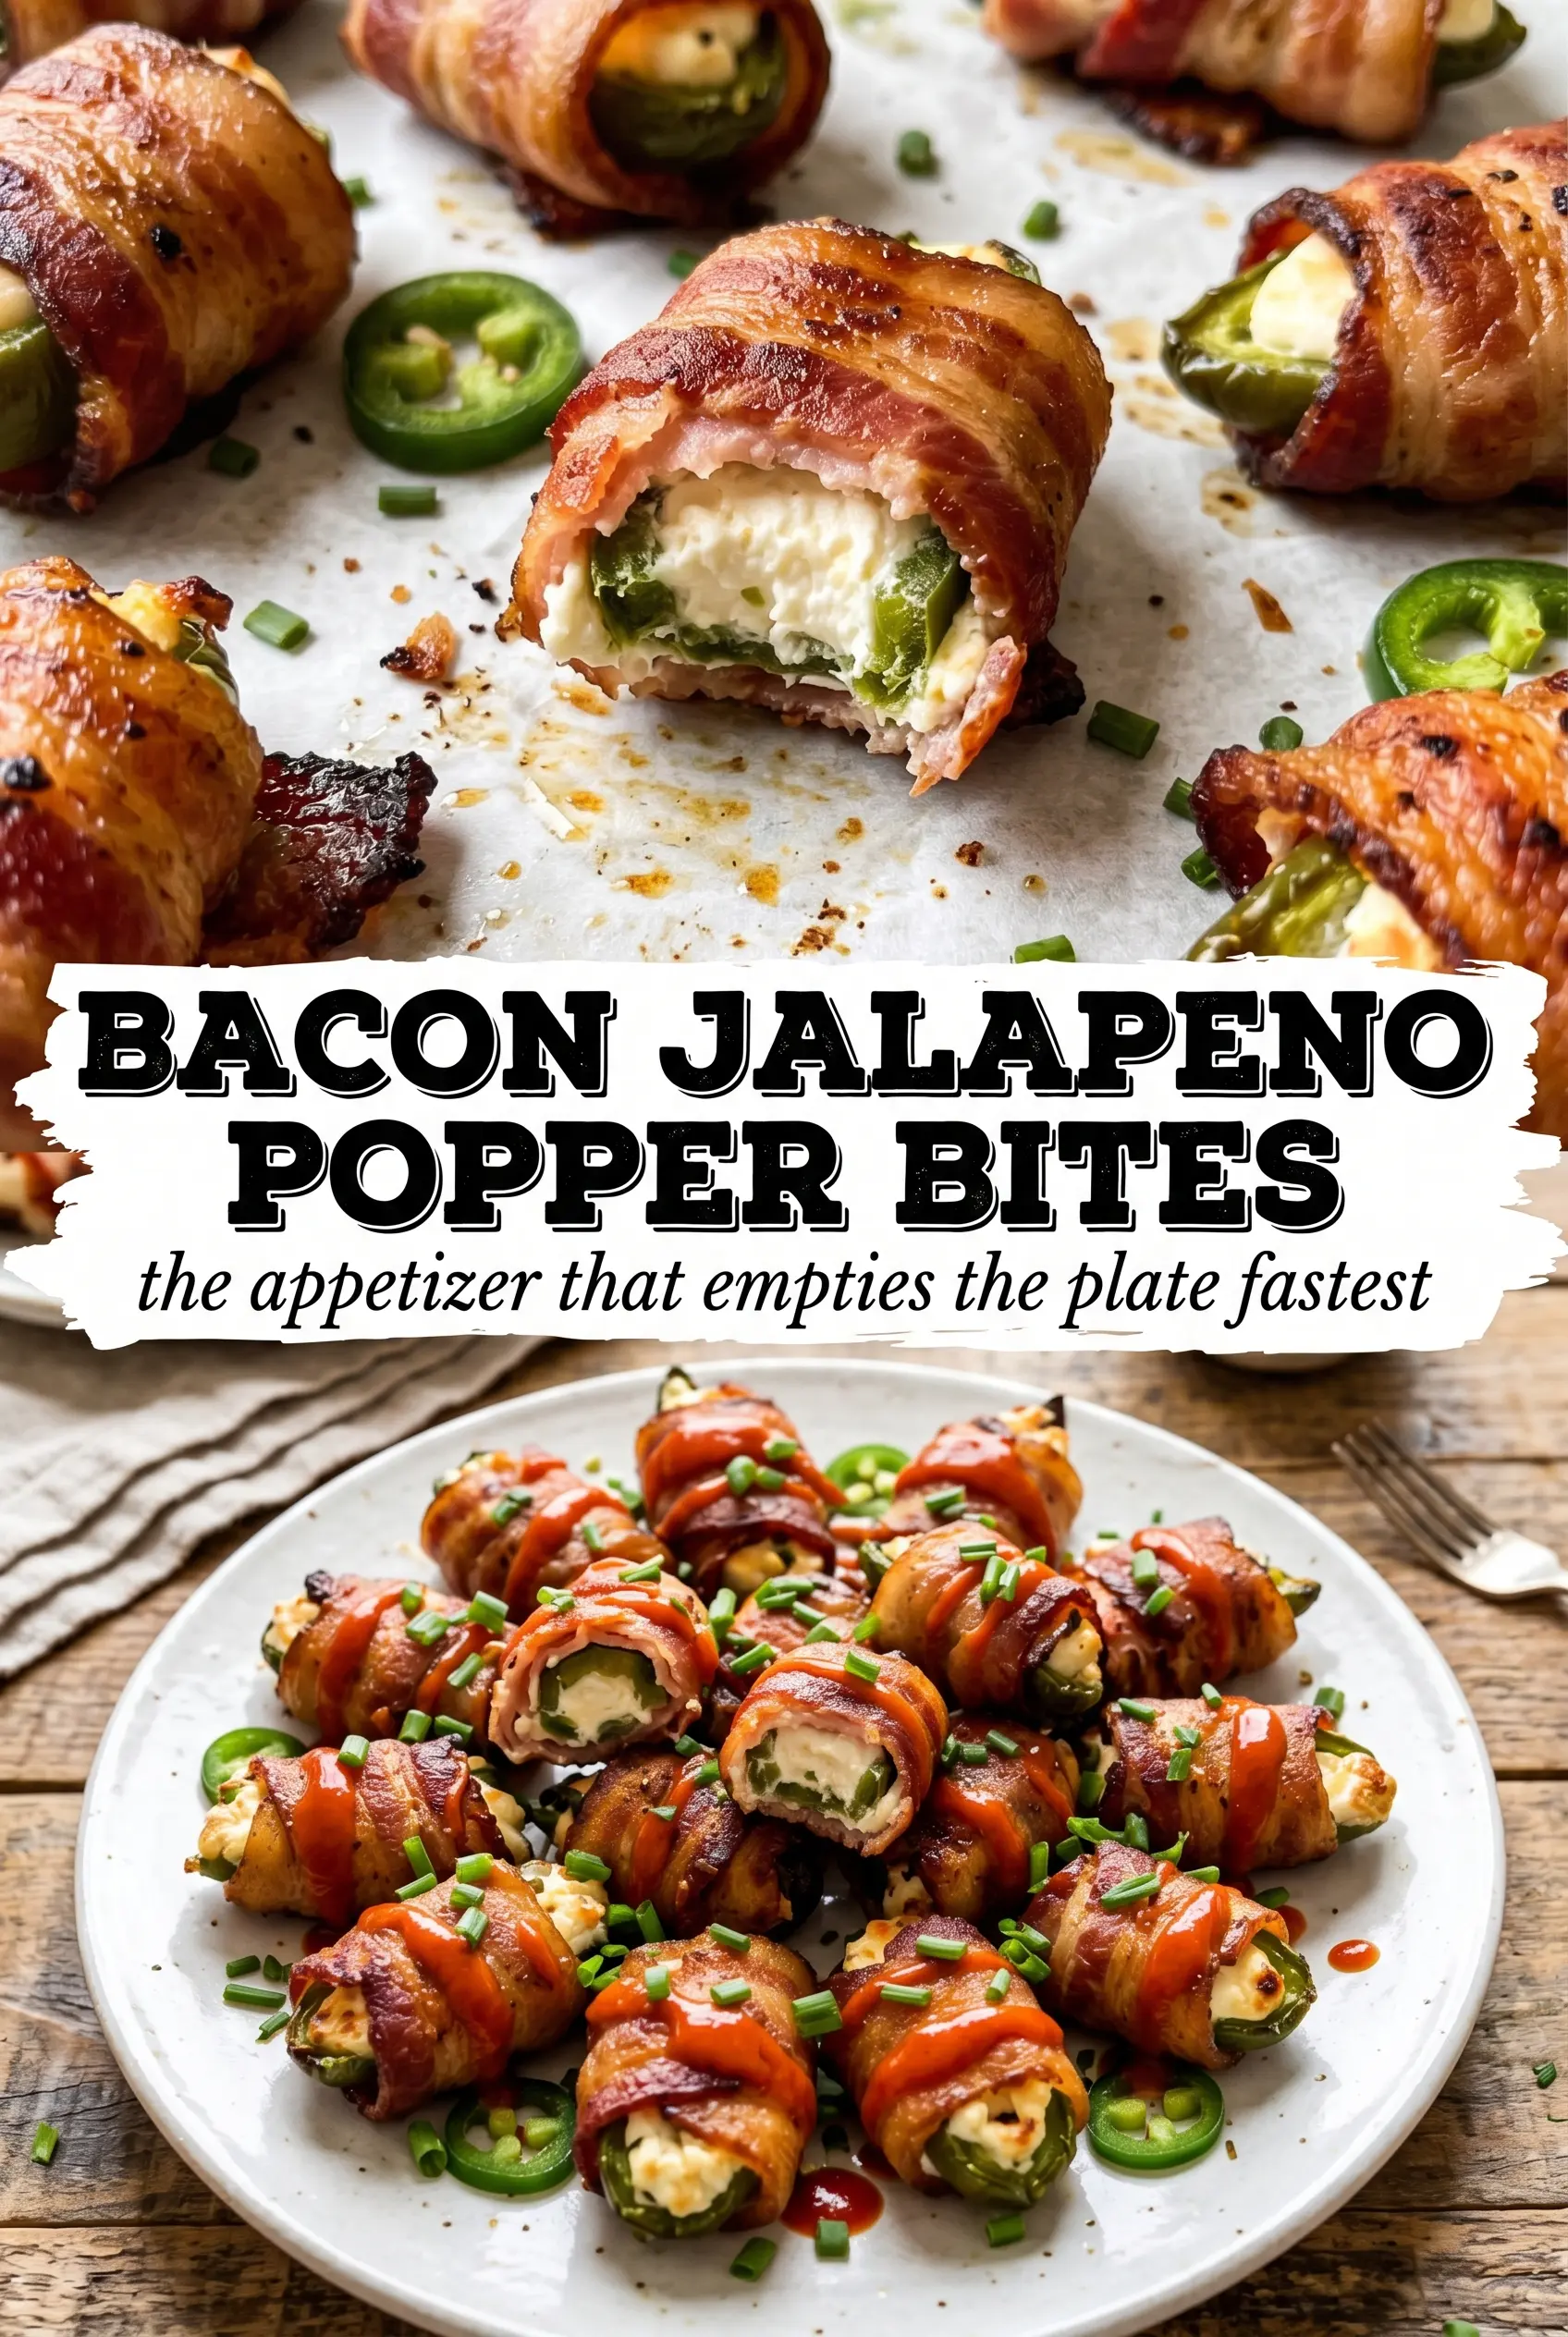
Golden bacon-wrapped jalapeño halves are the kind of appetizer people hover over before the tray even hits the table. The bacon turns crisp around the edges, the cream cheese filling stays rich and smooth, and the jalapeños keep just enough bite to keep every popper from tasting one-note. A little drizzle of honey at the end adds the kind of sweet heat that makes these disappear fast.
What makes this version work is the balance. Thin-cut bacon has enough time to crisp in the oven without leaving the peppers underdone, and the wire rack keeps the bottoms from sitting in rendered fat. The filling uses sharp cheddar for punch, not just more richness, so the inside tastes seasoned instead of flat. Smoked paprika adds a little depth that reads as cooked bacon even before you take the first bite.
Below you’ll find the small details that matter here: how to keep the bacon tight, why the peppers should be seeded all the way, and when honey earns its place on top. If you’ve had jalapeño poppers go greasy or limp before, this version fixes that.
The bacon crisped up all the way on the rack and the filling stayed creamy instead of leaking out. I added the honey drizzle at the end and it was the first tray empty at our game night.
Like these bacon jalapeño popper bites? Save them to Pinterest for the next game day, potluck, or any night that needs a crispy, creamy appetizer with a little heat.
The Trick to Bacon That Crisps Before the Cheese Blows Out
The biggest failure with jalapeño poppers is timing. If the bacon is too thick, it needs longer than the filling can comfortably take, and the cheese starts bubbling out before the bacon has any color. Thin-cut bacon gives you a tighter window, which is exactly what you want for a bite-size appetizer like this.
The wire rack matters just as much as the bacon. It lifts the poppers out of the rendered fat so the bottoms don’t steam, and that keeps the bacon from going soft underneath. If you skip the rack and bake them directly on a sheet pan, the first side to touch the pan usually ends up pale and greasy while the tops overcook.
- Thin-cut bacon — This is the one place I wouldn’t swap casually. Thick-cut bacon needs too much time and can leave the peppers underdone, while thin-cut bacon wraps tightly and crisps before the filling escapes.
- Sharp cheddar — It gives the filling enough bite to stand up to the bacon and pepper. Mild cheddar melts fine, but the flavor gets lost under the cream cheese.
- Smoked paprika — It adds a little savory depth that makes the filling taste fuller. If you don’t have it, regular paprika works, but the result will be a touch flatter.
- Honey — Optional, but worth it if you like sweet heat. Drizzle it after baking so it stays glossy and doesn’t burn in the oven.
What Each Ingredient Is Actually Doing in This Appetizer
- Base ingredient (cream cheese, sour cream, or seasoned base) — This holds everything together and provides creaminess or tang.
- Proteins (bacon, ham, cheese, or seafood) — These add richness and saltiness. Cook or prepare ahead so they’re ready to mix.
- Vegetables (peppers, onions, corn, jalapeños) — Chop small so they distribute evenly. Some can be raw for crunch; some cook for softness.
- Cheese (the binding and golden finish) — Melted cheese makes appetizers creamy and sticky. Mix some in and top with more for a golden top.
- Seasonings (salt, pepper, hot sauce, spices) — Layer flavors so the dip isn’t one-note. Taste and adjust before serving.
- Heat or cooking method (oven-baked or cold) — Decide if warm or cold serves your menu better. Temperature changes texture and how flavors come across.
- Serving vehicle (crackers, chips, vegetables, bread) — Choose something that won’t get soggy if the dip is warm or liquidy.
- Garnish (fresh herbs, bacon, green onion) — The finishing touch makes it look intentional and adds fresh flavor right before eating.
Getting the Filling Tight, the Wrap Tight, and the Heat Just Right
Mixing the Cheese Base
Start with softened cream cheese so the filling blends smoothly with the cheddar and spices. If the cream cheese is cold, you’ll end up with small lumps that make stuffing the peppers harder and can tear the bacon when you try to wrap them. Stir until the mixture is uniform and thick enough to hold its shape on a spoon.
Stuffing the Jalapeños
Seed the jalapeños well and scrape out the ribs if you want milder bites. Leaving some seeds behind won’t ruin the recipe, but the heat stays sharper and less balanced. Fill each half generously, but don’t mound it so high that the bacon won’t sit flat around the pepper.
Wrapping and Baking
Wrap each pepper with a half-strip of bacon and overlap the ends slightly so they stay put as the fat renders. A toothpick helps, especially if your bacon is narrow or the peppers are extra full. Bake until the bacon looks crisp at the edges and the filling is bubbling; if the bacon still looks floppy, give it another few minutes rather than pulling them early.
Finishing With Honey
Drizzle the honey only after the poppers come out of the oven. That keeps the tops shiny instead of sticky and lets the sweet note stay bright against the smoky bacon. Serve them hot, because the bacon softens as they sit and the filling is best when it still has that creamy, molten texture.
How to Adapt These for Spicier, Milder, or Dairy-Free Crowds
Make Them Milder for Sensitive Eaters
Split the jalapeños, remove every seed and rib, and soak the halves in cold water for 10 minutes before filling. That takes the edge off without changing the shape or the bacon wrap. You still get the pepper flavor, but the heat lands much softer.
Turn Up the Heat
Leave a few seeds in the peppers and add a pinch of cayenne to the cheese filling. That gives the bites a slower burn that shows up after the bacon and cheddar hit first. Don’t go heavy on the cayenne unless you want the filling to dominate everything else.
Dairy-Free Version
Use a sturdy dairy-free cream cheese and a meltable plant-based cheddar-style shreds blend. The texture will be a little softer and the filling may not brown as much, but the bites still hold together well if you chill them for 15 minutes before baking. Keep the bacon thin so the wrap timing stays the same.
Storage and Reheating
- Refrigerator: Store leftovers in an airtight container for up to 3 days. The bacon softens a bit after chilling, but the filling stays usable.
- Freezer: These freeze best before baking. Freeze on a tray until solid, then move to a bag and bake from frozen, adding a few extra minutes.
- Reheating: Reheat on a wire rack in a 375°F oven until the bacon re-crisps and the center is hot. The microwave will make the bacon rubbery and the filling oily.
Questions I Get Asked About This Recipe
Bacon Jalapeño Popper Bites
Ingredients
Equipment
Method
- Preheat the oven to 400°F and line a baking sheet with a wire rack so the bacon crisps instead of steams.
- Halve the jalapeños lengthwise, seed them, and set them cut-side up for filling.
- Mix the softened cream cheese, shredded cheddar, garlic powder, and smoked paprika until fully combined and evenly colored.
- Fill each jalapeño half generously with the cream cheese mixture using a spoon or piping bag so the filling mounds slightly.
- Wrap each filled jalapeño half tightly with a half-strip of bacon and secure it with a toothpick to keep it closed while baking.
- Arrange the bacon-wrapped jalapeños on the wire rack with space between them for airflow and even browning.
- Bake at 400°F for 18–22 minutes until the bacon is crispy and the filling is bubbling with a hint of char on the edges.
- Drizzle with honey if desired and serve hot for a sweet-spicy finish.