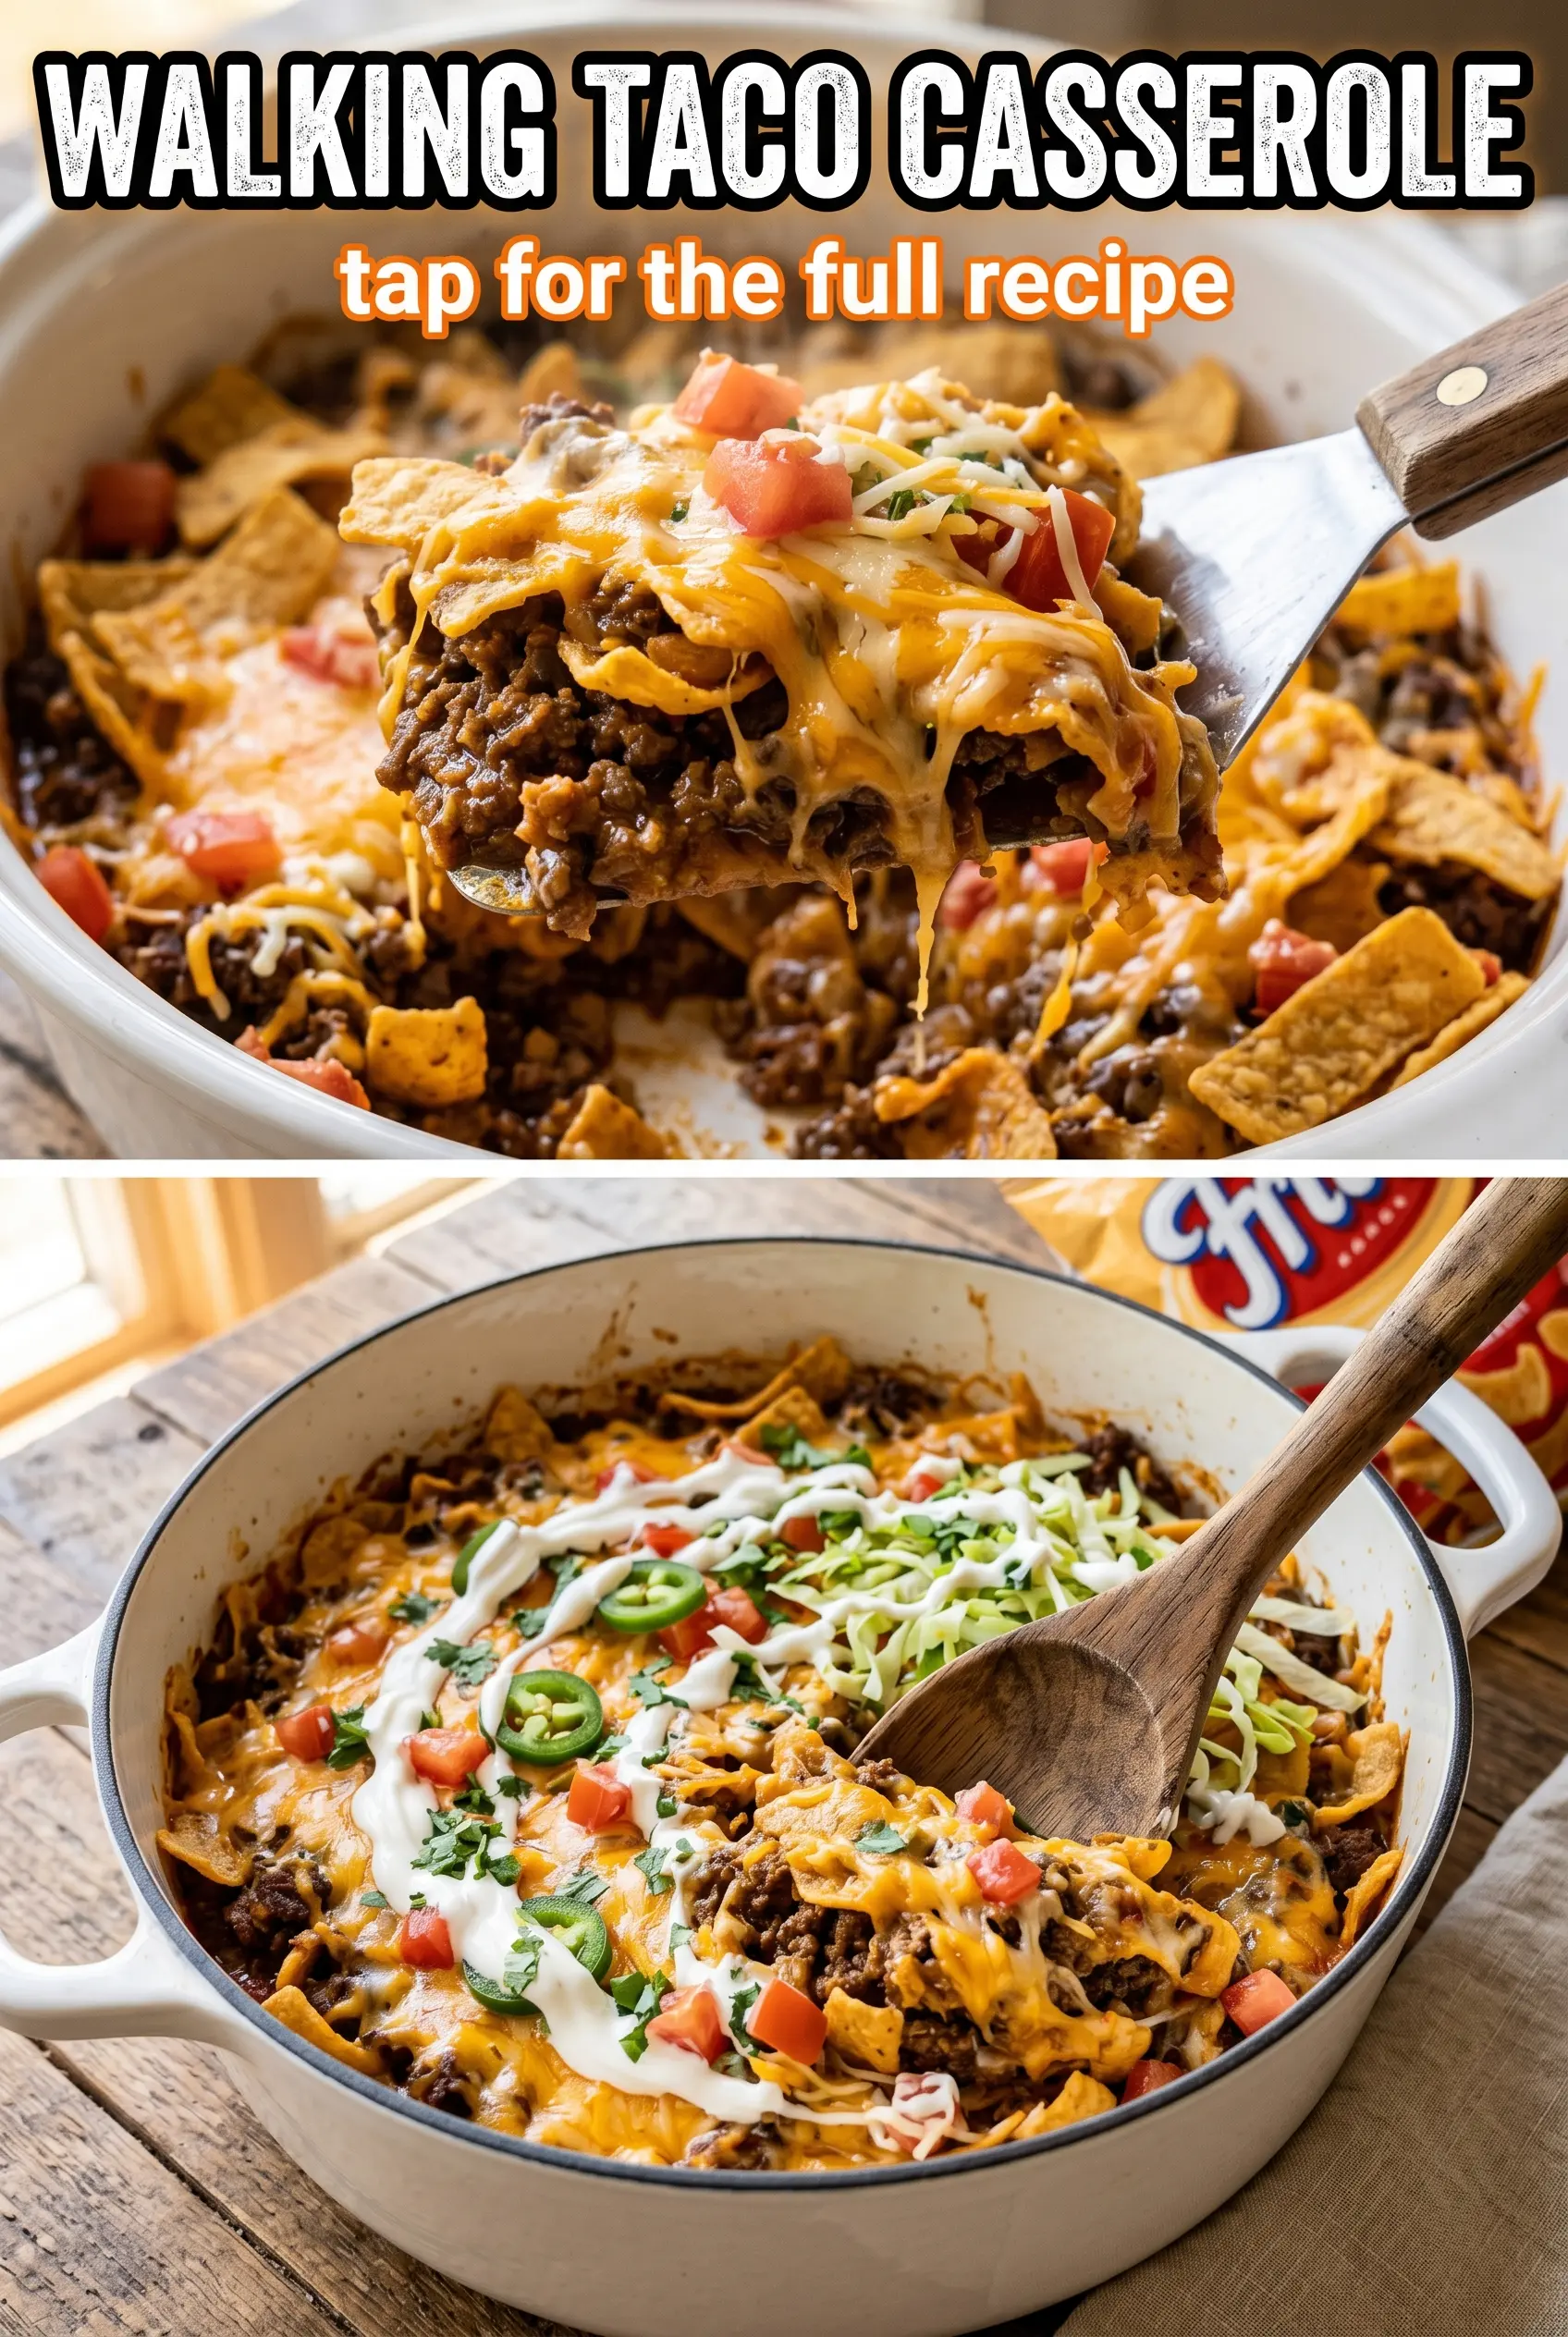
Walking Taco Casserole hits the table with everything people love about a taco night: seasoned beef, crunchy corn chips, creamy beans, and a blanket of melted cheddar. The best part is the texture contrast. You get crisp edges where the cheese meets the chips, a saucy middle, and just enough crunch left in the top layer to keep each bite interesting.
The trick is building it in layers that protect the chips from turning soggy too fast. The refried beans act like a buffer, and the sour cream gets mixed with the tomatoes and green chiles so the whole middle stays creamy instead of dry. That balance matters more than adding extra toppings at the end.
Below, I’ll walk through the small details that keep the chips from disappearing into the casserole and the cheese from turning oily. There’s also a simple way to make it milder or spicier depending on who’s at the table.
The chips stayed crunchy on the bottom edges and the cheesy top got bubbly without drying out. I loved that the beans kept the middle creamy, and my kids went back for seconds with no complaints about spice.
Save this Walking Taco Casserole for the nights when you want taco flavor, crunchy Fritos, and a bubbling cheesy top with almost no cleanup.
The Crunch Layer That Keeps Walking Taco Casserole from Going Soggy
The biggest mistake with any taco casserole is burying the chips under wet ingredients too early. Fritos taste best when some of them stay intact and a little crisp, so the layering order matters. The beef goes down first because it’s the hottest component and needs to be closest to the dish, but the chips should still get a protective buffer from the beans and cheese.
Refried beans do more than add flavor here. They hold moisture in the center of the casserole and keep the tomatoes from soaking straight through the chip layer. If you skip that middle layer or spread the tomatoes directly on the chips, the bottom turns soft fast and you lose the whole point of a walking taco in casserole form.
- Fritos — These are the signature crunch. Regular corn chips work in a pinch, but Fritos hold their shape better and bring that salty, toasted corn flavor that makes the dish taste like a real walking taco.
- Refried beans — Use canned refried beans straight from the can, or loosen them with a spoonful of water if they’re stiff. They help stabilize the filling and keep the casserole from collapsing into a wet layer at the bottom.
- Diced tomatoes with green chiles — Don’t drain them completely. The small amount of liquid helps the sour cream blend smoothly, and the chiles give the casserole enough heat without needing extra seasoning.
- Cheddar cheese — Shred it yourself if you can. Pre-shredded cheese works, but freshly shredded cheddar melts more evenly and gives you that bubbly top instead of a grainy one.
Building the Layers So the Cheese Melts Before the Chips Give Up
Brown the Beef First
Cook the ground beef over medium-high heat until it’s no longer pink and the pan starts to show browned spots underneath. Break it into small pieces as it cooks so the filling spreads evenly through the casserole. If there’s excess grease in the skillet, drain it off before adding the seasoning. Too much fat will make the bottom layer slippery and keep the beans from settling properly.
Season and Simmer the Meat
Stir in the taco seasoning and water, then let it simmer for about 2 minutes until the liquid looks slightly thickened and clings to the beef. That short simmer matters because it blooms the seasoning and turns it from dusty to saucy. If the pan looks dry before the two minutes are up, add another tablespoon of water instead of letting the spices scorch.
Layer for Crunch, Not Mush
Start with half the Fritos in the baking dish, then add the beef, then the beans. Mix the tomatoes and sour cream together before spreading them over the beans so the dairy doesn’t sit in one cold pocket and curdle unevenly in the oven. Finish with the remaining chips and cheese on top. The top chips will soften just a little and the edges underneath will stay sturdier, which gives you the best texture contrast.
Bake Until the Top Is Bubbling
Bake at 375°F until the cheese is melted through and the edges are bubbling, usually 20 to 25 minutes. You’re not looking for a deep brown top here. You want the cheese fully melted and the casserole hot in the center without baking so long that the chips on the bottom disappear entirely. Let it rest for 5 minutes before serving so the layers settle and you can scoop clean portions.
Three Ways to Adjust Walking Taco Casserole Without Losing the Point
Make It Spicier with Jalapeños and Hotter Chiles
Add more diced jalapeños on top, or stir a spoonful of the jalapeños into the meat after it simmers. You can also use hot diced tomatoes with green chiles if your crowd likes heat. The flavor stays the same, but the finish gets sharper and more taco-stand style.
Make It Dairy-Free Without Losing Creaminess
Use a dairy-free sour cream substitute and a plant-based shredded cheddar-style cheese that melts well. The texture changes a little, but the casserole still holds together because the beans and meat carry the body of the dish. Watch the top closely in the oven, since some dairy-free cheeses brown faster than regular cheddar.
Swap in Ground Turkey for a Lighter Version
Ground turkey works well as long as you season it fully and don’t let it dry out in the skillet. Add the taco seasoning and water exactly the same way, but taste the filling before assembling and add a pinch of salt if needed. Turkey gives you a slightly leaner result, though the casserole loses a little of the beefy richness.
Storage and Reheating
- Refrigerator: Store leftovers in an airtight container for up to 3 days. The chips soften, but the flavor holds well.
- Freezer: It freezes, but the chips lose their crunch completely, so I only freeze the beef-bean mixture if I’m planning ahead. Assemble fresh with chips and cheese after thawing.
- Reheating: Warm in a 325°F oven or in the microwave in short bursts until heated through. If you reheat it hard and fast, the cheese turns oily and the chips fall apart even more.
Answers to the Questions Worth Asking
Walking Taco Casserole
Ingredients
Equipment
Method
- Preheat the oven to 375°F to get it ready for baking.
- Brown the ground beef in a skillet over medium-high heat, breaking it into small pieces until no longer pink.
- Add the taco seasoning and water, then simmer for 2 minutes, stirring, until the mixture looks saucy.
- In a 9x13 inch baking dish, layer 2 cups of Fritos on the bottom for a crunchy base.
- Spread the seasoned beef over the chips, covering them in an even layer.
- Layer the refried beans over the beef so the next layer bakes into a creamy middle.
- Mix the diced tomatoes with green chiles and sour cream, then spread the mixture over the beans.
- Top with the remaining Fritos to create a golden, crisp top when baked.
- Sprinkle shredded cheddar cheese over the top so it melts into a bubbly cover.
- Bake at 375°F for 20-25 minutes, until the cheese is bubbly and the edges look lightly browned.
- Let the casserole rest for 5 minutes so the layers set before slicing and serving.
- Garnish with diced jalapeños and fresh cilantro right before serving for a fresh, spicy finish.


