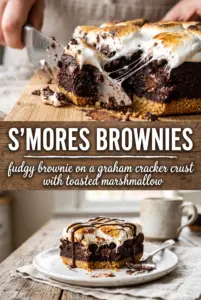
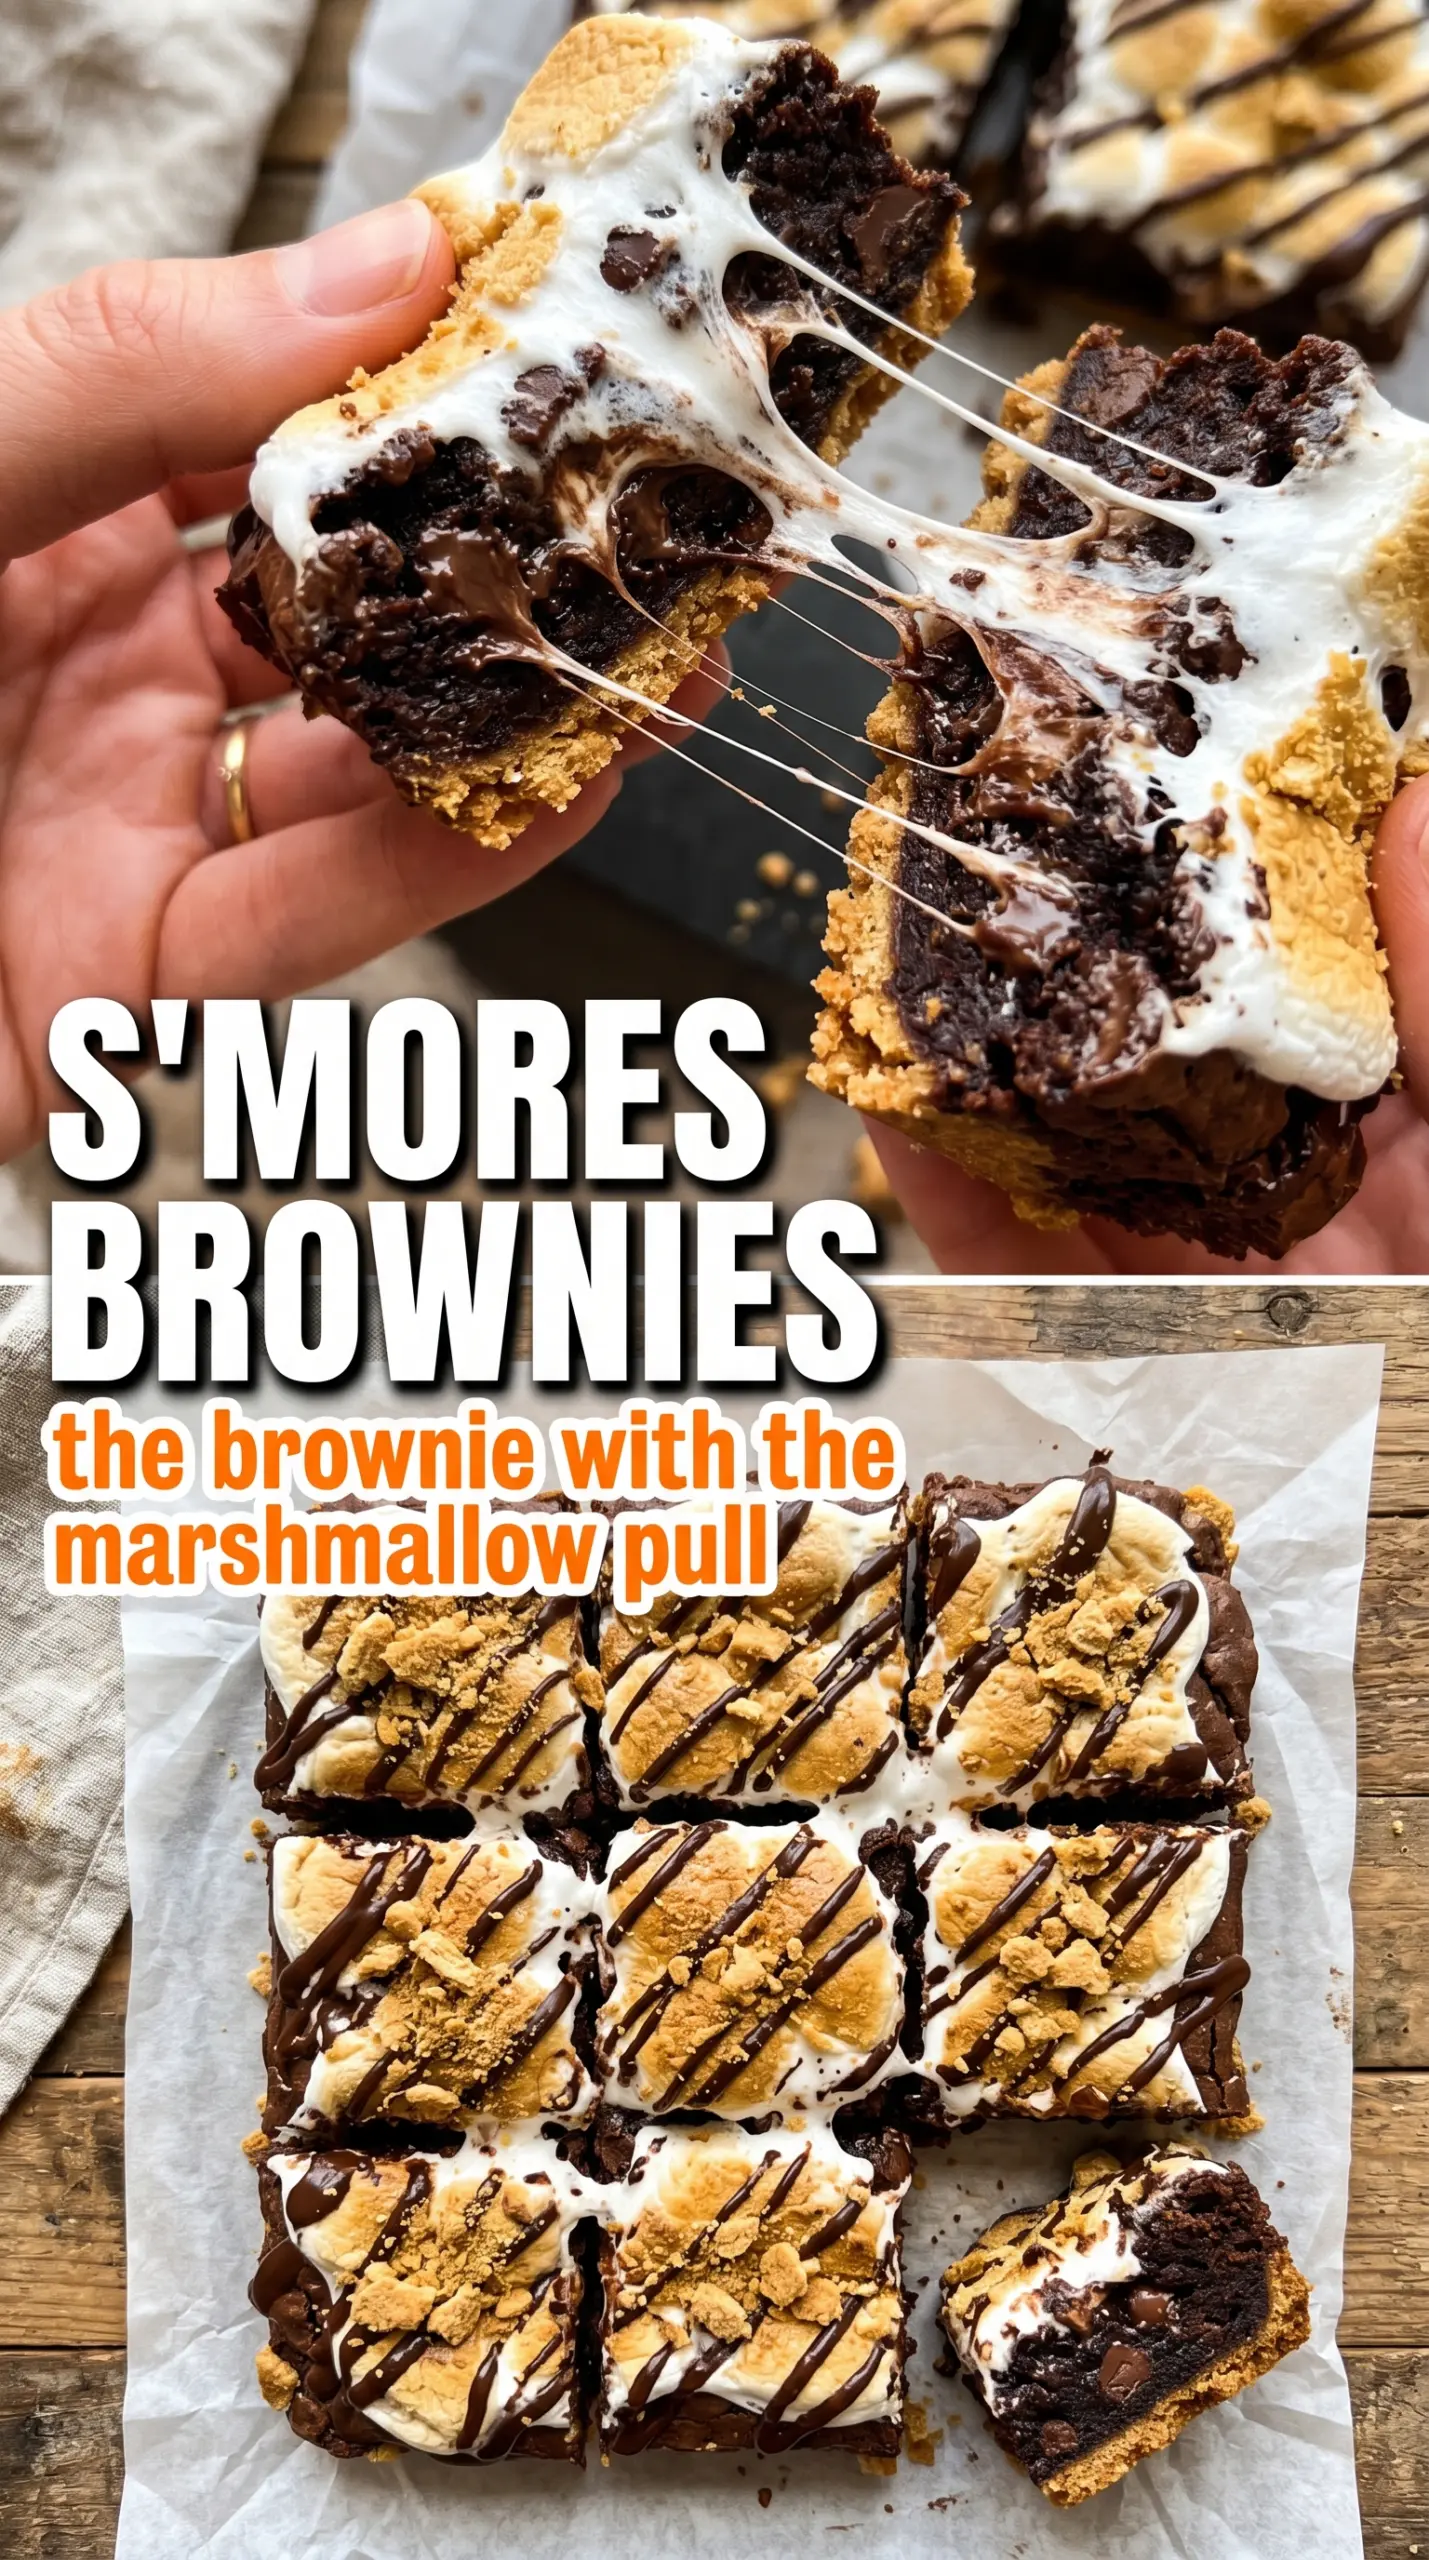
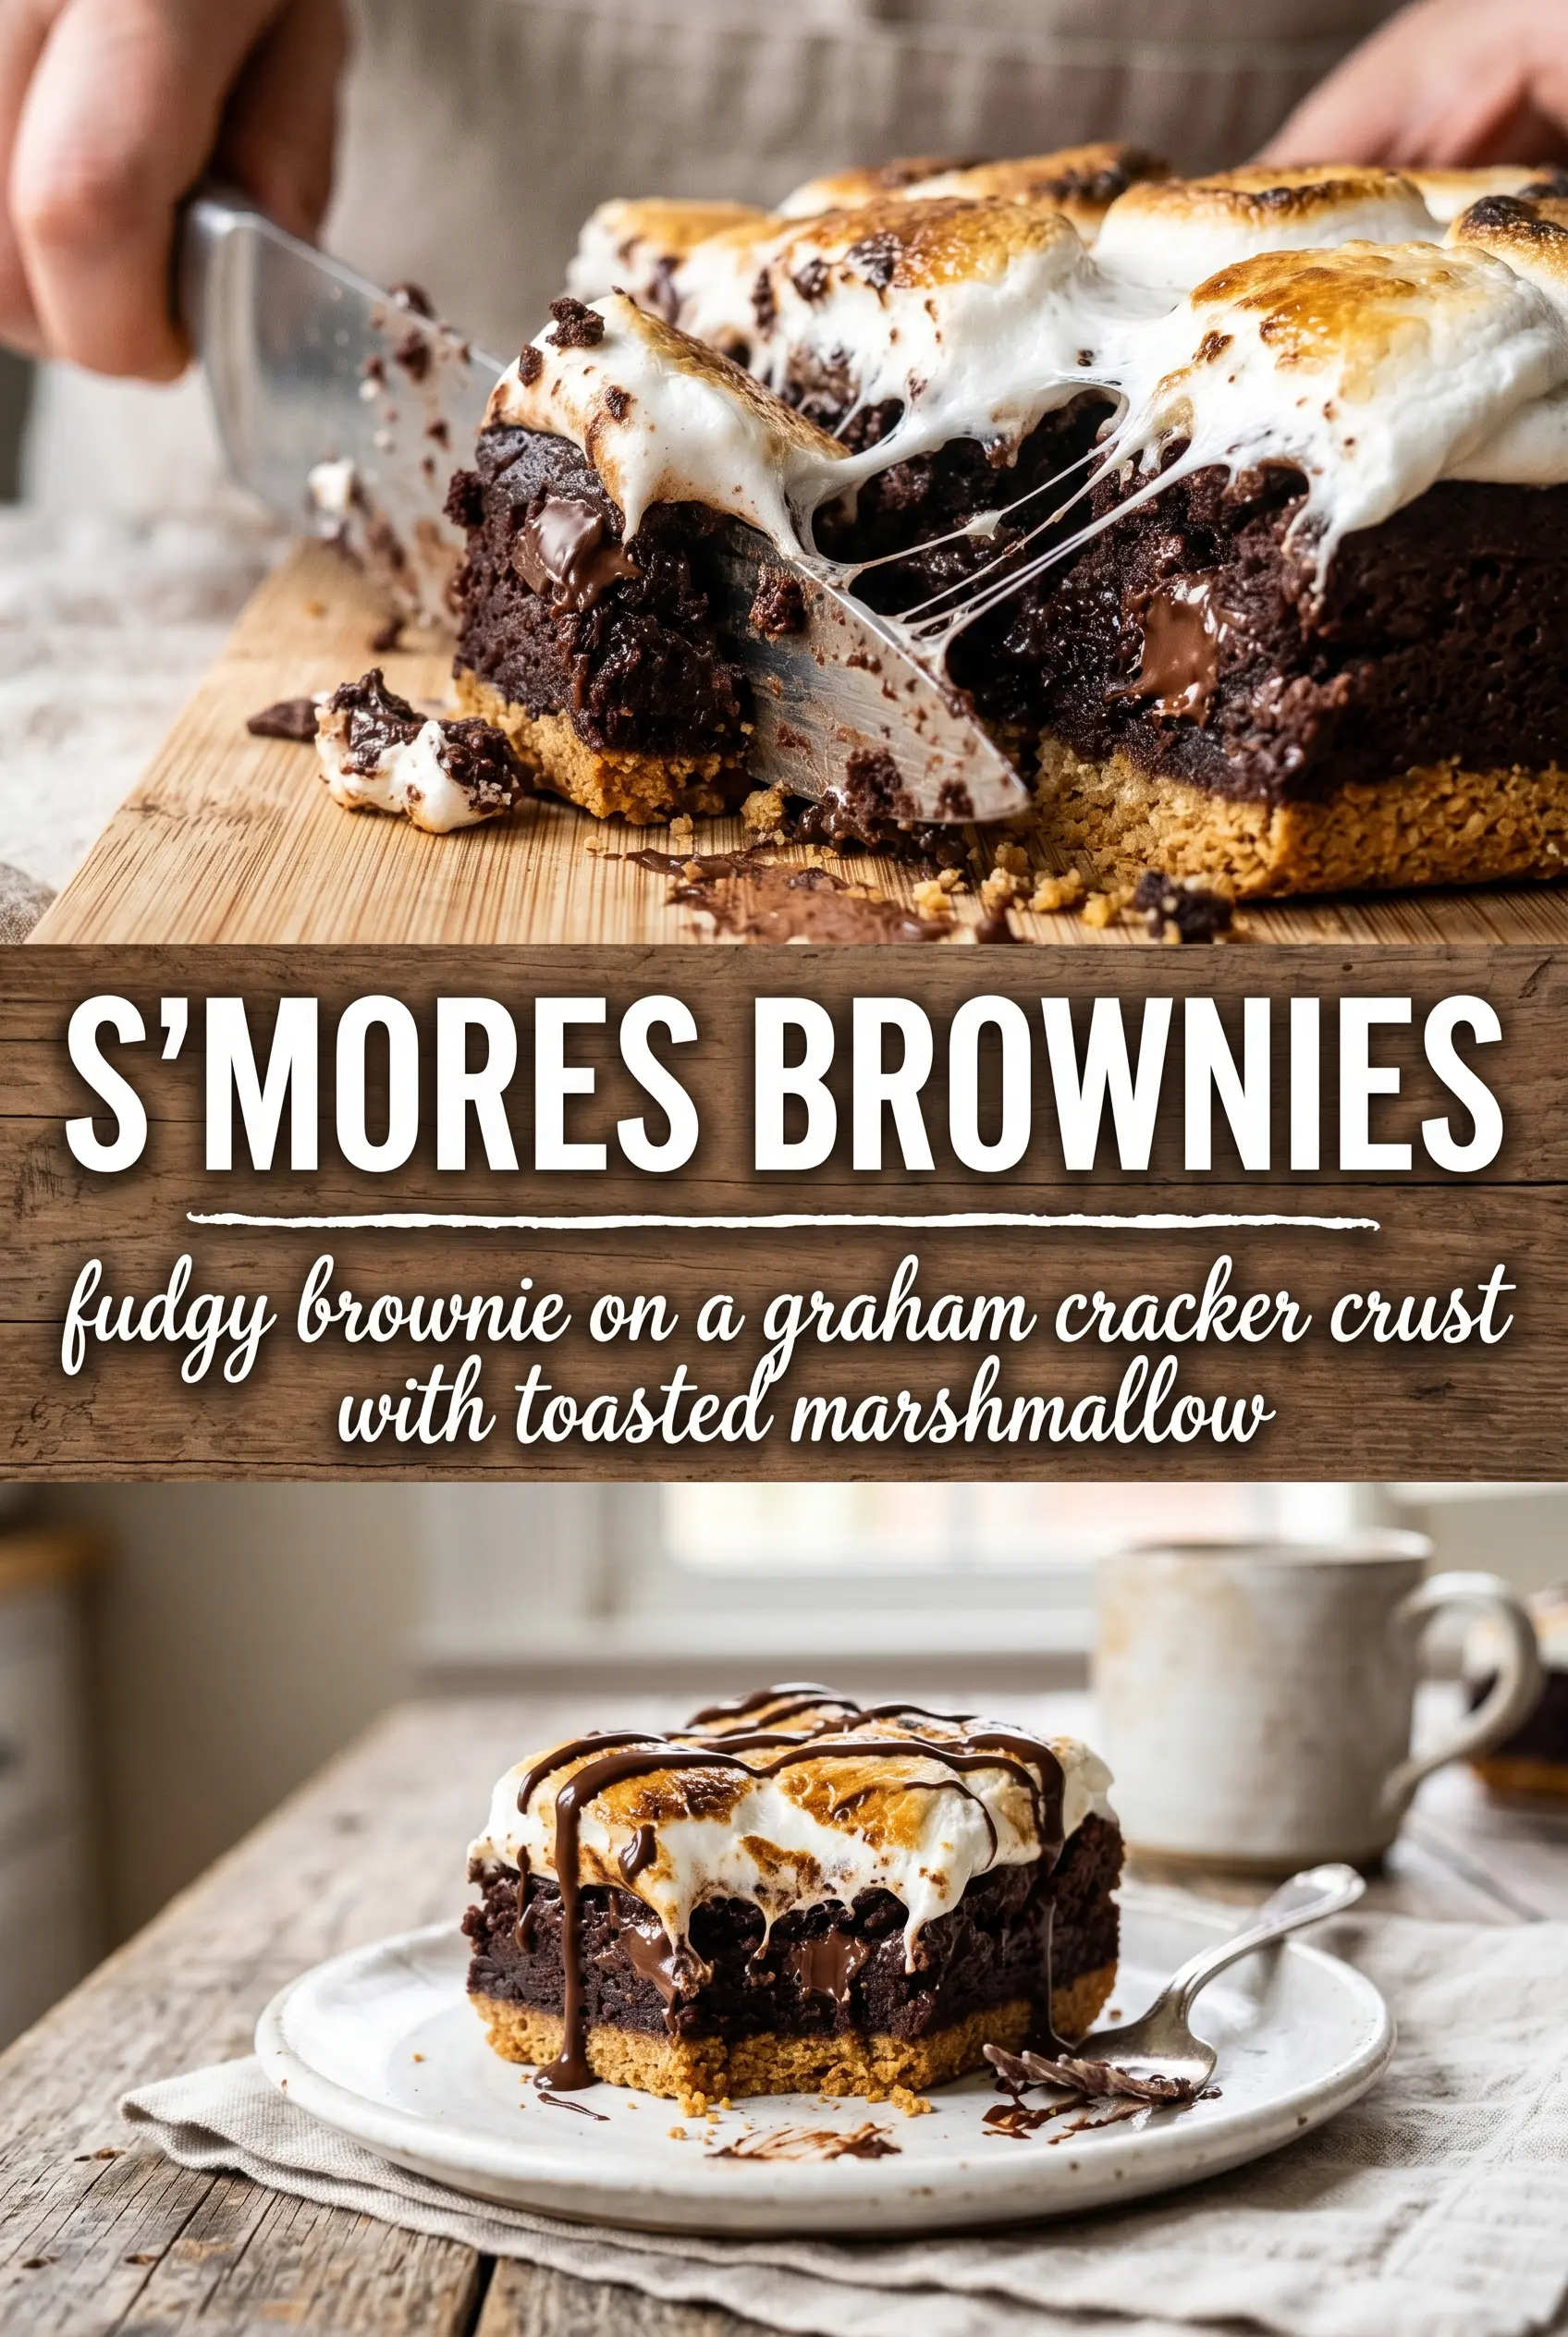
Fudgy brownies, a crisp graham cracker base, and a toasted marshmallow top give these s’mores brownies the kind of layered bite that keeps people hovering by the pan. The bottom stays sturdy enough to hold the square, the center bakes up dense and glossy, and the broiled marshmallows turn golden and bubbly instead of sliding into a sticky mess. That contrast is what makes this version worth making again and again.
The key is building each layer for a different job. The graham cracker crust gets a quick bake so it sets before the brownie batter goes on top, and the brownie itself is mixed just enough to stay fudgy instead of cakey. The marshmallows go on only after the brownies are almost fully baked, which keeps them toasty on top without drying out the pan underneath.
Keep reading for the timing details that matter most, plus the trick for clean slices after the chocolate drizzle sets. If you’ve ever had s’mores bars turn soggy or the topping burn before the center was done, this version handles both problems.
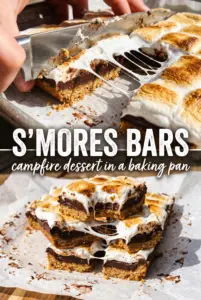
The graham cracker layer stayed crisp, and the marshmallows browned evenly under the broiler without melting into a puddle. I used the buttered knife tip for cutting and got neat squares for once.
These s’mores brownies get their best texture from the crisp graham base and that toasted marshmallow top.
The Marshmallow Topping Only Works If the Brownie Layer Is Almost Done
Broiling marshmallows on top of a raw brownie pan is how you end up with burnt tops and an underbaked center. The brownie layer needs to be mostly set before the marshmallows go on, because the broiler does its job fast and it doesn’t care what’s happening underneath. A toothpick with a few moist crumbs is the target here. Wet batter means the topping will finish long before the middle does.
The other thing that matters is distance. Keep the pan centered under the broiler and watch it the whole time. Marshmallows go from pale to toasted to scorched in a blink, and once they start collapsing, they’re done. Pull the pan the moment the tops are golden and bubbly.
What Each Layer Is Doing in These S’mores Brownies
- Graham cracker crumbs — These form the base that makes the brownies taste like actual s’mores, not just brownies with marshmallows on top. Fine crumbs pack more tightly, so if your crumbs are coarse, pulse them a little finer before mixing.
- Butter in the crust and brownie — Melted butter gives the crust enough richness to hold together and keeps the brownie layer dense and fudgy. The brownie batter starts with melted butter instead of creamed butter, which helps the texture stay closer to a classic boxed-brownie chew.
- Cocoa powder — Unsweetened cocoa drives the chocolate flavor and keeps the brownie layer deep and dark. Natural or Dutch-process both work here, but Dutch-process gives a slightly smoother, more dramatic chocolate taste.
- Mini marshmallows — Mini marshmallows melt and toast more evenly than large ones. If you only have big marshmallows, cut them into smaller pieces so the top doesn’t turn into uneven hot spots under the broiler.
- Chocolate chips for drizzling — The drizzle finishes the bars with extra chocolate and helps the top look polished once the marshmallows cool. Any semi-sweet chips work, but chopped chocolate melts a little smoother if that’s what you have on hand.
Build the Crust, Then Stop Stirring the Brownie Batter
Pressing and Prebaking the Base
Mix the graham cracker crumbs, sugar, and melted butter until the texture looks like damp sand and holds together when squeezed. Press it firmly into a parchment-lined 9×13 pan, all the way into the corners, because loose spots crumble when you slice the bars later. A 6-minute bake is enough to set the crust without drying it out. If you skip that quick bake, the bottom can go soft under the brownie layer.
Mixing the Brownie Batter
Whisk the melted butter and sugar until the mixture looks glossy, then add the eggs and vanilla. Stir in the cocoa, flour, baking powder, and salt just until the streaks disappear. Overmixing here is what turns a fudgy brownie cakey, so stop as soon as the batter looks uniform and thick. Spread it gently over the crust instead of dumping it in one spot, which helps keep the bottom layer intact.
Baking to the Right Center
Bake until the edges look set and the center no longer sloshes when you nudge the pan. A toothpick should come out with a few moist crumbs, not clean. Clean usually means overbaked for this style of brownie. If the center still looks shiny and wet, give it a few more minutes before adding the marshmallows.
Toasting the Marshmallows
Scatter the mini marshmallows evenly over the warm brownies, then broil on high for 1 to 3 minutes. Stay right there. The goal is golden tops and soft, bubbling edges, not a burned sugar crust. If your broiler runs hot, the difference between toasted and ruined is seconds, so pull the pan early if the marshmallows are coloring fast.
Make Them More Chocolatey
Add a handful of chocolate chunks to the brownie batter before spreading it into the pan. The bars bake up richer and denser, with melted pockets of chocolate in every slice. Keep the drizzle on top, because that extra layer helps carry the s’mores look all the way through.
Gluten-Free Version
Use gluten-free graham crackers for the crust and a 1:1 gluten-free baking flour in the brownie batter. The texture stays close to the original, though the bars may be a little more delicate when warm. Let them cool fully before cutting so the layers can firm up.
Dairy-Free Swaps
Use plant-based butter in both the crust and brownie, then finish with dairy-free chocolate chips. The bars still bake up fudgy and the graham layer still holds, but the flavor will be slightly less rich than the butter-based version. Choose a vegan marshmallow if you need the topping to stay fully dairy-free.
Storage and Reheating
- Refrigerator: Store in an airtight container for up to 4 days. The marshmallow top softens a bit, but the brownie stays moist.
- Freezer: Freeze the cut bars without the drizzle for up to 2 months, wrapped well and separated with parchment. Thaw in the fridge so the topping doesn’t sweat too much.
- Reheating: Warm individual squares for 10 to 15 seconds in the microwave if you want the brownie soft again. Don’t rebroil them; the marshmallows will harden or burn before the center heats through.
Answers to the Questions Worth Asking
S'mores Brownies
Ingredients
Equipment
Method
- Preheat the oven to 350°F and line a 9x13 pan with parchment paper, leaving overhang for easy lifting later.
- Mix graham cracker crumbs, sugar, and melted butter, then press firmly into the bottom of the pan.
- Bake the crust for 6 minutes, until it looks set and lightly fragrant.
- Whisk melted butter and granulated sugar until smooth.
- Whisk in eggs and vanilla until glossy and fully combined.
- Stir in cocoa powder, all-purpose flour, baking powder, and salt until the batter is smooth and thick.
- Spread the brownie batter evenly over the graham cracker crust.
- Bake for 22-25 minutes, until a toothpick comes out with a few moist crumbs.
- Scatter mini marshmallows over the top in an even layer.
- Broil on HIGH for 1-3 minutes, watching closely until golden and bubbly.
- Cool for 30 minutes before drizzling with melted chocolate.
- Cut into 16 squares using a buttered knife, wiping the blade as needed for clean edges.