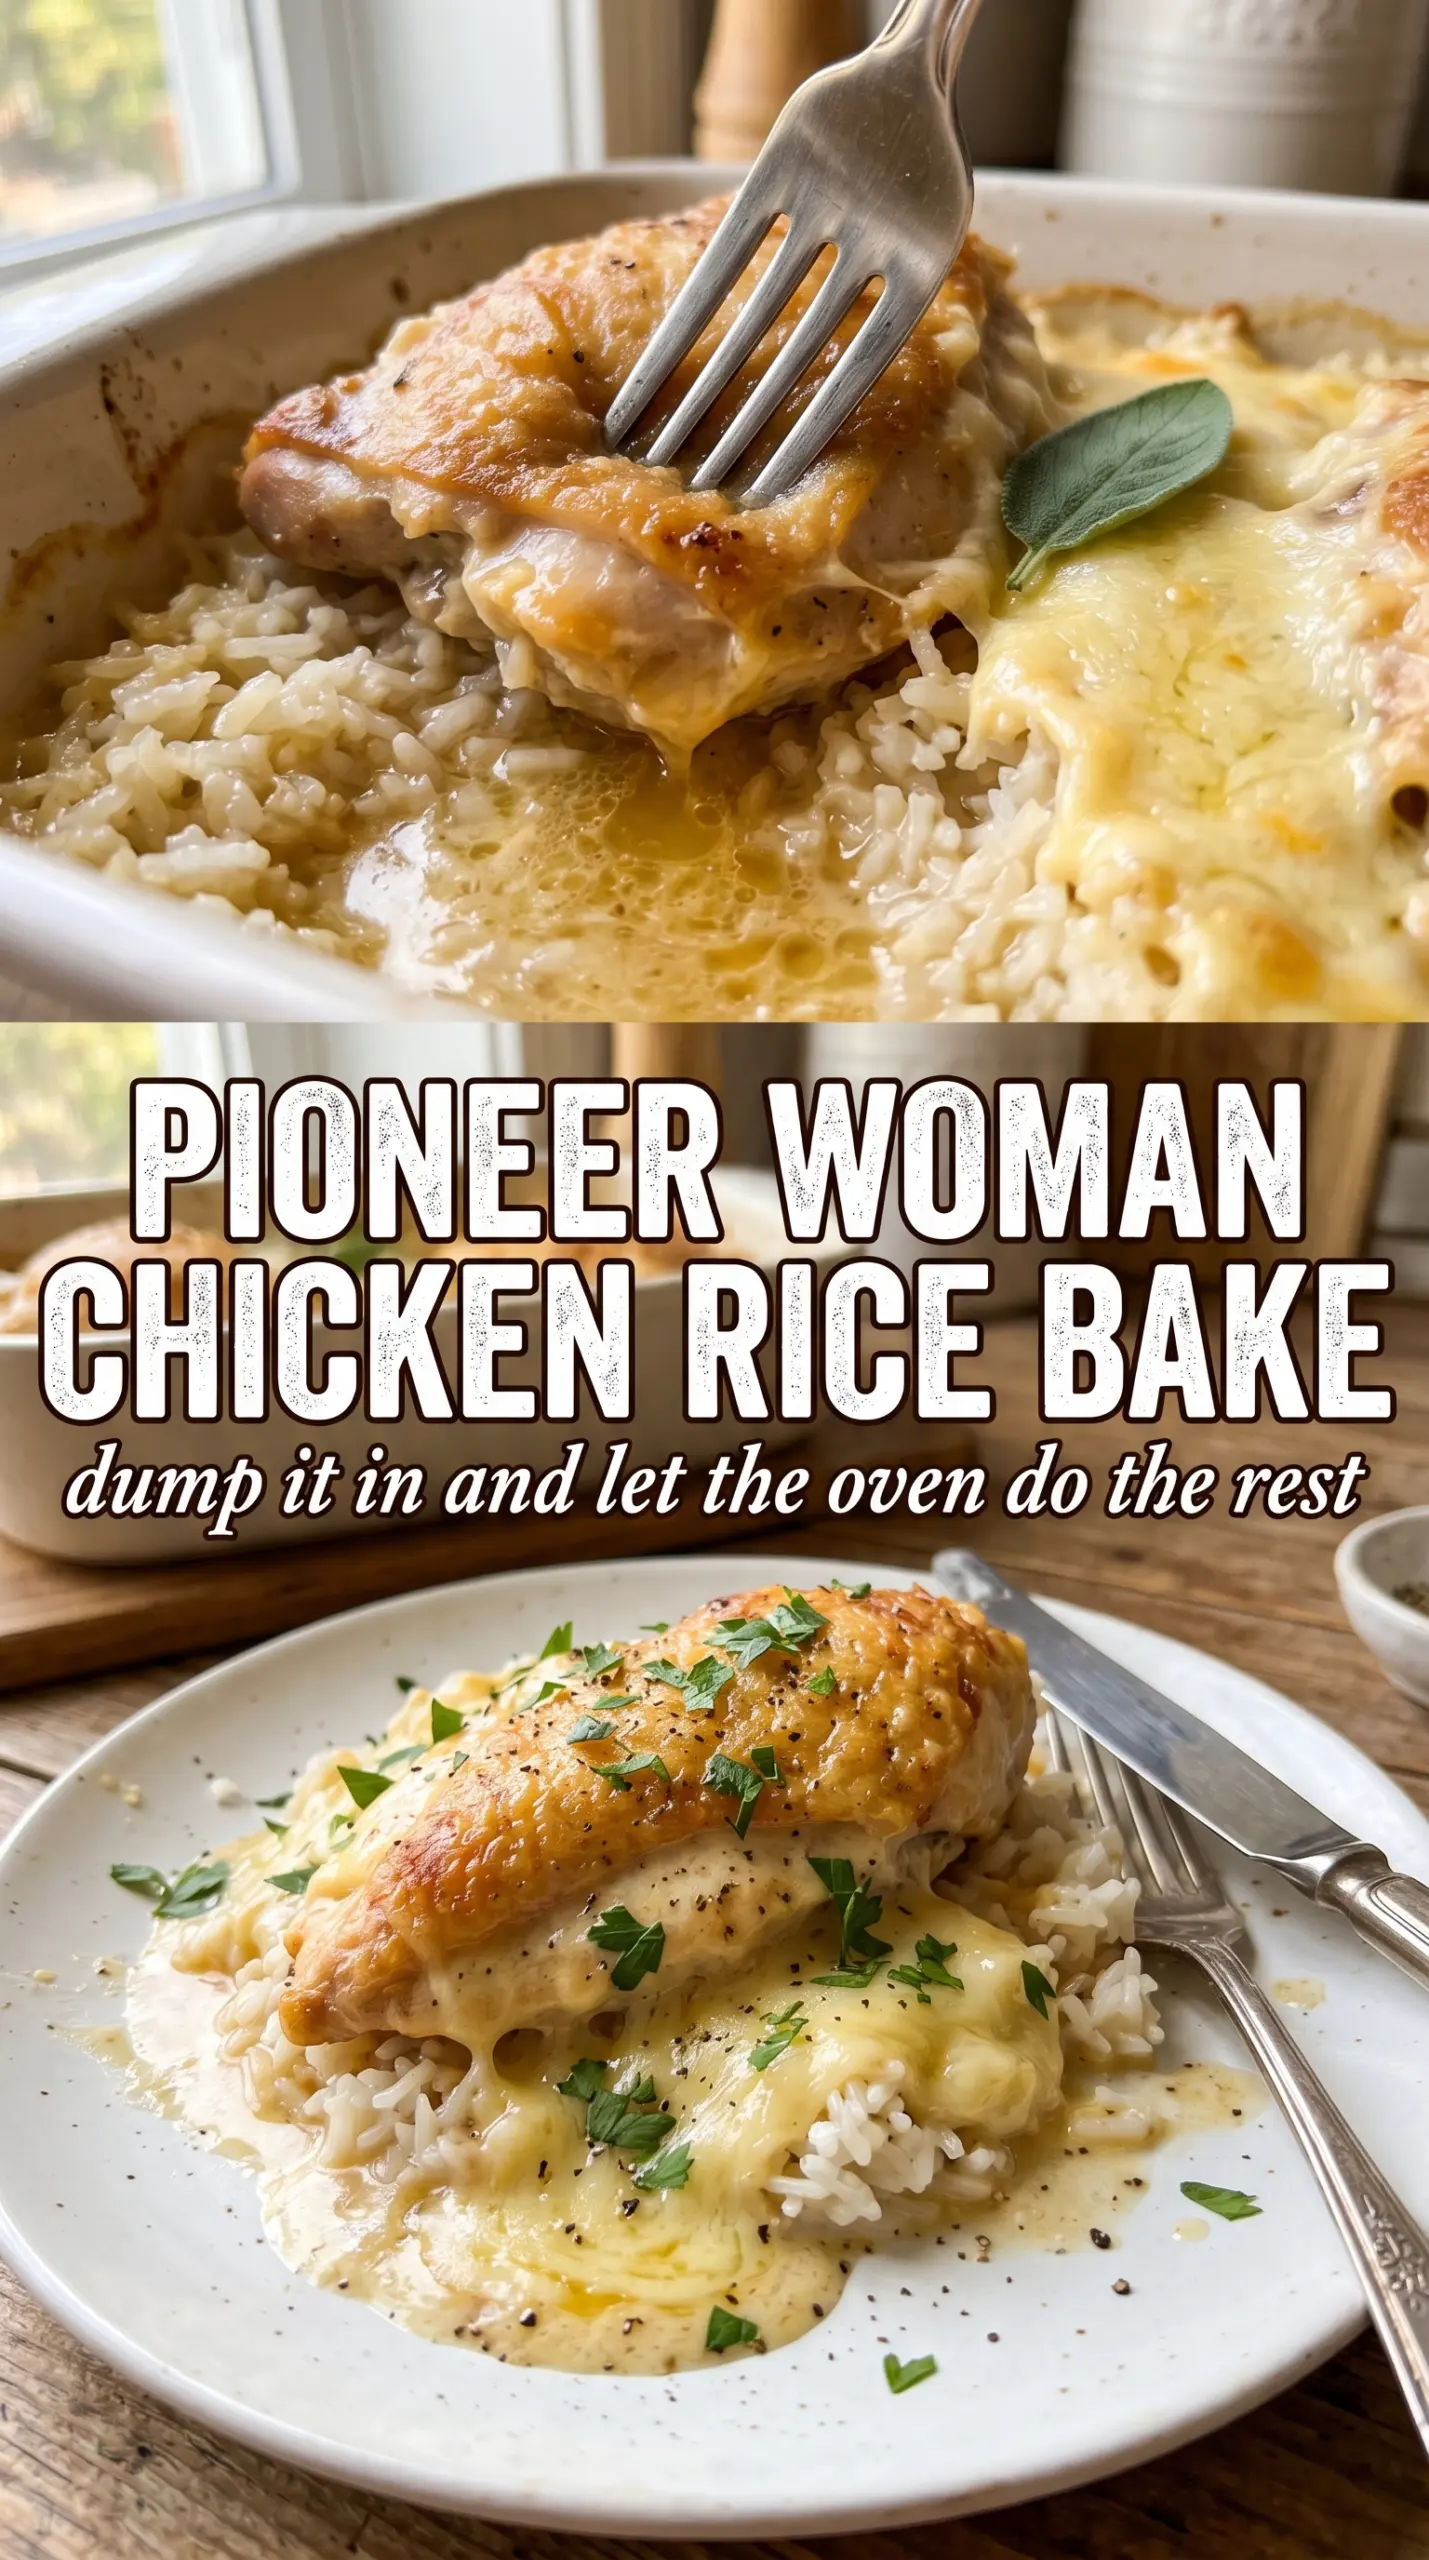
Golden chicken over deeply savory rice is the kind of bake that earns its place in the regular rotation because it cooks the main dish and the side dish together without losing either one. The rice doesn’t stay plain or separate here; it soaks up oniony drippings and the blended soups, turning into a soft, seasoned bed under the chicken while the skin above it turns lacquered and crisp.
What makes this version work is the balance of moisture and time. The soups bring body, the broth or water loosens everything just enough for the rice to cook through, and the foil cover traps steam long enough for the grains to finish before the top browns. If you’ve ever ended up with crunchy rice or pale chicken, it usually means the dish dried out too early or the bake wasn’t uncovered long enough at the end.
Below you’ll find the small details that matter most: how to keep the rice from turning mushy, when the chicken needs more color, and the easiest swaps if you’re working with what’s already in the pantry.
The rice came out tender all the way through and soaked up every bit of flavor from the soups and onion mix. I uncovered it for the last 25 minutes like you said, and the chicken skin actually browned instead of just steaming.
Save this Pioneer Woman Chicken Rice Bake for a one-dish dinner with crispy chicken skin and spoon-soft, oniony rice.
The Part That Keeps the Rice Tender Instead of Gummy
The biggest mistake with chicken and rice bakes is crowding too much liquid into a pan that never gets the chance to finish evenly. This version works because the soups bring thickness, but the rice still needs enough free liquid to cook through under the foil. If the mixture looks almost loose before it goes into the oven, that’s the right place to be; dry it up too early and the grains on top will stay hard while the bottom turns pasty.
Bone-in chicken matters here because the drippings do the heavy lifting. As the chicken roasts, the fat and juices slide into the rice and season it from the top down. The foil keeps that moisture in place at first, then the uncovered finish lets the skin dry out and the liquid reduce into a coating instead of a puddle.
- Long-grain white rice — This is the rice that holds its shape best in a bake like this. Short-grain rice turns soft faster and can go gluey; brown rice needs a different liquid ratio and a longer bake.
- Bone-in chicken pieces — Thighs and drumsticks stay juicier than boneless breast meat and give the rice more flavor. If you use breast pieces, check them early so they don’t dry out before the rice is done.
- The canned soups — They’re doing more than adding creaminess. They bring salt, fat, and body, which is why the dish tastes finished even before you add a sauce on the side.
- Onion soup mix — This is the seasoning backbone. Stir part of it into the rice so every bite gets flavor, then sprinkle the rest over the chicken so the skin picks it up as it bakes.
What Each Ingredient Is Actually Doing in This Chicken
- Chicken breasts (the protein) — Let them sit at room temperature 15 minutes before cooking. This helps them cook evenly without drying.
- Oil or butter (the cooking medium) — This prevents the chicken from drying out and carries herb and spice flavors throughout.
- Garlic (the aromatic foundation) — Fresh minced garlic mellows and becomes sweet when cooked. Don’t brown it or it turns bitter.
- Cream or sauce (the moisture keeper) — This prevents the chicken from drying out during cooking. Balance richness with acid.
- Lemon, wine, or acid (the brightness) — This prevents heavy cream sauces from tasting flat. Add at the end to preserve freshness.
- Fresh herbs (basil, thyme, parsley) — Add some during cooking and some after so you get both cooked and fresh flavors.
- Cheese or toppings (optional richness) — These add creaminess and depth. Don’t overdo it or the dish becomes heavy.
- Proper oven temperature (375-400°F) or pan heat — This cooks chicken through without drying the edges. Use a thermometer for 165°F.
How to Layer the Pan So Everything Cooks at the Same Pace
Building the Rice Base
Whisk the soups, uncooked rice, and liquid directly in the greased baking dish until the mixture looks evenly combined and the rice is suspended throughout, not sitting in a dry mound at the bottom. That even spread matters because any clump left behind can stay undercooked. Once the onion soup mix goes in, give it one more stir so the seasoning is distributed before the chicken ever touches the pan.
Seasoning and Nestling the Chicken
Season the chicken pieces generously on all sides, not just the skin. Paprika helps the top color, garlic powder fills in the savory notes, and salt wakes up the soups so the whole dish doesn’t taste flat. Place the pieces skin-side up and press them lightly into the rice; they should sit partly settled, not buried, so the skin can brown instead of steaming shut.
The Covered Bake
Cover the dish tightly with foil and bake until the rice has had time to absorb the liquid underneath. A loose cover leaks steam, and that’s how the rice ends up uneven. After about an hour, the pan should still look moist but not soupy; if it looks dry that early, the foil wasn’t sealed well or the oven runs hot.
The Uncovered Finish
Take the foil off and keep baking until the chicken is golden and the rice is fully tender. This is the stage that gives you the browned top and the deep roasted flavor, so don’t rush it. If the chicken is done but the rice still seems wet in the center, give it a few more minutes uncovered and let the steam escape. The top will tighten as it rests.
How to Adjust This Casserole Without Losing the Texture
Use chicken thighs for a juicier bake
Thighs are the best swap if you want the richest result. They stay tender through the long bake and give the rice a little more fat to work with, which keeps the casserole from tasting dry.
Make it gluten-free with gluten-free soups and broth
Use certified gluten-free condensed soups and check the onion soup mix before you start. The texture stays the same, but this only works cleanly if every canned and packaged ingredient is labeled gluten-free.
Swap in cream of celery if you want a lighter savory note
You can replace one of the cream soups with an extra can of cream of celery if you want less mushroom flavor. The casserole still comes out creamy, but the flavor leans a little cleaner and more neutral.
Stretch it for a bigger crowd
You can scale it up in a larger roasting pan, but don’t pile the rice too thickly or the center will lag behind. If the pan gets crowded, add a little more liquid and expect a longer bake before the chicken browns.
Storage and Reheating
- Refrigerator: Store leftovers in an airtight container for up to 4 days. The rice firms up as it chills, so expect a slightly thicker texture the next day.
- Freezer: This freezes fairly well in portions for up to 2 months, though the rice will soften a bit after thawing. Cool it completely first and freeze in flat containers so it reheats evenly.
- Reheating: Reheat covered in the oven at 325°F with a splash of broth to loosen the rice, or use the microwave in short bursts. The common mistake is blasting it uncovered, which dries the chicken out before the center gets hot.
Answers to the Questions Worth Asking

Pioneer Woman Chicken Rice Bake
Ingredients
Equipment
Method
- Preheat the oven to 350°F and grease a large 9x13 baking dish. Set it up so the dish is ready for mixing immediately.
- Whisk together the three soups, long-grain white rice, and water or chicken broth in the prepared baking dish until combined. The mixture should look evenly coated with no dry rice pockets.
- Sprinkle half of the onion soup mix into the rice and stir. Make sure the flavor is distributed through the rice layer.
- Season the chicken pieces generously with salt, pepper, garlic powder, and paprika. Nestle the chicken skin-side up into the rice so the tops stay visible.
- Sprinkle the remaining onion soup mix over the chicken. Aim it mostly over the skin so it browns as it roasts.
- Cover tightly with foil and bake at 350°F for 1 hour. The rice should begin absorbing the liquid while the chicken cooks through.
- Remove the foil and bake at 350°F for 25-30 minutes, until the chicken is golden and the rice has absorbed all liquid. Look for a crispy, caramelized chicken skin and a dry, tender rice surface.