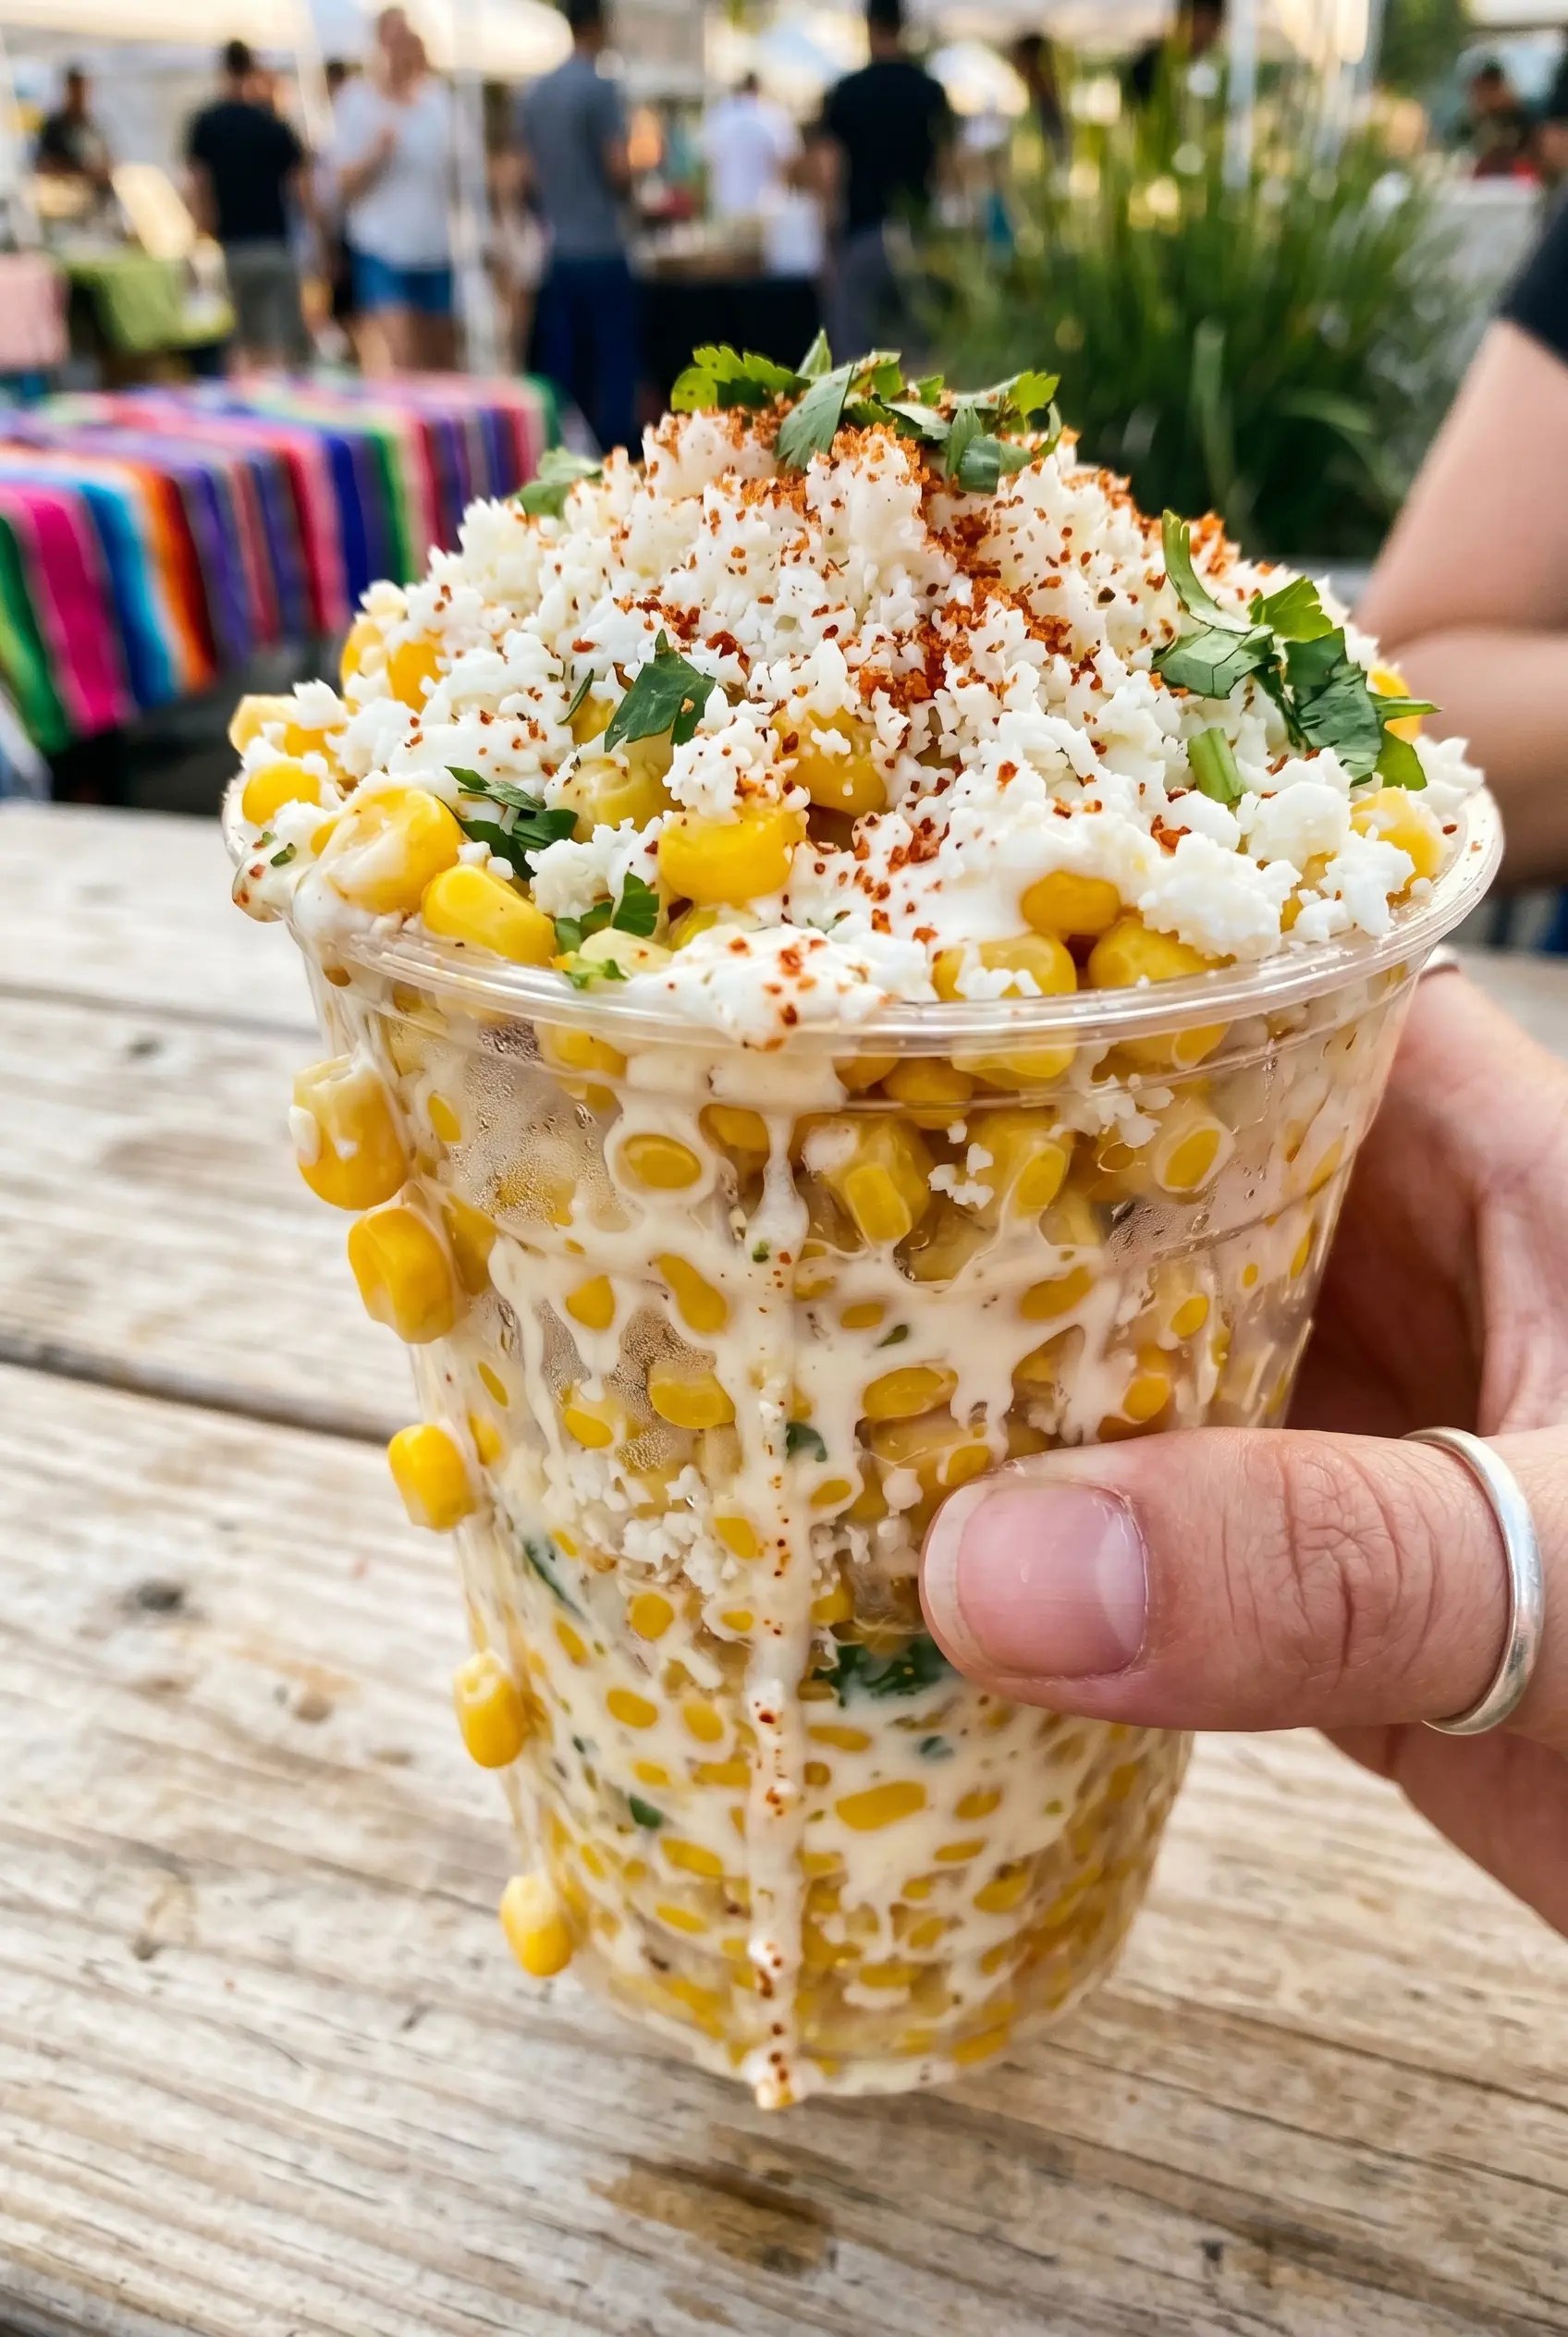
Crispy, charred corn tucked under a cool cotija-lime topping is the kind of side dish that disappears before the main course even lands on the table. The best bites hit all at once: sweet corn with dark edges, creamy dressing, salty cheese, fresh cilantro, and a sharp squeeze of lime. It tastes like street corn, but the cup format keeps every spoonful neat and concentrated.
This version works because the corn gets real color before anything else touches it. A hot skillet pulls moisture off the kernels and leaves behind those browned bits that taste deeper and sweeter than boiled corn ever could. The topping stays simple on purpose — mayonnaise for body, cotija for salt, garlic for bite, and lime to wake the whole thing up. Nothing here hides the corn. It just gives it a better frame.
Below, I’ll show you how to get those charred edges without steaming the pan, plus a few smart swaps if you need to change the cheese or turn this into a dairy-free version.
The corn got those perfect golden edges in the skillet, and the cotija mixture stayed creamy instead of sliding off. I served it with tacos and my husband went back for seconds before the pan was even empty.
These Mexican Street Corn Cups keep the charred corn, creamy cotija topping, and bright lime in every bite.
The Skillet Needs to Stay Hot So the Corn Actually Charters
The biggest mistake with street corn cups is treating the corn like a quick sauté. If the pan isn’t hot enough, the kernels release their moisture and sit there steaming in butter. You end up with soft, pale corn instead of the sweet, browned edges that give this dish its depth.
Let the cast iron or heavy skillet heat fully before the corn goes in. Once the kernels hit the pan, stir them just enough to keep them from scorching in one spot, then leave them alone long enough to pick up color. You’re listening for a steady sizzle, not a wet hiss. If the pan starts looking dry before the corn is charred, a small extra knob of butter helps, but don’t flood it or you’ll lose the browning.
What Each Ingredient Is Actually Doing in This Dish
- Corn — Fresh corn gives you the best sweet pop and the most obvious char, which is the whole point here. Frozen corn will work in a pinch, but thaw it and pat it dry first so extra water doesn’t keep it from browning.
- Butter — Butter helps the kernels caramelize and carries the browned flavor through the pan. Olive oil can stand in, but it won’t give you the same round, rich finish.
- Cotija cheese — Cotija brings the salty, crumbly finish that makes the topping taste like street corn instead of plain corn salad. If you can’t find it, feta is the closest swap, though it’s a little tangier and less mellow.
- Mayonnaise — Mayo binds the topping and gives it that creamy coating that clings to the corn instead of sliding to the bottom of the bowl. Sour cream can replace part of it, but the mixture will be looser and a little sharper.
- Lime — Lime is what cuts through the richness. Add it at the end, after the corn is plated, so the flavor stays bright instead of getting muted in the skillet.
- Cilantro and garlic — Cilantro brings freshness, and the garlic gives the topping a little bite. Mince the garlic finely so it doesn’t show up as raw chunks in the final spoonfuls.
Building the Charred Corn and Creamy Topping
Cutting the Corn Cleanly
Set each ear upright in a wide bowl or on a cutting board with a towel underneath so it doesn’t skate around. Slice downward with a sharp knife, keeping the blade close to the cob so you get full kernels without hacking up the center. If the kernels fly everywhere, your knife is probably dull or you’re cutting too fast. Work steadily and collect the corn before it starts rolling off the board.
Charring the Kernels
Heat the skillet over medium-high and add the melted butter, then the corn. Stir every minute or so, but don’t keep it in constant motion or you’ll prevent the browned spots from forming. You want a mix of golden kernels and a few deeper charred edges. If the corn starts to soften before it colors, the pan wasn’t hot enough.
Mixing the Cotija Topping
Stir the cotija, mayonnaise, cilantro, garlic, chili powder, salt, and pepper in a bowl until it looks thick and spoonable. The mixture should hold together, not run like a dressing. If it seems loose, add a little more cotija. If it tastes flat, it probably needs more lime at the table rather than more salt in the bowl.
Assembling the Cups
Spoon the hot corn into small bowls or corn husks, then top with the cheese mixture while the corn is still warm. That heat softens the topping just enough to melt into the kernels without turning it soupy. Finish with a squeeze of fresh lime juice right before serving. If you add the lime too early, the acidity can thin the mayo mixture and dull the texture.
Three Smart Ways to Adapt These Street Corn Cups
Make It Dairy-Free
Swap the butter for olive oil and use a plant-based mayo. For the cheese, a dairy-free feta-style crumble works best because you still get that salty, crumbly finish. The result is a little less rich, but the lime and chili still carry the dish.
Use Frozen Corn When Fresh Isn’t Available
Frozen corn can make good street corn cups if you thaw it and dry it well before it hits the pan. Wet corn won’t char; it just steams. The flavor is a touch less sweet than fresh, but the skillet still builds enough color to keep the dish satisfying.
Turn It Into a Lighter Side
Cut the mayonnaise with plain Greek yogurt if you want a tangier, lighter topping. The mixture won’t be quite as silky, but it still clings well and tastes bright with lime. This is the best option when you want the same street corn flavor without the heavier finish.
Storage and Reheating
- Refrigerator: Store the corn and topping separately for up to 3 days. The corn will soften a bit, but it still tastes good once reheated.
- Freezer: The charred corn can be frozen, but the creamy topping doesn’t freeze well. Freeze the corn alone in a sealed container for up to 2 months.
- Reheating: Rewarm the corn in a skillet over medium heat until hot, then add the topping after heating. Microwaving the whole dish makes the corn watery and the topping loose.
Questions I Get Asked About This Recipe
Mexican Street Corn Cups
Ingredients
Equipment
Method
- Cut the corn kernels from the husked cobs and keep the kernels ready. Heat a cast iron skillet over medium-high heat until hot, then add the melted butter and the corn kernels.
- Stir occasionally and cook the corn until the kernels char and turn golden, about 12-15 minutes. Pull the skillet off the heat when the edges look dark and crisp.
- In a bowl, combine the cotija cheese, mayonnaise, chopped cilantro, minced garlic, chili powder, salt, and pepper. Stir until the mixture looks thick and evenly speckled with herbs and spices.
- Divide the charred corn among four small bowls or corn husks. Spoon the cotija cheese mixture over each portion.
- Finish each cup with a squeeze of fresh lime juice and serve warm. The topping should look creamy and cling to the hot, crunchy corn edges.