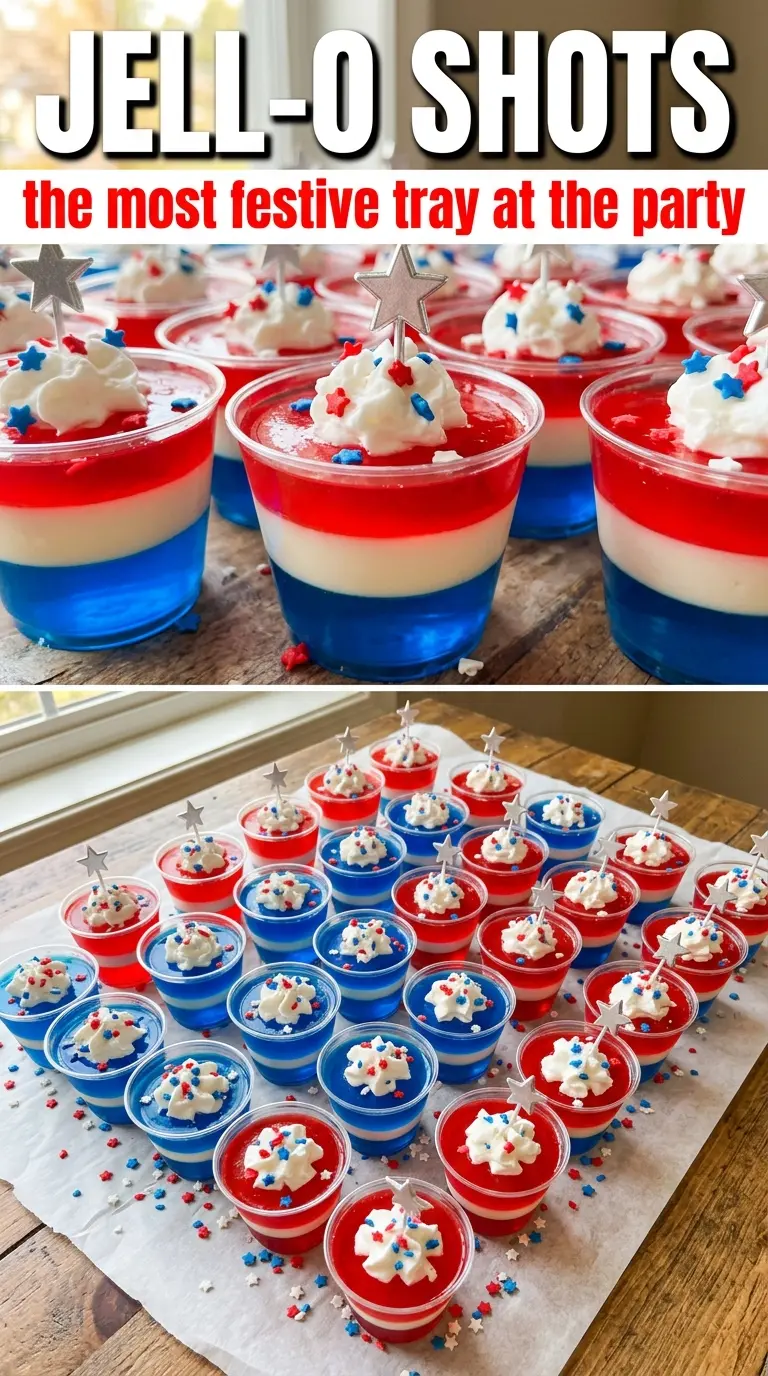
These red, white, and blue Jell-O shots set up cleanly into bright, distinct layers instead of blurring into one cloudy cup, and that’s what makes them worth the little bit of staging they need. The cherry layer comes through first, the creamy middle softens the vodka edge, and the blue finish gives them that sharp, festive look people reach for at a party.
The trick is temperature control. Each layer has to be fully set before the next one goes in, and the liquid you pour on top needs to be cooled enough that it doesn’t melt the layer underneath. The white layer is the one that usually causes trouble, because the condensed milk can cloud up or sink if it’s too hot or poured too fast. Slow, gentle pouring is what keeps the stripes crisp.
Below, I’ve included the exact timing that keeps the layers separate, plus a few swaps and fixes for when you want to adjust the alcohol, the colors, or the make-ahead plan.
The layers set up perfectly, and I finally got clean red, white, and blue stripes instead of a mixed mess. I let each layer chill the full time, and the cups held their shape all night.
Like these red, white, and blue Jell-O shots? Save this layered party recipe for your next patriotic celebration.
The Reason These Layers Stay Clean Instead of Blending
The biggest mistake with layered Jell-O shots is rushing the chill time. If the first layer is even slightly soft when the next one goes in, the colors bleed and the cups lose that striped look. The set layer should feel firm when you tap the side of the cup, not wobbly in the middle.
Cooling each liquid before it goes into the cups matters just as much as the chilling time. Hot or even warm liquid will melt the layer below, especially the creamy middle, and that’s how you end up with a muddy center. Pour along the side of a spoon or the back of a teaspoon if you want the layers to stay neat.
- Vodka — Cold vodka keeps the gelatin from taking forever to set and keeps the mixture from heating the cup. Use a plain, clean-tasting vodka; this isn’t the place for flavored liquor unless you want that flavor to show up in every layer.
- Sweetened condensed milk — This gives the middle layer its opaque white color and a softer, creamy bite. Regular milk won’t give the same body or look, and it can separate more easily.
- Unflavored gelatin — This is what makes the white layer firm enough to stack. Don’t skip the blooming and dissolving step, or you’ll get little grains instead of a smooth layer.
- Cherry or strawberry and berry blue Jell-O — Boxed gelatin gives you the strongest color and the fastest set, which is exactly what you want here. The strawberry version is a little softer in flavor; cherry tastes brighter and a bit more candy-like.
What Each Ingredient Is Actually Doing in This Recipe
- Primary ingredient (the star) — This carries the main flavor and defines the dish. Quality matters here.
- Base sauce or cooking medium (the carrier) — This brings all flavors together and keeps the dish from being dry.
- Aromatics (onion, garlic, ginger) — These add depth and complexity. They mellow and become sweet when cooked.
- Seasonings (salt, spices, herbs) — These define the personality and prevent the dish from tasting one-dimensional.
- Vegetables (nutrition and texture) — These add freshness and color. Cut to size so they cook evenly.
- Acid (lemon, vinegar, tomato, wine) — This brightens the dish and prevents it from tasting heavy or flat.
- Fat (oil, butter, cream) — This carries flavors and creates a satisfying mouthfeel. Don’t skip it.
- Proper technique (heat, time, temperature) — The right method turns good ingredients into great food. Follow the instructions carefully.
Building the Cups One Layer at a Time
Setting the Red Base
Stir the cherry or strawberry gelatin into boiling water until every granule disappears, then add the cold vodka and pour it into the cups right away. Fill each cup only about one-third full so you leave room for the other layers. Refrigerate until the surface is fully firm and no longer jiggles when you tilt the cup. If it’s even a little soft, the next layer will sink through it.
Making the White Center
Whisk the unflavored gelatin into the boiling water with the sweetened condensed milk until it dissolves completely and the mixture looks smooth, not speckled. Let it cool slightly before adding the cold water, then spoon it gently over the set red layer. A spoon helps break the fall of the liquid, which keeps the red layer from tearing. Chill again until the white layer is set all the way through before moving on.
Finishing with the Blue Top
Dissolve the blue gelatin in boiling water, stir until clear, then add the cold vodka and let it cool to room temperature. If it goes in warm, it can melt the white layer and blur the line between colors. Pour slowly over the back of a spoon and refrigerate until the tops are firm and glossy. At that point, the cups should look cleanly stacked and feel fully set from top to bottom.
Make Them Stronger or Softer
Use less vodka and replace the difference with cold water if you want a softer set and a lighter bite. If you want them firmer and a little stronger, keep the vodka amount as written and don’t add extra liquid. Too much alcohol slows the setting time and can leave the cups loose in the middle.
Dairy-Free Version
Swap the condensed milk layer for a dairy-free sweetened condensed coconut milk and keep the gelatin amount the same. The white layer will taste a little coconut-forward and won’t be quite as neutral, but it still stacks and sets cleanly. That swap works best if you’re okay with a subtle coconut note in the middle.
Nonalcoholic Party Cups
Replace the vodka with cold water in both fruit layers if you need a no-alcohol version. The texture will still set, but the cups taste more like layered gelatin desserts than shots. That’s the cleanest way to keep the patriotic look for a mixed-age crowd.
Storage and Reheating
- Refrigerator: Store covered for up to 3 days. The layers stay neat, though the top can start to dry out if they sit uncovered.
- Freezer: Don’t freeze these. Gelatin turns watery and grainy after thawing, and the layers lose their clean texture.
- Reheating: Not applicable. Serve them straight from the refrigerator, and keep them chilled until the moment they’re passed around.
Answers to the Questions Worth Asking
Jell-O Shots (Red, White, and Blue)
Ingredients
Method
- Dissolve cherry or strawberry Jell-O in 1 cup boiling water, stirring for 2 minutes until smooth. Stir in 1/2 cup cold vodka, then pour into shot cups filling one-third of the way.
- Refrigerate the cups for 45 minutes until fully set, so the surface looks firm and holds its shape.
- Combine sweetened condensed milk, 1 cup boiling water, and unflavored gelatin, then stir until fully dissolved. Cool slightly, add 1/2 cup cold water, then spoon gently over the set red layer to avoid breaking it.
- Refrigerate for another 45 minutes until the white layer is set and no longer jiggles when lightly nudged.
- Dissolve berry blue Jell-O in 1 cup boiling water, stirring for 2 minutes until smooth. Mix in 1/2 cup cold vodka, then cool to room temperature before pouring over the white layer.
- Refrigerate for at least 1 hour until fully set, then serve cold for clean, glossy red-white-blue layers.


