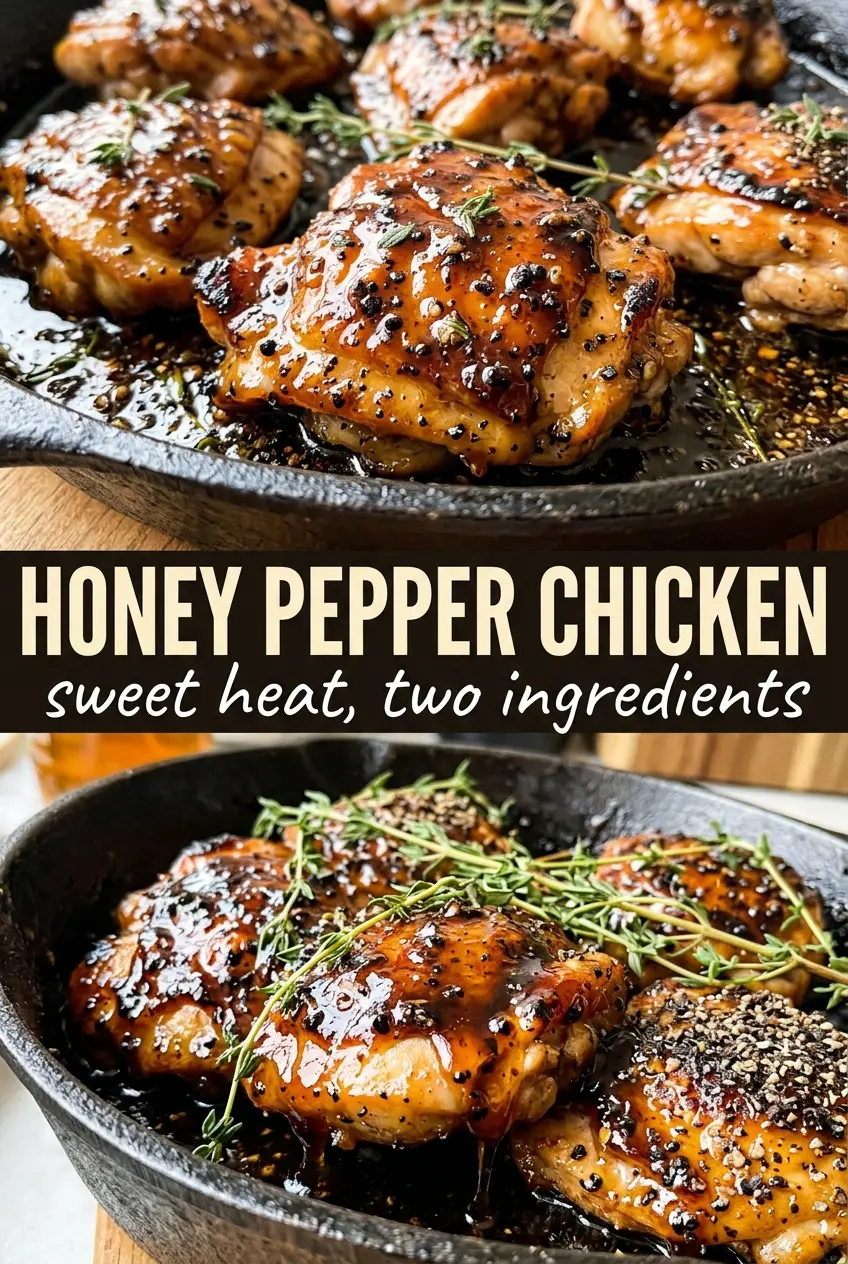
Glossy honey pepper chicken earns its place in the dinner rotation fast: crisp-edged chicken, a sticky amber glaze, and just enough cracked pepper to keep the sweetness from turning flat. The sauce clings to every slice instead of running off the plate, and when it hits the hot skillet it picks up those browned bits from the chicken for a deeper, restaurant-style finish.
The part that makes this version work is balance. Honey brings body, soy sauce adds salt and umami, apple cider vinegar keeps the glaze bright, and a small spoonful of cornstarch turns it from thin and shiny into something that actually coats the chicken. Pounding the breasts to even thickness matters too, because it keeps the outside from overcooking before the center is done.
Below you’ll find the exact point where the sauce thickens, the best way to keep the pepper from getting harsh, and a few smart swaps if you need to stretch this into a bigger dinner.
The sauce thickened up beautifully and coated the chicken instead of pooling at the bottom of the pan. I served it over rice, and the cracked pepper gave it that sweet-spicy bite I was hoping for.
Save this honey pepper chicken for the nights when you want a sticky glazed skillet dinner with bold peppery heat.
The Trick to Keeping Honey Pepper Chicken Glazed Instead of Gummy
The line between glossy and sticky-in-a-bad-way is thinner than people expect. If the chicken goes back into the pan before the sauce has thickened, the glaze stays loose and slides off. If the sauce cooks too long after the cornstarch goes in, it can turn tacky and heavy instead of silky.
The sweet spot is a gentle simmer after the slurry goes in, stirring just until the sauce turns shiny and lightly nappé, meaning it coats the back of a spoon without looking dull or pasty. The chicken should already be cooked through and resting off the heat when the sauce thickens, so it only needs a final toss to pick up that glaze.
- Chicken breasts — Pounding them to an even thickness is what keeps the cooking time predictable. Thick ends stay from drying out while thinner sections finish.
- Honey — This is the backbone of the glaze, not just the sweetener. Maple syrup works in a pinch, but it tastes looser and less sticky than honey.
- Soy sauce — It brings salt and depth, and it keeps the glaze from reading like candy. Use low-sodium if that’s what you keep around; just don’t skip it.
- Cracked black pepper — This is the ingredient that makes the sauce wake up. Freshly cracked pepper gives heat and aroma; pre-ground pepper tastes flatter and more dusty here.
- Cornstarch slurry — Mix it with cold water before it hits the pan. If you dump the starch in dry, you’ll get little gummy bits instead of a smooth glaze.
What Each Ingredient Is Actually Doing in This Recipe

- Primary ingredient (the star) — This carries the main flavor and defines the dish. Quality matters here.
- Base sauce or cooking medium (the carrier) — This brings all flavors together and keeps the dish from being dry.
- Aromatics (onion, garlic, ginger) — These add depth and complexity. They mellow and become sweet when cooked.
- Seasonings (salt, spices, herbs) — These define the personality and prevent the dish from tasting one-dimensional.
- Vegetables (nutrition and texture) — These add freshness and color. Cut to size so they cook evenly.
- Acid (lemon, vinegar, tomato, wine) — This brightens the dish and prevents it from tasting heavy or flat.
- Fat (oil, butter, cream) — This carries flavors and creates a satisfying mouthfeel. Don’t skip it.
- Proper technique (heat, time, temperature) — The right method turns good ingredients into great food. Follow the instructions carefully.
Building the Sear, Then Letting the Sauce Catch Up
Evening Out the Chicken
Pound the chicken breasts until they’re the same thickness from end to end, then season them generously with salt and cracked pepper. This keeps the sear even and prevents the thick center from lagging behind the edges. If one breast is much larger than the others, slice it in half horizontally before cooking so everything finishes at the same time.
Getting a Deep Golden Sear
Heat the olive oil in a skillet over medium-high heat until it shimmers, then lay the chicken in without crowding the pan. You want a steady sizzle, not a violent sputter. Let the first side develop a deep golden crust before turning; if it sticks hard, it probably needs another minute to release cleanly.
Turning Pan Bits Into Sauce
Once the chicken comes out, keep the same skillet. Those browned bits are what give the glaze its roasted edge. Whisk in the honey, soy sauce, vinegar, brown sugar, pepper, garlic powder, and cayenne, then let the mixture come up to a simmer before adding the cornstarch slurry.
Thickening and Coating
Stir the slurry in and keep the sauce moving as it simmers for about 2 minutes. It should go from loose and glossy to thick enough to coat the spoon and cling in ribbons. Return the chicken to the pan and turn each piece until every side is lacquered; if the sauce gets too thick, splash in a spoonful of water and stir it smooth again.
How to Adapt This Honey Pepper Chicken for Different Dinners
Gluten-Free Version
Swap the soy sauce for tamari or a certified gluten-free soy sauce. The glaze will taste almost the same, but the label matters because regular soy sauce usually contains wheat. Everything else in the recipe stays put.
Less Sweet, More Peppery
Reduce the brown sugar to 1 teaspoon and bump the cracked black pepper up to 1 1/2 teaspoons. You’ll get a sharper glaze with a little more bite and less of the candy-like finish, which is how I like it with mashed potatoes.
Chicken Thigh Swap
Boneless skinless thighs work well if you want a juicier result. They need a few extra minutes in the skillet, but they’re more forgiving if you cook past the exact second the breasts are done. Expect a richer bite and a slightly less tidy slice.
Storage and Reheating
- Refrigerator: Store leftovers in an airtight container for up to 4 days. The sauce will thicken as it chills, but it loosens again when warmed.
- Freezer: It freezes well for up to 2 months, though the glaze may look a little dull after thawing. Freeze in portions with extra sauce so the chicken stays coated when reheated.
- Reheating: Warm gently in a covered skillet over low heat with a splash of water. High heat dries out the chicken and can make the glaze seize up before it loosens.
Questions I Get Asked About This Recipe
Honey Pepper Chicken
Ingredients
Equipment
Method
- Pound the chicken breasts to an even thickness, then season generously with salt and cracked black pepper so the surface is well coated.
- Heat the olive oil in a skillet over medium-high heat, then sear the chicken for 5–6 minutes per side until golden and cooked through.
- Set the seared chicken aside while you make the honey pepper sauce in the same pan.
- Whisk honey, soy sauce, apple cider vinegar, brown sugar, cracked black pepper, garlic powder, and cayenne pepper until smooth.
- Bring the sauce to a simmer, then stir in the cornstarch slurry and cook for about 2 minutes until thickened and glossy with caramelized edges.
- Return the chicken to the pan and coat on all sides, simmering just until the glaze clings thickly to the breasts.
- Serve the honey pepper glazed chicken over mashed potatoes or rice with extra sauce drizzled on top for pooling glaze.


