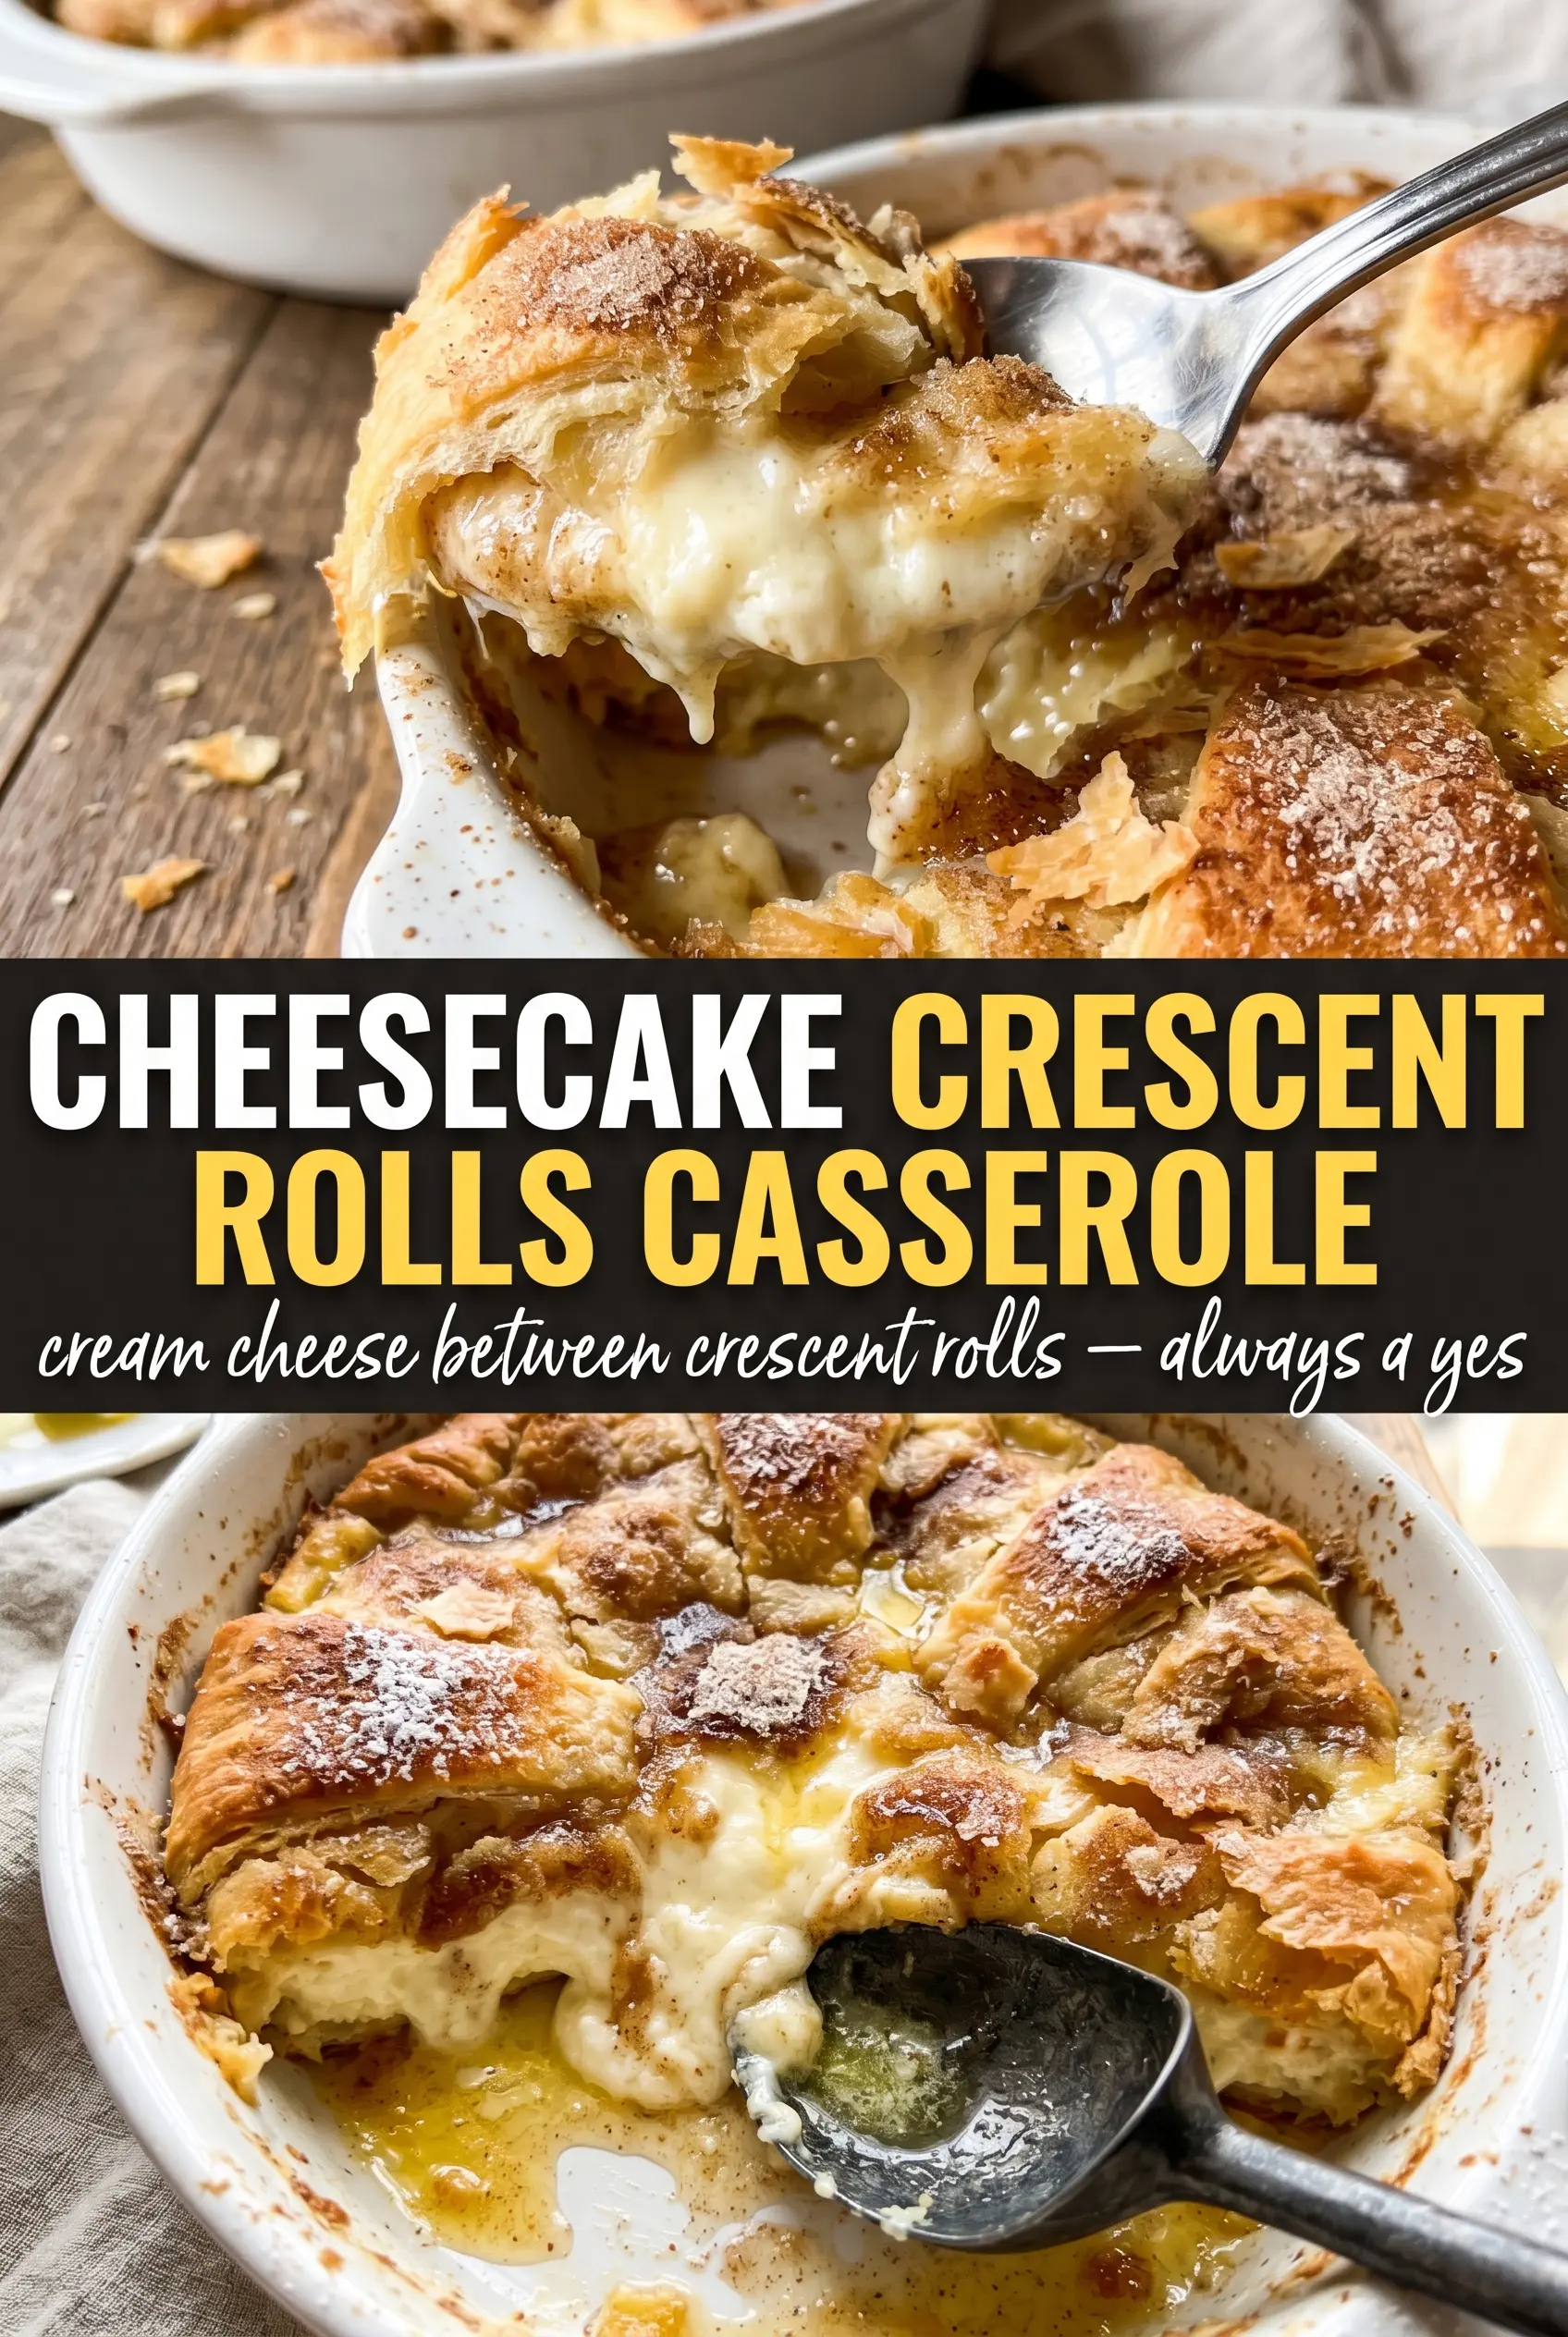
Golden crescent roll layers, a smooth cheesecake center, and a cinnamon-sugar crust give this casserole the kind of contrast that keeps people cutting “just one more square.” The bottom bakes up tender and lightly crisp at the edges, while the top turns deep golden where the butter and sugar settle into the pastry. It lands somewhere between breakfast bake and dessert bars, which is exactly why it disappears fast.
The part that makes this version work is the structure. Crescent dough is easy, but it needs the seams pressed together so the cream cheese filling doesn’t leak through and bake into gaps. The filling itself stays simple: softened cream cheese, sugar, and vanilla beaten until fully smooth. If the cream cheese is even a little cold, you’ll get tiny lumps that never fully disappear, so letting it soften first matters more than any extra mixing later.
Below you’ll find the timing that keeps the center set without drying out the pastry, plus the one cooling step that makes clean squares possible instead of a messy pan of filling and crumbs.
The filling stayed creamy and the crescent layers baked up crisp instead of soggy. I let it cool the full 15 minutes and got neat squares that held together perfectly.
Cheesecake Crescent Rolls Casserole with that buttery cinnamon-sugar top belongs in your breakfast rotation.
The Seam-Sealing Step That Keeps the Filling Inside
Crescent dough looks forgiving, but the seams are the difference between a clean layered casserole and a cream cheese layer that oozes into the pan. Press the perforations together firmly on both the bottom and top sheets before adding anything else. That gives the filling a real base to sit on and helps the top bake into one continuous lid instead of a patchwork of separated triangles.
The other place this recipe goes sideways is heat. If the oven runs too hot, the top browns before the center sets and the filling can puff, then sink. Bake until the top is deep golden and the middle looks set when the pan is nudged. A slight wobble is fine; a wet, sloshing center needs more time.
What Each Ingredient Is Actually Doing in This Dish

- Refrigerated crescent roll dough — This is the structure and the shortcut. It bakes into a tender, buttery crust with enough lift to feel pastry-like, but it only works if the seams are pressed closed. If you want to use puff pastry instead, the result will be flakier and less soft, with a more pronounced pastry crunch.
- Cream cheese — This is the whole point of the filling, and full-fat cream cheese gives the richest texture and the best set. Low-fat cream cheese can work, but it tends to bake up looser and a little grainier. Soften it fully before mixing so the filling turns smooth in one pass.
- Granulated sugar — Sugar sweetens the filling and helps it bake into a sliceable layer rather than a runny custard. The sugar on top also caramelizes with the butter and cinnamon, which is what gives the casserole its crackly crust.
- Vanilla extract — Vanilla rounds out the tang of the cream cheese and keeps the filling from tasting flat. Use pure vanilla if you have it; the flavor shows up clearly because the ingredient list is short.
- Butter, cinnamon, and the top sugar — The butter carries the cinnamon sugar across the entire top surface, so every bite gets that warm crust. If the butter is poured in patches, you get dry spots that bake pale and sandy. Melt it fully and spread it evenly before adding the cinnamon sugar.
Getting the Layers to Bake Up Soft in the Middle and Crisp on Top
Building the Bottom Crust
Press the first sheet of crescent dough into a greased 9×13 pan and seal every seam you can see. The goal is a solid sheet, not a loose nest of triangles, because any open seam gives the filling a place to sink into. It doesn’t need to look perfect, but it does need to be continuous.
Mixing the Cheesecake Filling
Beat the cream cheese, one cup of sugar, and vanilla until the mixture is completely smooth and glossy. Scrape the bowl and beat again so there aren’t streaks of plain cream cheese hiding at the bottom. If the filling looks grainy before it goes in the pan, those lumps will bake in; they won’t melt out later.
Layering and Topping
Spread the filling all the way to the edges, then lay the second sheet of dough on top and seal the seams again. Pour the melted butter evenly over the top so the cinnamon sugar has something to cling to across the whole surface. If the butter pools in one corner, that part will bake darker and the rest will stay dry.
Baking Until Set
Bake at 350°F until the top is a deep golden color and the center no longer looks wet when you gently shake the pan. This usually takes 28 to 32 minutes, but ovens vary, and the visual cue matters more than the clock. Let it cool for 15 minutes before cutting; that short rest lets the filling settle so the squares hold their shape.
Three Ways to Adjust This Casserole Without Losing What Makes It Work
Make it a little less sweet
Cut the sugar in the filling to 3/4 cup and keep the topping as written. That keeps the cheesecake layer tangy and balanced while preserving the caramelized top that gives the casserole its appeal.
Gluten-free version
Use a gluten-free crescent-style dough if you can find one that rolls and seals well. The filling doesn’t need adjustment, but the bake time may shift a few minutes because gluten-free dough often browns a little differently.
Add a fruit layer
Spread a thin layer of well-drained cherry or blueberry pie filling over the cream cheese before adding the top dough. Too much fruit will make the center slippery, so keep it thin. The result is closer to a bakery-style cheesecake bar with a fruit swirl.
Storage and Reheating
- Refrigerator: Store covered for up to 4 days. The top softens a bit after the first day, but the filling stays creamy.
- Freezer: It freezes fairly well in squares. Wrap tightly and freeze for up to 2 months, then thaw in the refrigerator overnight.
- Reheating: Warm individual squares in a 300°F oven for 8 to 10 minutes. The microwave softens the pastry too much and makes the topping sticky, so use the oven when you want the best texture.
Answers to the Questions Worth Asking
Cheesecake Crescent Rolls Casserole
Ingredients
Equipment
Method
- Preheat the oven to 350°F and grease a 9x13 baking dish.
- Unroll one can of refrigerated crescent roll dough and press it into the bottom of the prepared dish, pressing seams together to seal.
- Beat cream cheese, 1 cup granulated sugar, and vanilla extract until completely smooth, then spread evenly over the dough layer.
- Unroll the second can of refrigerated crescent roll dough and lay it over the cream cheese filling, pressing seams together.
- Pour melted butter evenly over the top.
- Mix 1/2 cup granulated sugar with cinnamon and sprinkle generously over the butter, aiming for an even, thick crust.
- Bake for 28-32 minutes at 350°F until the top is deep golden and the filling is set, with edges visibly firming up.
- Cool for 15 minutes before cutting into squares so the filling sets cleanly.