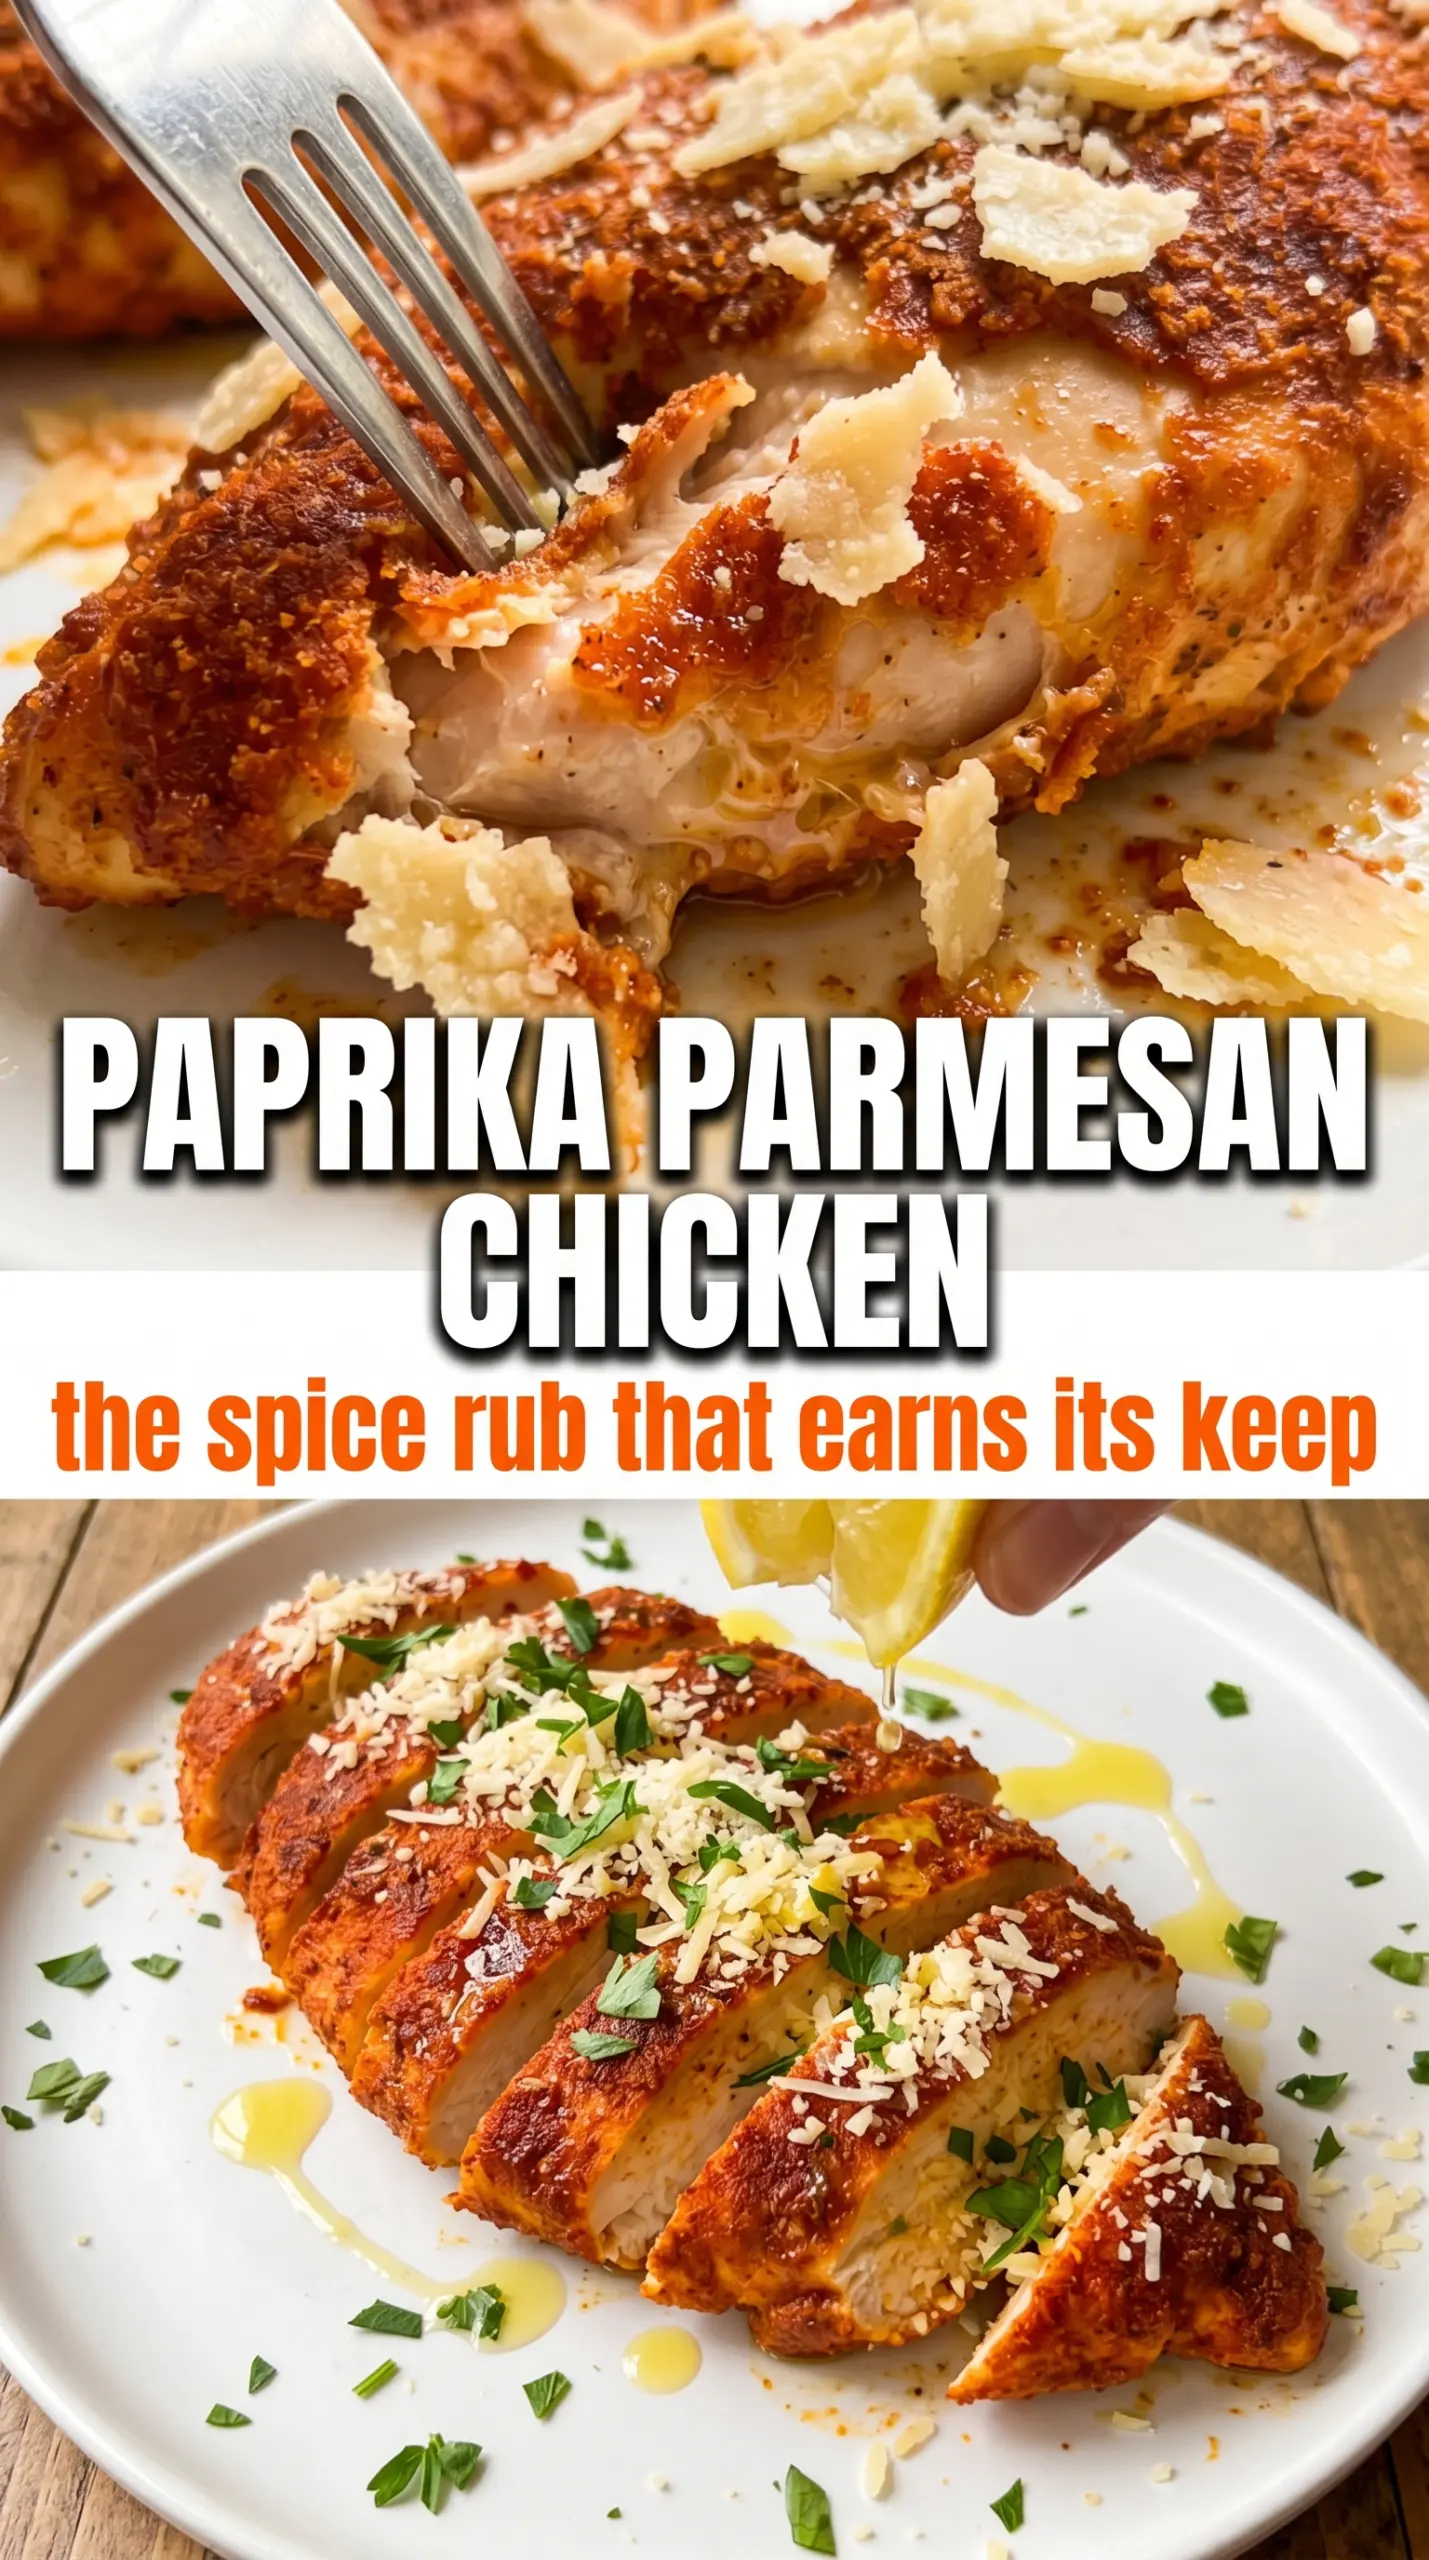
Golden, crackled, and full of smoky paprika aroma, this baked paprika Parmesan chicken lands with the kind of crust that makes plain chicken breasts feel worth looking forward to. The Parmesan browns into a salty, nutty shell while the panko keeps the coating light instead of heavy, and the paprika mixture gives the whole dish that deep orange-red color that looks as good as it smells.
What makes this version work is the order of the coating. The paprika and oil go on first, so the spices bloom and cling to the chicken before the Parmesan-panko layer is pressed on top. That gives you better color, better coverage, and a crust that actually stays put in the oven instead of sliding off halfway through baking. A hot oven does the rest, turning the top into a crisp, caramelized cap while the chicken stays juicy underneath.
Below, I’ll show you the part that matters most: how to get the coating to brown without drying out the chicken. I’ve also included a few smart swaps and storage notes, because this is the kind of dinner that earns a spot in the regular rotation.
The paprika crust turned this into a whole different chicken dinner. Mine baked up with a crisp top that stayed on the chicken, and the Parmesan got those browned edges we all fought over.
Save this baked paprika Parmesan chicken for the nights when you want a crisp, smoky crust without frying.
The Part That Keeps the Crust From Slipping Off
Most baked chicken coatings fail for one of two reasons: the surface is too wet, or the coating gets packed on without anything underneath to help it stick. Here, the seasoned oil acts like the glue and the flavor base at the same time. That means the chicken gets seasoned all the way through the coating, not just on the surface.
The other detail that matters is pressure. Press the Parmesan-panko mixture onto the top of the chicken with your hands so it adheres instead of sitting loosely. If you scatter it on, you’ll lose a lot of it to the pan, and the crust won’t brown in one piece. A hot oven at 425°F is what helps the cheese crisp before the chicken overcooks.
- Smoked paprika — This is the ingredient that gives the dish its color and that deep, almost grilled aroma. Sweet paprika helps soften the edge, but smoked paprika is the one you want for the strongest effect.
- Freshly grated Parmesan — Pre-grated cheese won’t melt and brown the same way, and it can taste dusty. Freshly grated Parmesan melts into the crumb mixture and turns into those crisp, salty edges.
- Panko breadcrumbs — Panko keeps the crust lighter and crisper than fine breadcrumbs. If you use regular breadcrumbs, the coating will be denser and a little less shattery on top.
- Chicken breasts — If yours are very thick, pound them to even thickness before coating. That helps them cook at the same pace, so the crust finishes at the same time the center reaches 165°F.
What Each Ingredient Is Actually Doing in This Chicken
- Chicken breasts (the protein) — Let them sit at room temperature 15 minutes before cooking. This helps them cook evenly without drying.
- Oil or butter (the cooking medium) — This prevents the chicken from drying out and carries herb and spice flavors throughout.
- Garlic (the aromatic foundation) — Fresh minced garlic mellows and becomes sweet when cooked. Don’t brown it or it turns bitter.
- Cream or sauce (the moisture keeper) — This prevents the chicken from drying out during cooking. Balance richness with acid.
- Lemon, wine, or acid (the brightness) — This prevents heavy cream sauces from tasting flat. Add at the end to preserve freshness.
- Fresh herbs (basil, thyme, parsley) — Add some during cooking and some after so you get both cooked and fresh flavors.
- Cheese or toppings (optional richness) — These add creaminess and depth. Don’t overdo it or the dish becomes heavy.
- Proper oven temperature (375-400°F) or pan heat — This cooks chicken through without drying the edges. Use a thermometer for 165°F.
Building the Paprika Oil and the Parmesan Crust
Mixing the seasoned oil
Stir the olive oil with both paprikas, garlic powder, onion powder, salt, and pepper until it looks like a smooth brick-red paste. The mixture should be loose enough to brush, but thick enough to leave a visible stain on the chicken. If it pools and runs off, add a touch more paprika; if it feels dry, a little more oil brings it back together. This step matters because dry spices sprinkled over chicken don’t cling as well and don’t color evenly.
Coating the chicken
Brush the paprika oil over both sides of each chicken breast, then lay them on the parchment-lined sheet. Use enough to cover every exposed surface, especially any thinner edges that tend to dry out first. Once the chicken is coated, press the Parmesan-panko mixture onto the top side in a firm layer. Don’t bury the chicken in crumbs; a compact, even cap browns better than a thick pile that steams.
Baking to a crisp finish
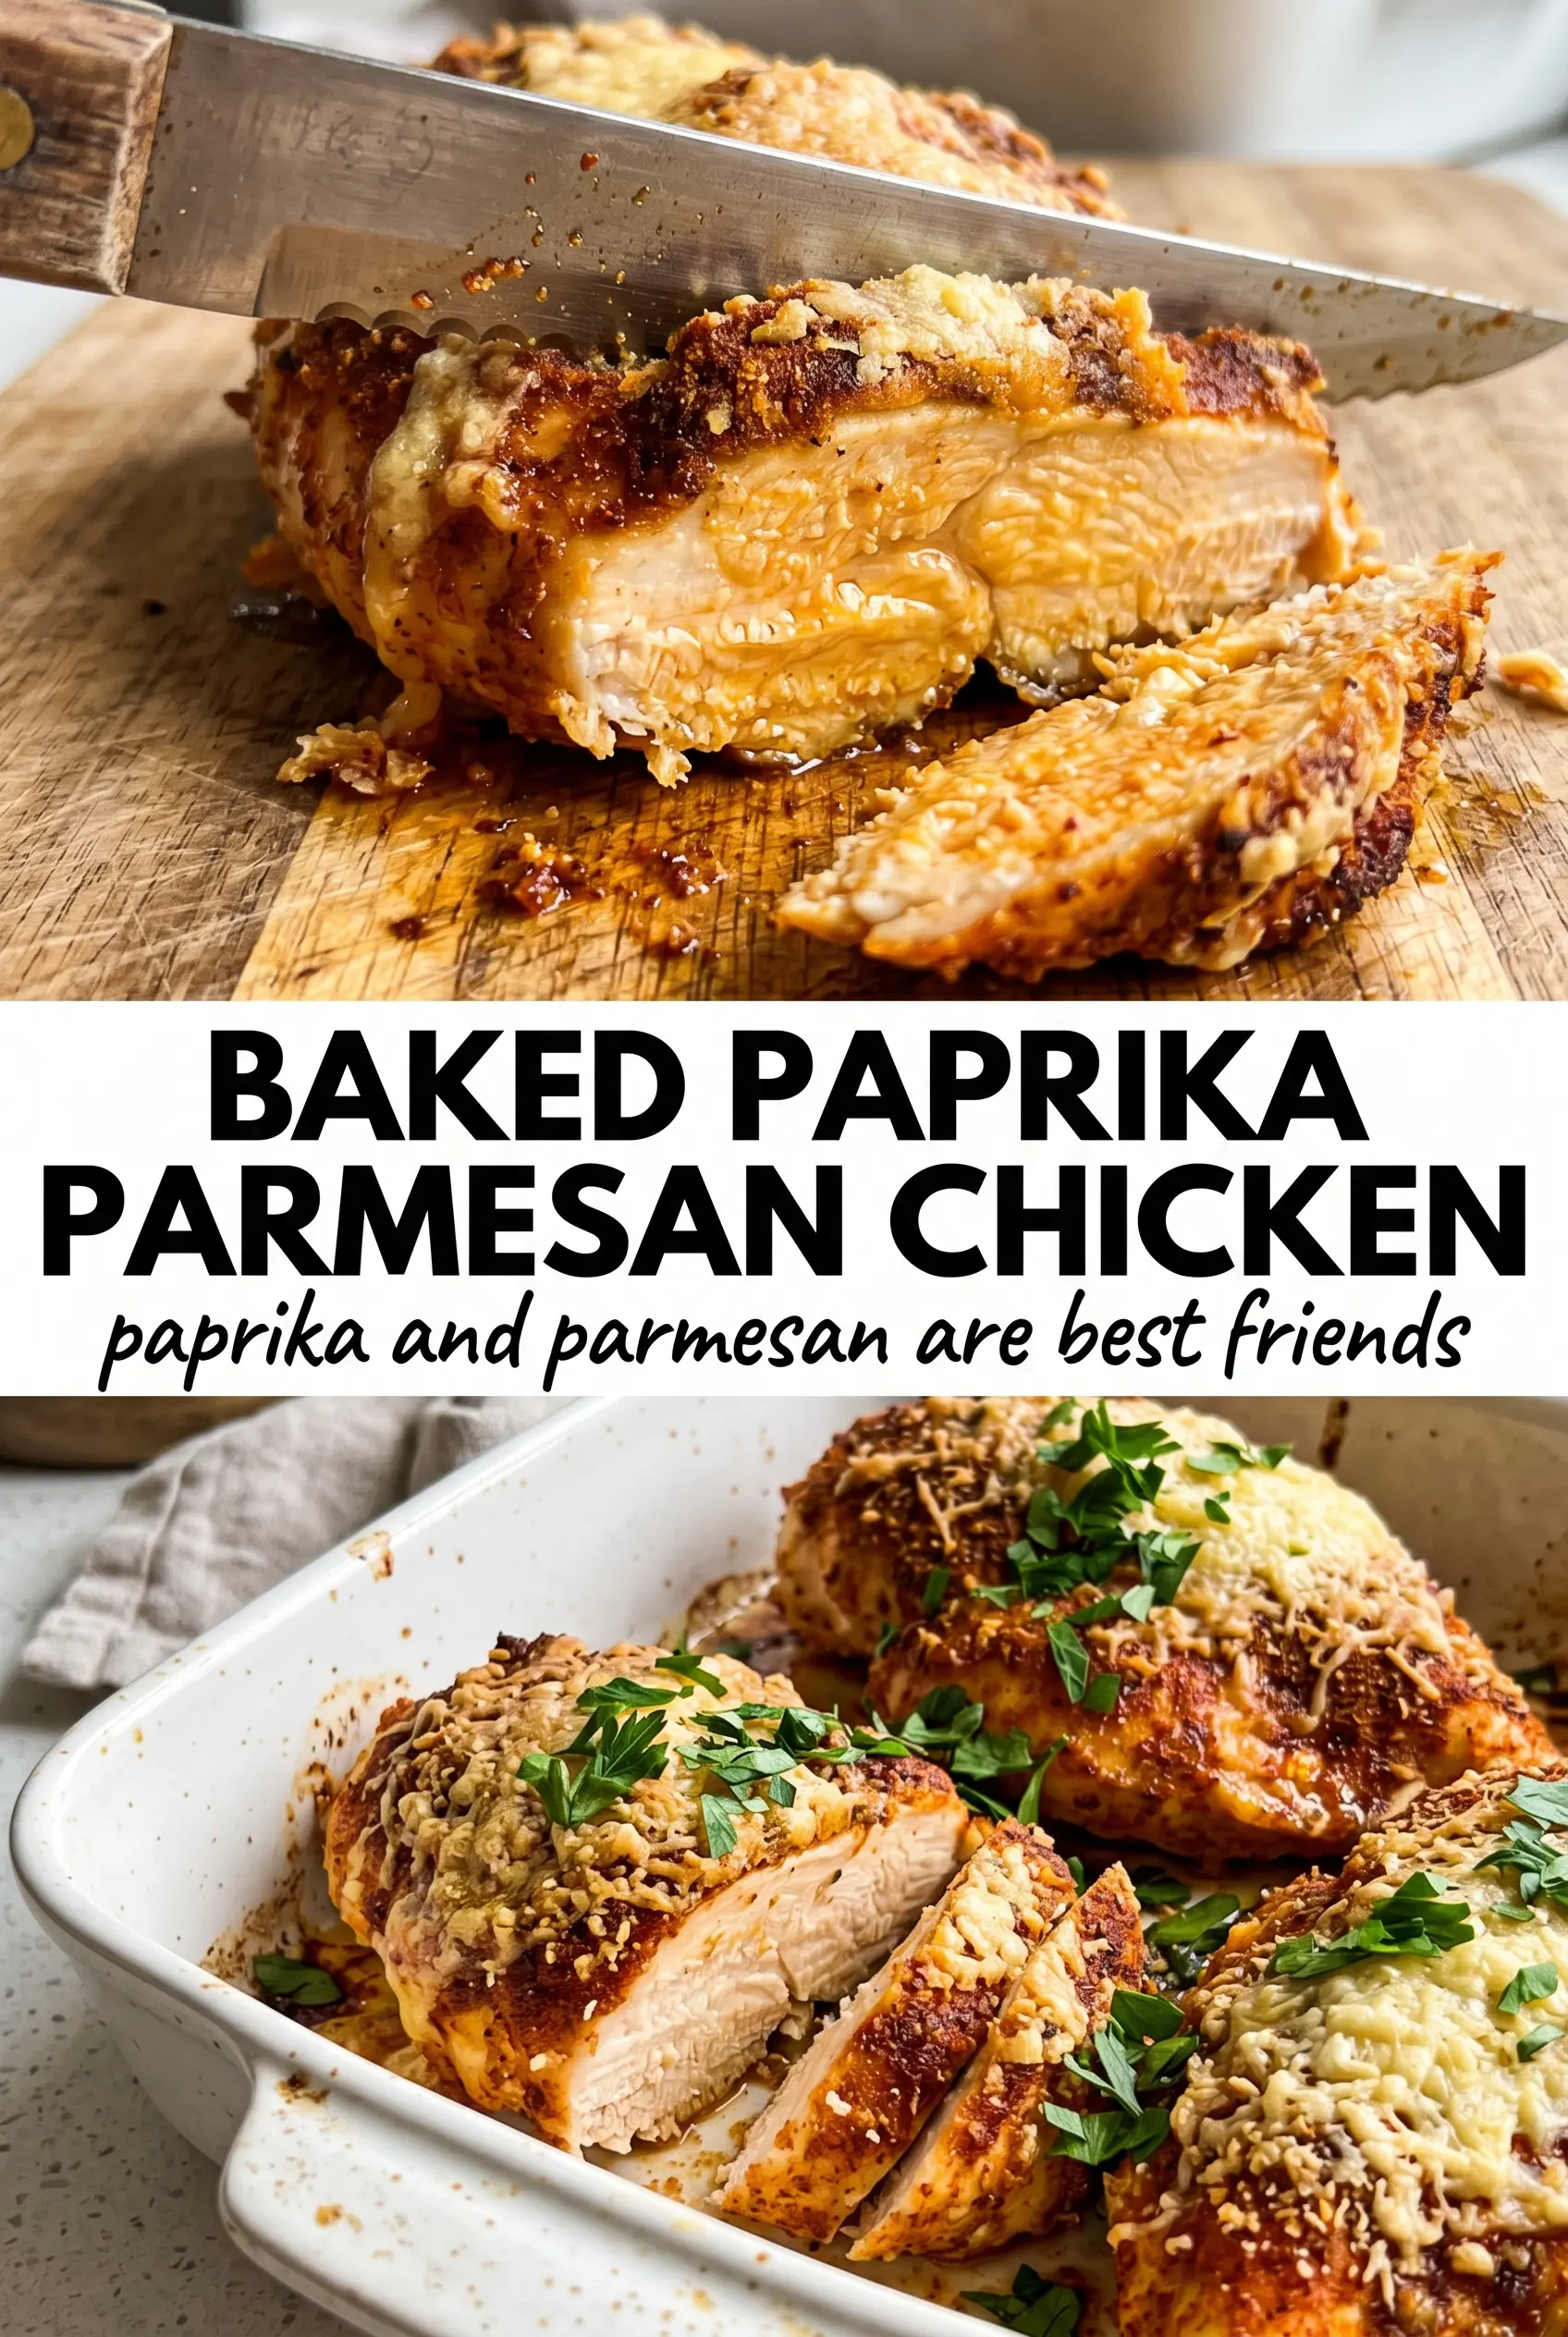
Bake at 425°F for 22 to 25 minutes, depending on the thickness of the breasts. The crust should look deeply golden-red and the cheese should be browned at the edges, not pale and powdery. The safest sign is the temperature in the thickest part of the chicken, which should reach 165°F. If the top is browned before the chicken is done, leave it alone; opening the oven too often slows the heat and dries the coating.
Resting before serving
Let the chicken sit for a few minutes before slicing. That short rest keeps the juices from running out and gives the crust a chance to settle, so it doesn’t crack apart when you cut into it. Finish with parsley and lemon wedges. The lemon cuts through the richness of the Parmesan and wakes up the paprika without making the dish taste sharp.
Three Smart Ways to Adjust the Crust
Make it gluten-free with crushed nuts or GF crumbs
Swap the panko for certified gluten-free breadcrumbs or very finely crushed almonds. Gluten-free crumbs work best if they’re light and dry, while nuts add a richer, toastier crust that browns fast and tastes a little more substantial.
Make it dairy-free without losing the seasoning
Use a dairy-free Parmesan-style topping or replace the cheese with a mix of nutritional yeast and extra panko. You won’t get the same salty melt, but you will keep the savory coating and crisp texture. Add a little extra salt to the oil mixture because Parmesan normally carries some of that load.
Use chicken thighs for a juicier version
Boneless, skinless thighs work well if you want more forgiveness and a richer bite. They may need a few extra minutes in the oven, and the crust won’t sit as flat as it does on breasts, but the flavor is excellent and the meat stays tender.
Add a little heat without changing the method
A pinch of cayenne or crushed red pepper in the oil mixture gives the crust more bite without affecting the texture. Keep it light, because the smoked paprika already brings enough intensity on its own, and too much heat can bury the cheese flavor.
Storage and Reheating
- Refrigerator: Store leftovers in an airtight container for up to 3 days. The crust softens a bit, but the flavor stays strong.
- Freezer: It freezes well, though the topping loses some crunch. Wrap pieces tightly and freeze for up to 2 months.
- Reheating: Reheat on a baking sheet in a 375°F oven until hot through. The microwave will steam the crust and make it soggy, which is the one thing you want to avoid here.
Questions I Get Asked About This Recipe
Baked Paprika Parmesan Chicken
Ingredients
Equipment
Method
- Preheat oven to 425°F and line a baking sheet with parchment to prevent sticking. Clear a spot for the chicken so you can coat quickly after mixing.
- Mix olive oil with smoked paprika, sweet paprika, garlic powder, onion powder, salt, and pepper until you have a cohesive, bright-orange-red seasoning oil. Taste and adjust so the seasoning is bold.
- Brush the paprika oil generously over both sides of each chicken breast until the surface looks glossy. Make sure the edges are coated so they brown.
- Combine Parmesan and panko, then press the mixture firmly onto the oiled chicken tops so it adheres in an even layer. Press harder on any dry spots.
- Bake at 425°F for 22-25 minutes until the crust is golden-red and crackled at the edges. The visual cue is a caramelized top with set crumbs that look crisp.
- Check doneness by confirming the internal temperature reaches 165°F at the thickest part. If it’s under, bake 2-3 minutes more and recheck.
- Garnish with fresh parsley and serve with lemon wedges right away. The lemon adds brightness against the smoked paprika and caramelized Parmesan.