Golden biscuit bombs with a molten buffalo chicken center are the kind of appetizer that disappears before the pan even cools. The bacon wraps around the outside and crisps up while the biscuit turns deeply browned, so every bite gives you crunch first, then spicy chicken, then that stretchy mozzarella middle.
The trick is keeping the filling compact and the biscuit sealed tight. If the dough is stretched too thin or the seams aren’t pinched well, the cheese will escape before the bacon has time to crisp. A thinner strip of bacon helps here, too, because it tightens around the biscuit without fighting the bake.
Below, I’ve included the one part that matters most when you’re shaping these bombs, plus a few smart swaps if you need to use different cheese or want to adjust the heat level. It’s the kind of recipe that rewards a little attention up front and gives you a tray of snackable, grab-and-go appetizers in return.
The biscuit stayed crisp on the outside and the mozzarella stayed inside instead of leaking everywhere. I used a little less buffalo sauce than I thought I needed and the filling was perfect, not soggy at all.
Like these buffalo chicken bacon mozzarella bombs? Save them to Pinterest for your next game day spread or late-night appetizer craving.
The Seams Have to Hold Before the Bacon Goes On
With stuffed biscuit appetizers, the filling usually fails before the oven does. The biscuit dough softens fast once it’s flattened, and if you overfill each round, the seams open and the cheese leaks out before the bacon has a chance to crisp. Pinching the dough closed at the top, then turning the seam side down on the tray, gives the biscuit a better shot at staying sealed.
The bacon wrap matters for more than flavor. It acts like a belt around the biscuit, helping hold the shape while the dough rises. Thin-cut bacon is the right call here because thick slices stay flabby longer and can tug the biscuit open instead of tightening as they cook.
- Buffalo sauce — Use a sauce you already like the flavor of, since it doesn’t mellow much during baking. If yours is very sharp, a spoonful of melted butter stirred into the chicken softens the heat without losing the buffalo character.
- Mozzarella — Cut it into firm cubes, not shredded, so it melts into a true center instead of disappearing into the filling. Low-moisture mozzarella works best because fresh mozzarella can leak extra liquid.
- Thin-cut bacon — This is one ingredient where the right style matters. Thick-cut bacon often needs longer than the biscuit does, which means the outside overcooks before the center is ready.
- Biscuit dough — Canned biscuit dough gives you the structure and the lift that make these fast. Flatten it evenly so the edges aren’t paper-thin, or they’ll split when you pull them over the filling.
- Garlic butter — Brushing it on before baking gives the outside a more savory finish and helps the top brown. Melted butter also encourages the bacon to take on color instead of going pale and chewy.
What Each Ingredient Is Actually Doing in This Chicken

- Chicken breasts (the protein) — Let them sit at room temperature 15 minutes before cooking. This helps them cook evenly without drying.
- Oil or butter (the cooking medium) — This prevents the chicken from drying out and carries herb and spice flavors throughout.
- Garlic (the aromatic foundation) — Fresh minced garlic mellows and becomes sweet when cooked. Don’t brown it or it turns bitter.
- Cream or sauce (the moisture keeper) — This prevents the chicken from drying out during cooking. Balance richness with acid.
- Lemon, wine, or acid (the brightness) — This prevents heavy cream sauces from tasting flat. Add at the end to preserve freshness.
- Fresh herbs (basil, thyme, parsley) — Add some during cooking and some after so you get both cooked and fresh flavors.
- Cheese or toppings (optional richness) — These add creaminess and depth. Don’t overdo it or the dish becomes heavy.
- Proper oven temperature (375-400°F) or pan heat — This cooks chicken through without drying the edges. Use a thermometer for 165°F.
Building the Bombs Without Losing the Filling
Coating the Chicken
Mix the shredded chicken with the buffalo sauce until every strand is lightly coated, not swimming. Too much sauce makes the center wet, and wet filling is what breaks a biscuit open from the inside. The chicken should clump a little when you scoop it, which tells you it will stay put during wrapping.
Shaping the Biscuit
Flatten each biscuit into an even round about 4 inches across, pressing the center a little thinner than the edges. That gives you extra dough where the seams need to meet. Place the chicken and one mozzarella cube in the center, then gather the edges up and pinch them firmly at the top until the seam disappears.
Wrapping and Baking
Wrap each sealed ball with a strip of bacon so it overlaps slightly, then secure it with a toothpick if needed. Set them seam-side down on the foil-lined pan so gravity works in your favor. Bake until the bacon looks crisp at the edges and the biscuit is a deep golden color; if you pull them too early, the underside stays doughy while the cheese is still trapped inside.
Finishing for the Best Bite
Let the bombs rest for a few minutes before serving. That short pause gives the molten cheese a chance to settle from lava-hot to eatable. Pull out the toothpicks, then serve them with ranch or blue cheese dressing while the bacon is still crisp and the centers are still gooey.
How to Adapt These for Different Heat Levels and Diets
Milder Buffalo Chicken Bombs
Use a mild buffalo sauce or cut the sauce with a little melted butter before tossing it with the chicken. You’ll keep the tangy flavor, but the heat lands softer, which helps if you’re serving a mixed crowd.
Extra Cheesy Center
Swap the mozzarella cube for a mozzarella and cream cheese blend if you want a richer, more molten middle. The filling will be softer, so chill the shaped bombs for 10 minutes before baking to help them hold together.
Gluten-Free Version
Use gluten-free biscuit dough in place of the canned biscuits and check that your buffalo sauce is gluten-free. The texture won’t puff quite the same way, but the bacon still crisps and the center stays just as gooey.
Make-Ahead Game Day Prep
Assemble the bombs up to a day ahead, cover them, and chill until baking time. They bake best straight from the fridge, and the chilled dough is actually easier to seal cleanly than warm dough.
Storage and Reheating
- Refrigerator: Store leftovers in an airtight container for up to 3 days. The biscuit softens a bit, but the bacon and filling still hold up well.
- Freezer: These freeze well after baking. Cool completely, wrap individually, and freeze for up to 2 months; the bacon won’t stay as crisp, but the texture is still good.
- Reheating: Reheat in a 350°F oven or air fryer until hot and the outside crisp again. Skip the microwave if you can, since it turns the biscuit rubbery and makes the bacon go limp.
Answers to the Questions Worth Asking
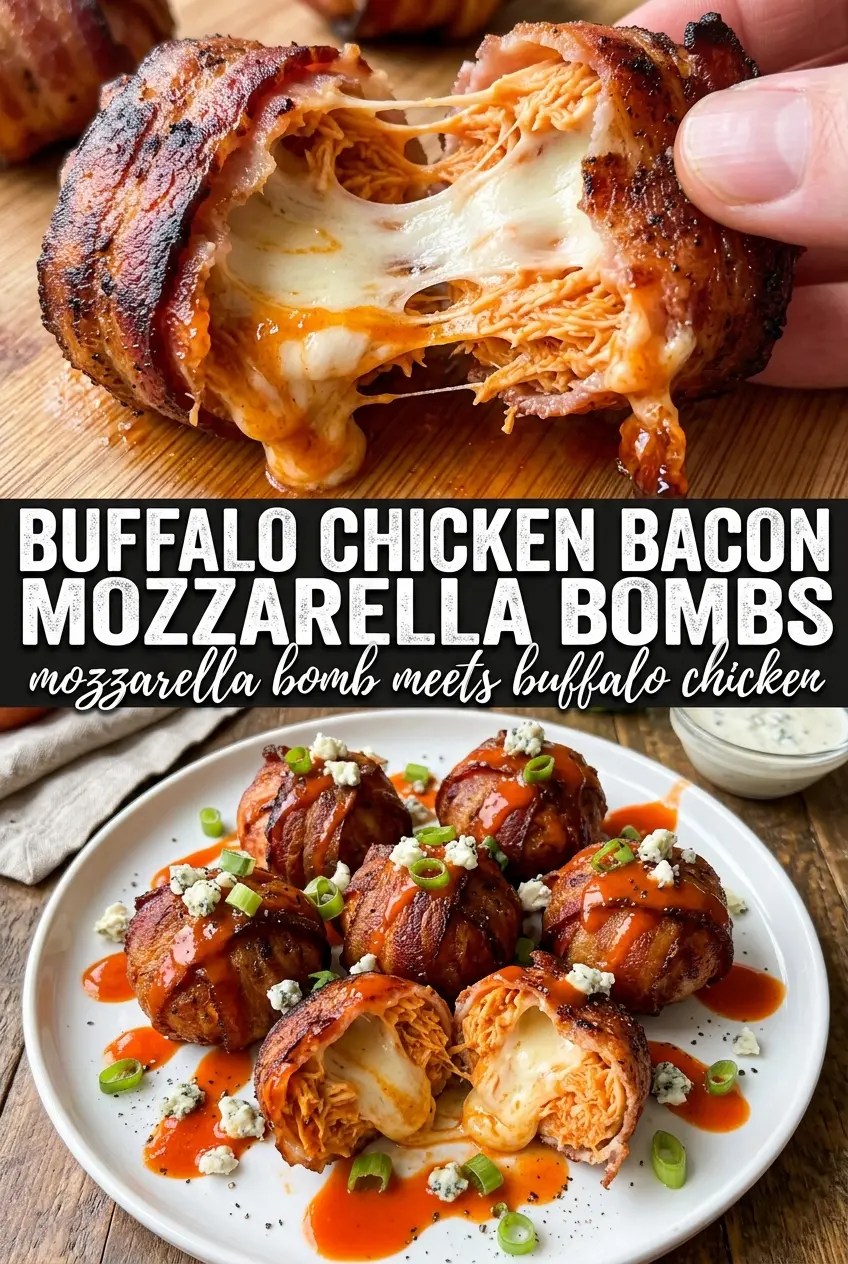
Buffalo Chicken Bacon Mozzarella Bombs
Ingredients
Equipment
Method
- Preheat the oven to 375°F and line a baking sheet with foil for easy release and cleanup.
- Mix the shredded cooked chicken with the buffalo hot sauce until the chicken is evenly coated.
- Flatten each biscuit into a 4-inch circle.
- Place a scoop of buffalo chicken and one mozzarella cube in the center of each biscuit.
- Pull the biscuit edges up and over the filling, then pinch tightly to seal.
- Wrap each sealed ball with a strip of bacon and secure it with a toothpick so the wrap stays in place while baking.
- Mix melted butter with garlic powder, then brush the bombs with the garlic butter.
- Bake at 375°F for 22–25 minutes until the bacon is crispy and the biscuit is golden.
- Serve hot with ranch or blue cheese dressing for dipping.