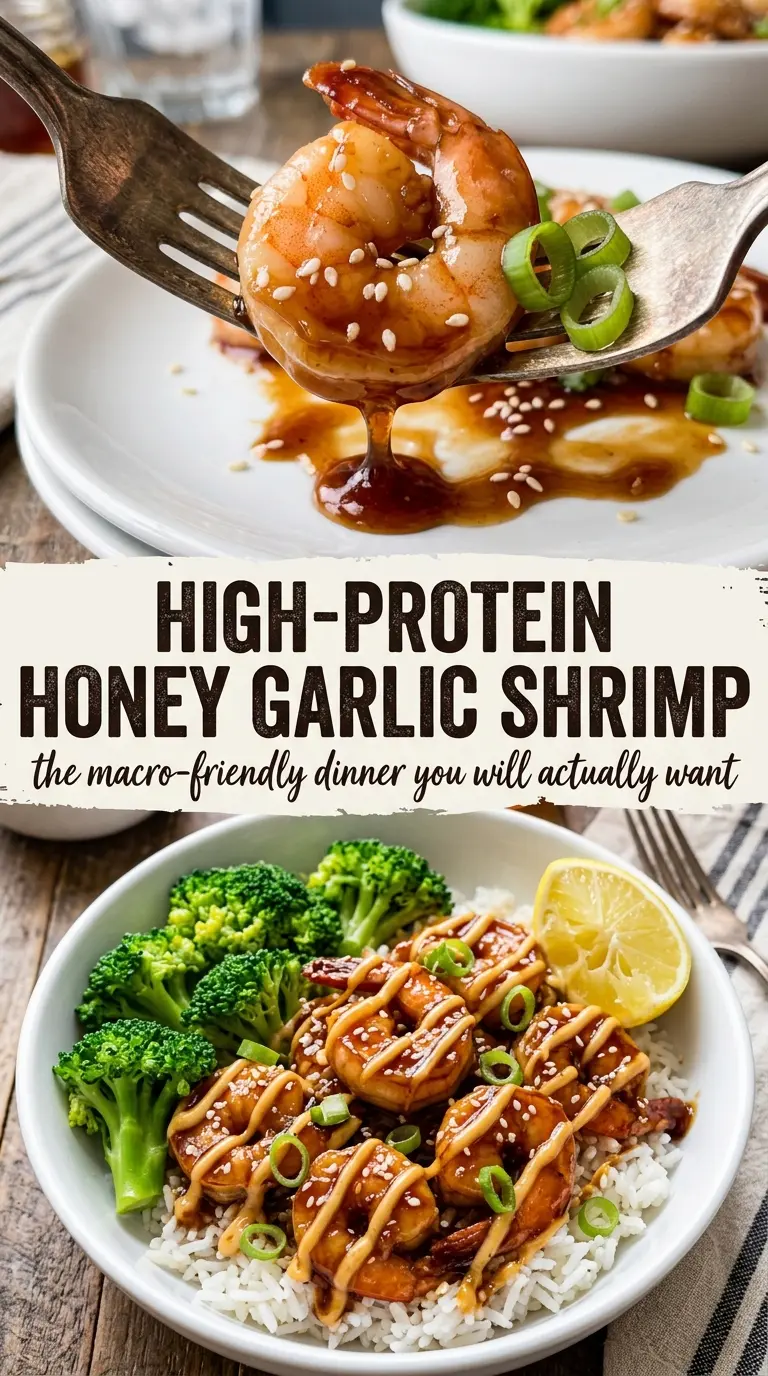
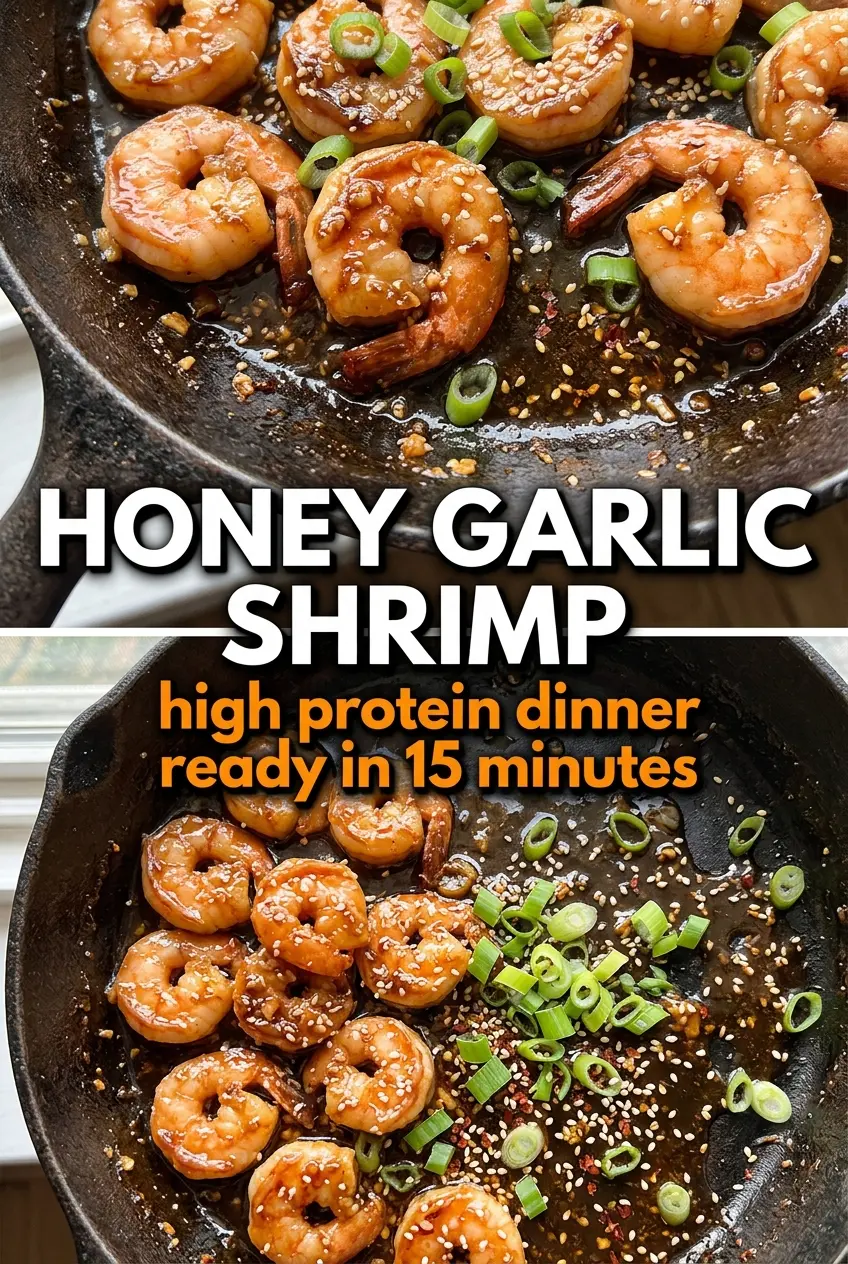
Plump shrimp coated in a sticky honey garlic glaze hit that sweet spot between fast and satisfying. The sauce clings to every curve, the edges caramelize just enough in the skillet, and the whole dish lands on the table looking like you spent far longer than 20 minutes on it. Served over rice or piled onto broccoli, it’s the kind of dinner that disappears before the pan has a chance to cool.
What makes this version work is the balance: enough honey to glaze, enough soy sauce to keep it savory, and just enough lemon juice to keep the sweetness from turning flat. The shrimp cook first and come out of the pan before the sauce goes in, which keeps them tender instead of rubbery. Then the garlic gets a short head start before the liquids hit the pan, so it perfumes the sauce without burning.
Below, I’ve included the small details that matter here — how dry the shrimp should be before they hit the skillet, when the sauce is thick enough, and a few easy swaps if you want to adjust the heat or serve it a different way.
The sauce thickened up fast and coated the shrimp instead of pooling at the bottom. I served it over rice, and even my picky eater asked for seconds.
Save this high-protein honey garlic shrimp for a fast skillet dinner with sticky glaze and barely any cleanup.
The Trick to Keeping Shrimp Tender Instead of Rubbery
Shrimp go from perfectly cooked to tough in a blink, which is why this recipe uses a quick sear and a separate sauce finish. The shrimp should hit the pan dry and in a single layer so they can brown a little before the glaze goes in. If there’s water clinging to the surface, they steam, the pan cools down, and you lose both color and texture.
The other thing that matters is the order. The shrimp cook first, then come out while the sauce reduces on its own. If you leave them in during the simmer, especially with honey in the pan, they keep cooking while the glaze thickens and the texture goes chalky. Pull them as soon as they turn pink and opaque, then toss them back in at the end.
What Each Ingredient Is Actually Doing in the Pan
- Shrimp — Large shrimp hold up best here because they stay juicy through a fast cook. Smaller shrimp can work, but they overcook even faster, so shorten the sear and add them back to the sauce only long enough to coat.
- Honey — This is the glaze builder. It gives the sauce shine and that sticky finish, but it also burns if the heat is too high, so the simmer needs to stay controlled.
- Low-sodium soy sauce — This brings salt and depth without pushing the dish into overly salty territory. Regular soy sauce works too, but cut back slightly if yours runs strong.
- Lemon juice — A small amount keeps the sauce from tasting heavy. Fresh lemon is worth using here because bottled juice can taste flat against the honey.
- Garlic — Fresh minced garlic gives the sauce its backbone. It only needs about 30 seconds in the pan before the liquids go in, or it can turn bitter.
- Red pepper flakes — These add warmth, not full heat. If you want a gentler sauce, reduce them; if you want a sharper finish, add a pinch more at the end.
Building the Glaze Without Burning the Garlic
Dry the Shrimp First
Pat the shrimp dry before anything else. This is the difference between a quick sear and a watery skillet. Season lightly with salt and pepper, then get them into the hot oil while the pan is still shimmering. If the shrimp sit around after drying, moisture starts to come back to the surface, so don’t delay once the pan is ready.
Sear, Then Get Them Out
Cook the shrimp in a single layer for 1 to 2 minutes per side, just until they’re pink and opaque. The surface should pick up a little color, but you’re not chasing a deep crust here. As soon as they curl into a loose C shape and lose their translucent centers, move them to a plate. If they form a tight O, they’ve gone too far.
Cook the Garlic Briefly
Add the minced garlic to the same pan and stir it for about 30 seconds. The residual oil and shrimp drippings carry the flavor, but garlic burns fast once the pan is hot and dry. The moment you smell it bloom and turn fragrant, add the honey, soy sauce, lemon juice, and red pepper flakes. Waiting longer than this is how you get bitter edges in the glaze.
Reduce Until It Clings
Let the sauce simmer for 1 to 2 minutes until it looks glossy and slightly thicker at the spoon. It should coat the back of a spoon and leave a trail when you drag a spatula through the pan. If it turns too thick, splash in a teaspoon of water to loosen it. Then return the shrimp and toss just until every piece is coated and heated through.
How to Adapt This Honey Garlic Shrimp for Different Nights
Serve It Over Broccoli for a Lower-Carb Dinner
Skip the rice and spoon the shrimp over steamed broccoli or cauliflower rice. You still get plenty of sauce, but the plate feels lighter and the glaze stands out more because there’s less starch soaking it up.
Make It Gluten-Free with One Simple Swap
Use tamari or a certified gluten-free soy sauce instead of standard soy sauce. The sauce keeps the same balance of salty and sweet, and you won’t lose the glossy finish that makes the shrimp clingy and coated.
Dial the Heat Up or Down
The red pepper flakes are easy to adjust. Leave them out for a mild glaze, or add another pinch with the garlic if you want the sweetness to land with a little more edge.
Storage and Reheating
- Refrigerator: Store leftovers in an airtight container for up to 2 days. The shrimp will firm up a little, and the sauce will thicken in the fridge.
- Freezer: I don’t recommend freezing this. Shrimp turn mealy after thawing, and the glaze loses its fresh shine.
- Reheating: Warm gently in a skillet over low heat with a teaspoon of water to loosen the sauce. High heat is the mistake here — it tightens the shrimp and can scorch the honey.
Questions I Get Asked About This Recipe
High-Protein Honey Garlic Shrimp
Ingredients
Equipment
Method
- Pat the shrimp dry with paper towels and season lightly with salt and black pepper. The shrimp should look less wet so they sear instead of steam.
- Heat olive oil in a large skillet over medium-high heat until shimmering. You should see quick ripples in the oil when you tilt the pan.
- Add the shrimp in a single layer and cook for 1–2 minutes per side until pink and opaque, then remove and set aside. Keep them spaced so they caramelize at the edges.
- In the same pan, add minced garlic and cook for 30 seconds. Stir until fragrant and just starting to turn lightly golden.
- Add honey, low-sodium soy sauce, fresh lemon juice, and red pepper flakes and stir. Scrape up any browned bits to build flavor in the amber sauce.
- Simmer the sauce for 1–2 minutes until slightly thickened. It should look glossy and clingy enough to coat the back of a spoon.
- Return the shrimp to the pan and toss to coat. The glaze should coat the shrimp and pool slightly around them.
- Serve immediately over cooked rice (or steamed broccoli), garnished with sesame seeds and sliced green onions. Add the shrimp with any pan sauce so every bite has sticky honey garlic flavor.


