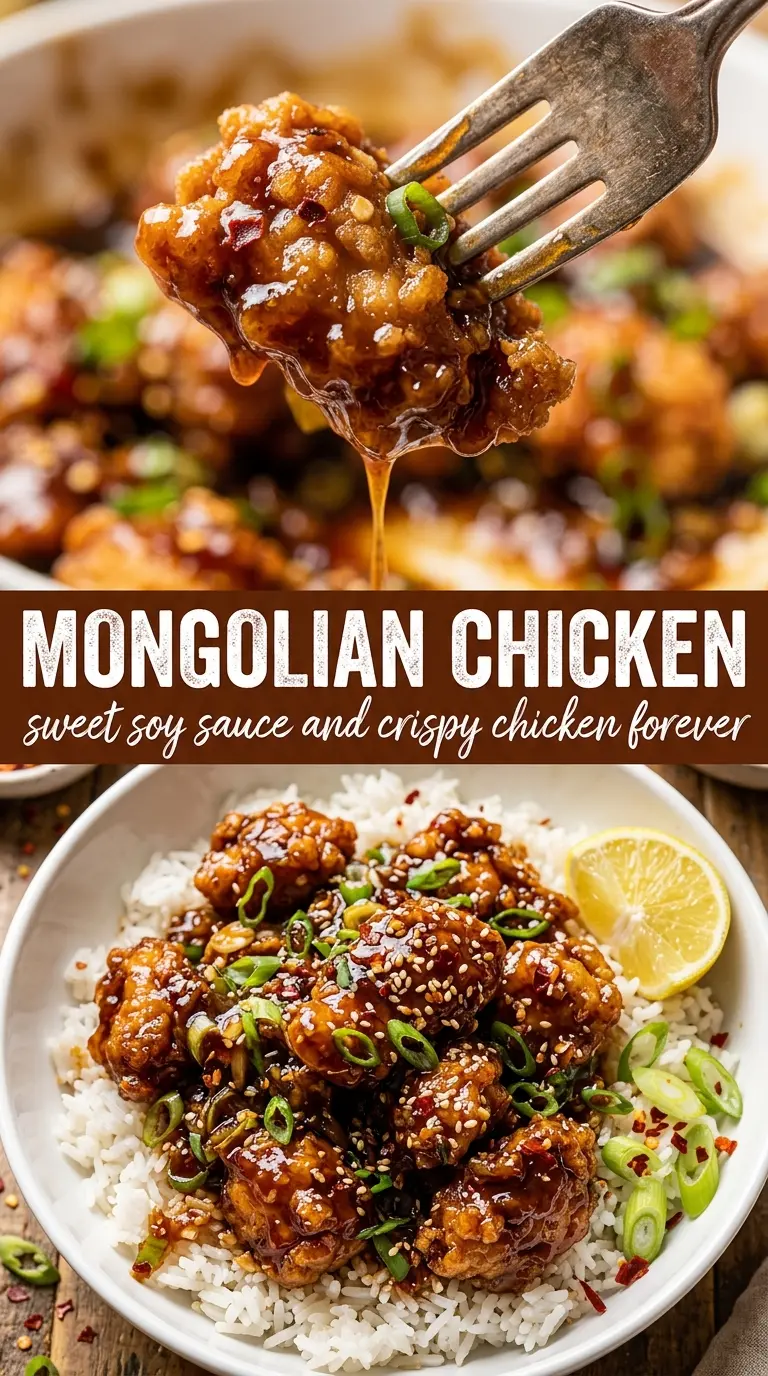
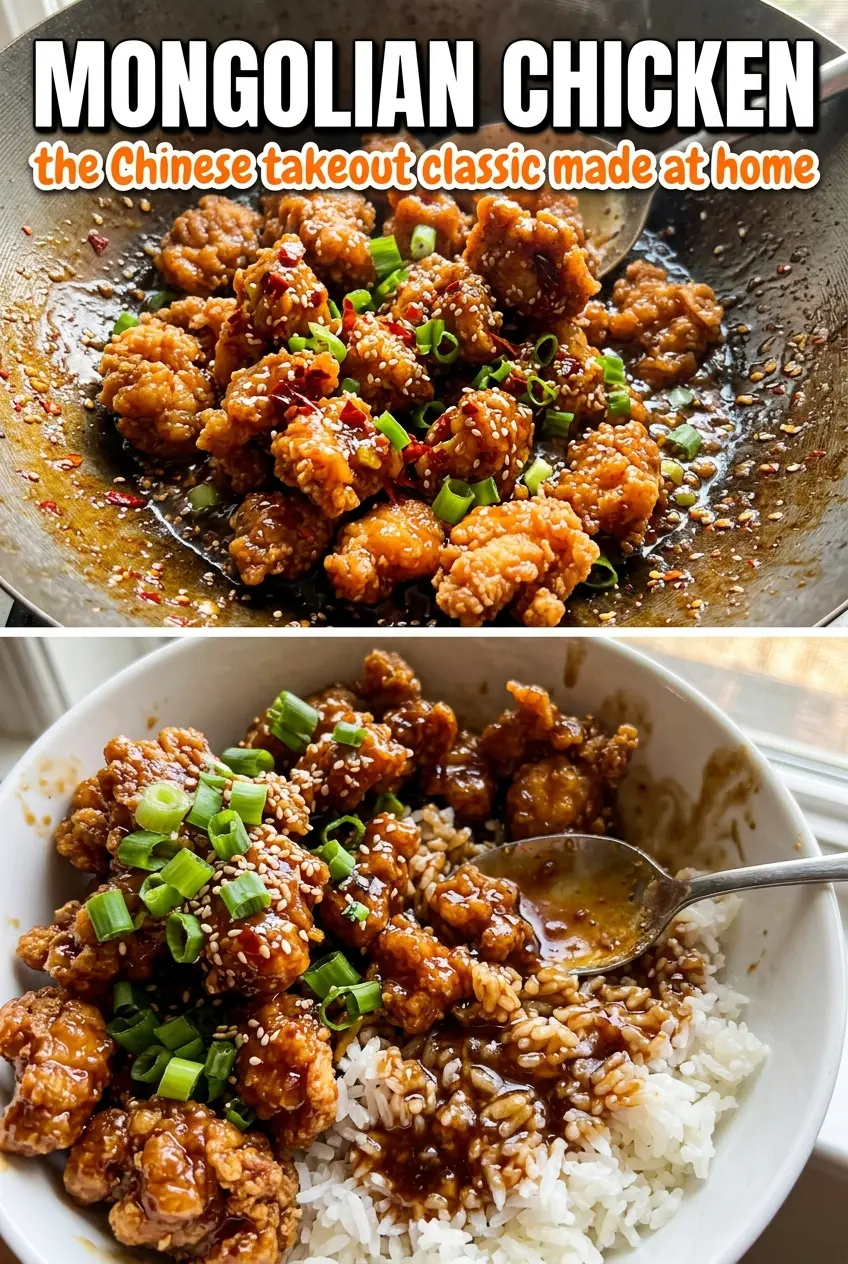
Crispy-edged chicken coated in a dark, glossy Mongolian sauce is one of those dinners that disappears fast because it hits every note at once: salty, sweet, garlicky, and just a little sticky on the plate. The chicken stays tender under that thin cornstarch crust, and the sauce clings instead of pooling, which is what separates a good stir-fry from one that feels watered down.
This version leans on high heat and a quick cornstarch slurry to get that takeout-style sheen without turning the sauce syrupy. Thinly sliced chicken breast cooks fast, so it never has time to dry out, and the garlic and ginger go in just long enough to perfume the pan without burning. The green onions finish in the sauce and soften just enough to keep a little bite.
Below, you’ll find the small details that matter most here: how to keep the chicken from steaming, when the sauce is thick enough, and what to swap if you need a gluten-free version without losing that sticky finish.
The chicken got that crisp edge even after tossing it in the sauce, and the glaze thickened up exactly like takeout. I used the extra green onions on top and the whole pan was gone before I finished making the rice.
Sticky Mongolian Chicken over rice is the kind of dinner that makes the skillet look polished clean.
The Step That Keeps the Chicken Crispy Under the Sauce
The biggest mistake with Mongolian chicken is crowding the pan. Once the chicken pieces start steaming instead of searing, the coating goes soft before it ever meets the sauce. A hot skillet and a single layer are what give you those crisp edges that hold up after tossing.
That cornstarch coating isn’t there just for texture. It also helps the sauce grab onto the chicken instead of sliding off. If the chicken looks pale when you add it back to the pan, it wasn’t cooked hot enough the first time, and the finished dish will taste more like boiled chicken in sauce than stir-fry.
- Chicken breast — Thin slices cook fast and stay tender, but the key is cutting them evenly so the pieces finish at the same time. If some slices are thick and others are paper-thin, the thin ones overcook before the rest are done.
- Cornstarch — This does double duty as a light coating and a thickener. Arrowroot can work in a pinch, but cornstarch gives the most reliable crisp edge and that familiar glossy finish.
- Soy sauce and brown sugar — These build the deep, dark glaze. Low-sodium soy sauce works fine if that’s what you keep on hand, but don’t cut the sugar too far or the sauce loses the sticky balance that makes the dish taste complete.
- Hoisin and sesame oil — Hoisin adds body and a little fermented depth; sesame oil adds the toasted finish at the end of the sauce. Neither one should be skipped if you want that takeout-style character.
Building the Glaze Before It Hits the Chicken
The sauce comes together fast, so mix it before you turn on the heat. If you’re scrambling to measure soy sauce while garlic is already in the pan, the garlic will burn in seconds. Once that happens, the whole sauce tastes sharp and bitter no matter how good the rest is.
The cornstarch slurry goes in after the sauce starts boiling, not before. That’s what gives you a smooth, glossy coating instead of a grainy paste. When it’s ready, the sauce should coat the back of a spoon and leave a clean trail when you drag a spatula through it.
- Garlic and ginger — Fresh is worth it here because the sauce is built around them. Powder won’t give you the same punch or the same clean, bright edge after the sauce reduces.
- Red pepper flakes — They add just enough heat to keep the sweet sauce from tasting flat. If you want a milder dish, cut them back, but don’t leave out all heat unless you plan to add something sharp at the end.
- Green onions — Use the white and light green parts in the pan and save the darker tops if you want a little raw bite on top. They soften in the sauce but still keep some structure, which keeps the dish from tasting one-note.
- Rice for serving — Steamed rice matters because the sauce is concentrated. Plain white rice soaks it up best, while brown rice adds nuttiness and a little chew if that’s your preference.
Marrying the Sauce and Chicken Without Losing the Crunch
Coating the Chicken Evenly
Toss the sliced chicken with cornstarch, salt, and pepper until every piece looks lightly dusted, not clumped. If you see dry pockets of cornstarch, those spots will turn pasty in the pan. The goal is a thin, even coating that turns golden when it hits the oil.
Searing Over High Heat
Heat the oil until it shimmers, then add the chicken in a single layer. You should hear an immediate sizzle. If the pan goes quiet, it isn’t hot enough, and the chicken will steam instead of browning. Let the first side develop color before moving it around; that crust is what keeps the final dish from feeling soft.
Thickening the Sauce
After the garlic and ginger bloom for about 30 seconds, pour in the sauce and bring it to a boil. Stir in the slurry and cook just until the glaze turns shiny and starts to cling. If you keep it on the heat too long after it thickens, it can tighten into a sticky glaze that goes past glossy and starts to feel stiff.
Finishing the Toss
Return the chicken to the pan with the green onions and toss quickly to coat. This part should happen fast enough that the onions stay a little fresh at the center and the chicken keeps some texture. Serve it right away over rice while the sauce is still loose enough to soak into every bite.
Three Ways to Adjust the Pan Without Losing the Takeout Feel
Make it gluten-free with a smart soy swap
Use tamari or gluten-free soy sauce in place of regular soy sauce, and check that your hoisin is labeled gluten-free too. The sauce will still turn dark and sticky, but the flavor may read a touch cleaner and less fermented than the classic version.
Turn it into a veggie-heavy stir-fry
Add broccoli florets, snap peas, or bell peppers after the chicken comes out and stir-fry them before the sauce goes in. You’ll get more crunch and volume, but the vegetables will dilute the sauce a little, so keep the glaze concentrated and don’t overdo the add-ins.
Use chicken thighs for a richer result
Boneless skinless thighs work beautifully here and stay juicier if you’re nervous about breast meat drying out. They bring a little more richness to the finished dish, though they may release more fat into the pan, so keep the heat high and don’t overcrowd them.
Storage and Reheating
- Refrigerator: Store leftovers in an airtight container for up to 4 days. The chicken softens as it sits, but the sauce keeps its flavor well.
- Freezer: It freezes better than most stir-fries if you cool it first and pack it without the rice. The texture won’t stay crisp, but the sauce and chicken hold up for about 2 months.
- Reheating: Reheat in a skillet over medium heat with a splash of water to loosen the sauce. The common mistake is blasting it in the microwave until the chicken turns rubbery and the glaze separates.
Answers to the Questions Worth Asking
Mongolian Chicken
Ingredients
Equipment
Method
- Toss the thinly sliced chicken with cornstarch, salt, and pepper until every piece is coated and lightly dry on the surface. Set aside while you mix the sauce.
- Whisk soy sauce, brown sugar, water, hoisin sauce, sesame oil, and red pepper flakes until the sugar dissolves and the mixture looks smooth. Keep it ready near the stove.
- Heat the vegetable oil in a large skillet or wok over high heat until shimmering, then add the chicken in an even layer. Cook for 3-4 minutes per side until deeply golden and cooked through, then remove to a plate.
- Add the minced garlic and grated ginger to the same pan and stir-fry for 30 seconds until fragrant. Pour in the sauce mixture and bring it to a boil, scraping up any browned bits.
- Stir in the cornstarch slurry and cook for 1-2 minutes until thickened and glossy. Reduce heat if needed to keep the glaze from over-bubbling.
- Return the chicken to the pan and toss with the green onions until the glaze clings and the green onions char-tender. Serve immediately over steamed rice with sesame seeds.