Mini pumpkin pies bake up with a tender, buttery crust and a smooth custard filling that tastes like the best part of a full-size pie in a few perfect bites. The edges turn golden and crisp in the muffin tin while the centers stay creamy, not loose or chalky, which is exactly what you want when you’re serving dessert to a crowd.
What makes this version work is the balance: enough pumpkin puree for that deep, familiar flavor, enough egg to set the filling, and just enough evaporated milk or cream to keep it silky. The crust gets pressed directly into a greased mini muffin tin, which gives you those neat little tart shells without any special equipment or blind baking. A short chill after baking helps the filling firm up so the pies release cleanly and hold their shape.
Below you’ll find the little details that keep the custard smooth, the crust crisp, and the pies easy to serve. I’ve also included the swaps I’d actually use if you need to work with what’s in the pantry.
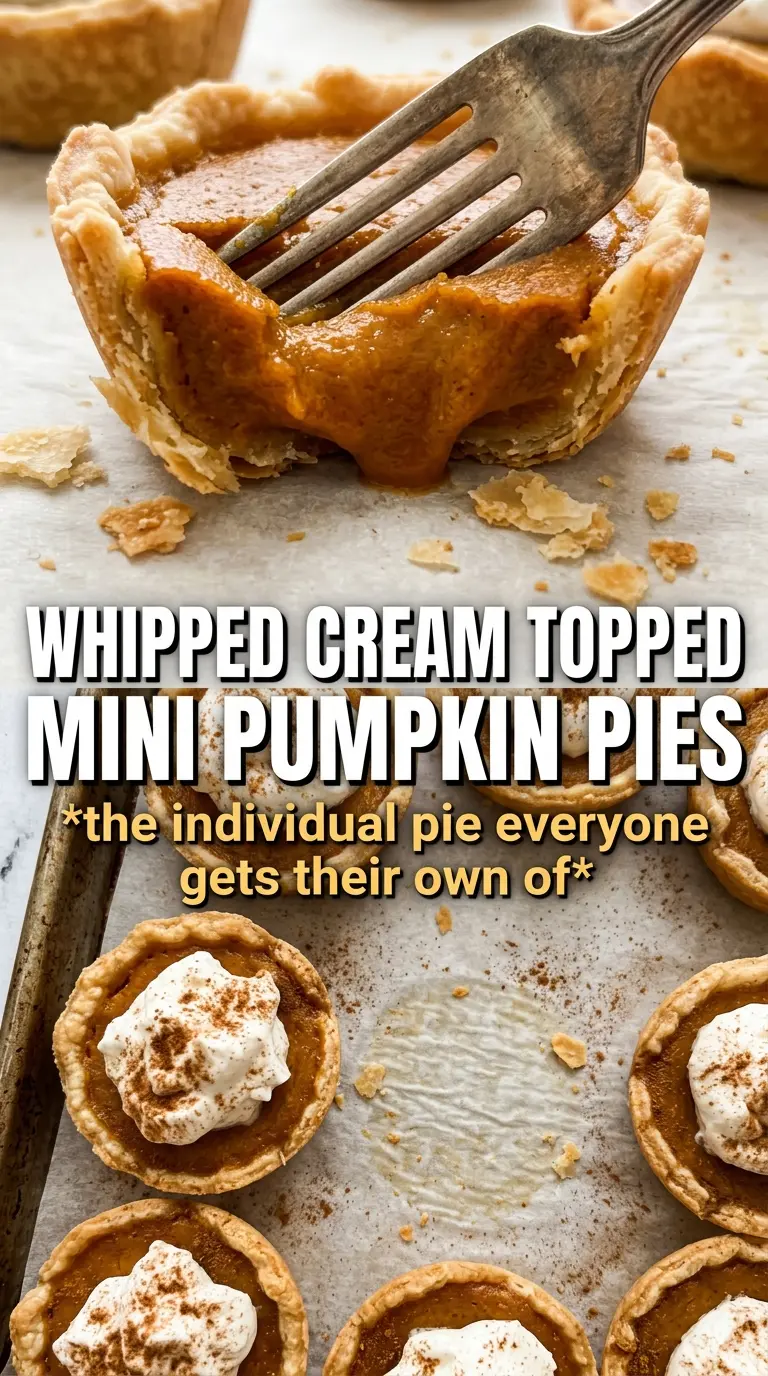
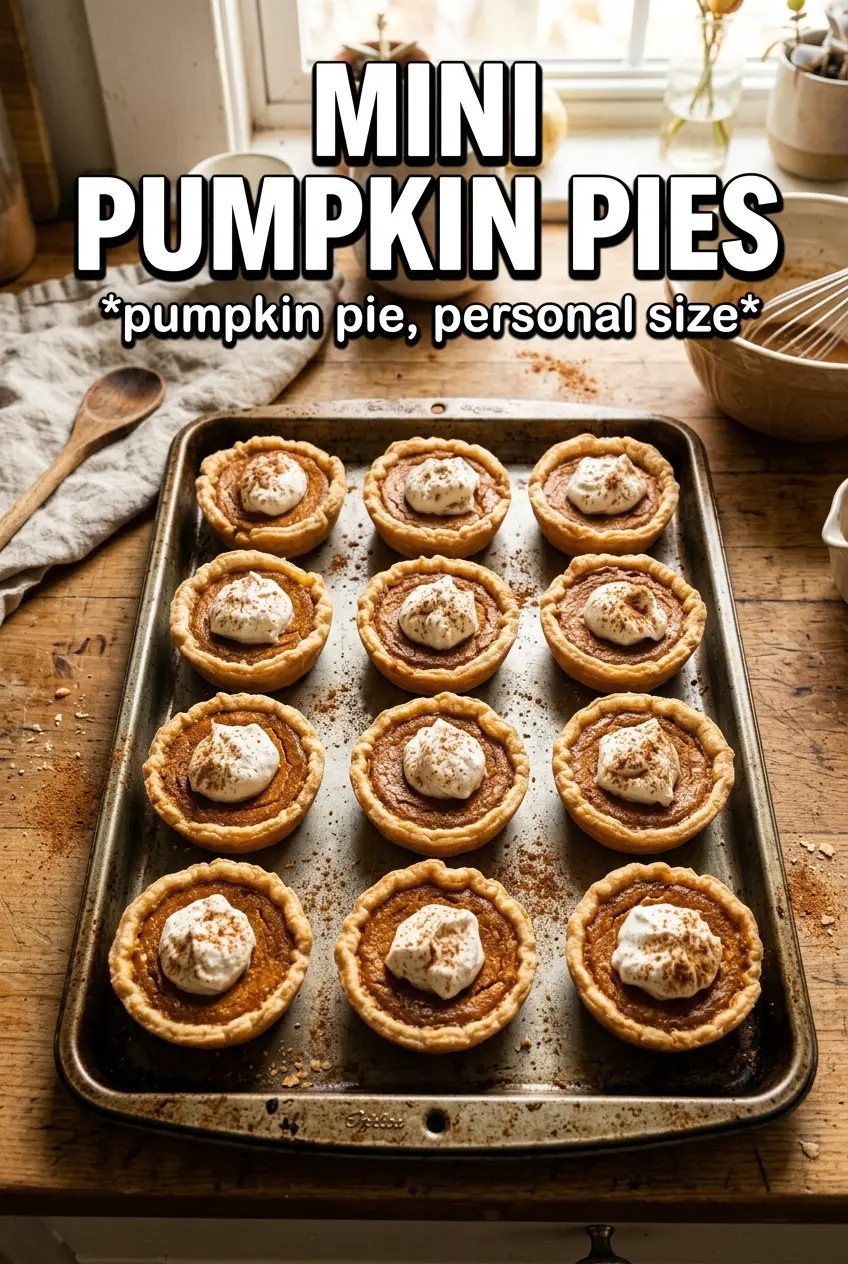
The filling set up beautifully and the crust stayed crisp even after chilling. I used whipped cream on top with a little cinnamon and they looked bakery-perfect in the muffin tin.
These mini pumpkin pies bake into neat little custard bites with crisp crusts and smooth, spiced centers — perfect for a dessert tray or holiday platter.
The Filling Sets Cleanly Because the Crust Gets a Head Start
The biggest mistake with mini pumpkin pies is overfilling the cups and expecting the center to behave like a full pie. In a mini muffin tin, the filling cooks faster than you think, so a three-quarter fill is the sweet spot. Any higher and the custard can dome, crack, or spill over the crust before it has time to set.
The crust also needs a little structure before the filling goes in. Pressing it firmly into the greased tin gives you a defined shell, and the greasing matters because these little pies like to cling at the edges. If the dough feels soft after cutting the circles, chill the assembled crusts for a few minutes before filling. That small pause helps the butter stay cold enough to bake into flakes instead of melting flat.
What Each Ingredient Is Actually Doing in These Mini Pumpkin Pies
- Refrigerated pie crust — This is the shortcut that keeps the recipe fast without losing that flaky, buttery shell. Homemade crust works if you already have it, but the store-bought version handles the small circles and muffin tin shape especially well. Let it warm just enough to cut cleanly, not so much that it stretches and shrinks.
- Pumpkin puree — Use pure pumpkin, not pumpkin pie filling. Pie filling already contains sugar and spices, which throws off the balance and can make the custard too loose or overly sweet.
- Evaporated milk or heavy cream — Evaporated milk gives you a classic pie texture that sets firmly and slices well. Heavy cream makes the filling a little richer and silkier. Either one works; just don’t swap in regular milk unless you’re willing to lose some body.
- Brown sugar — This brings deeper caramel notes than white sugar and helps the pumpkin taste rounder. If you only have white sugar, the pies will still work, but the filling will taste a little flatter.
- Pumpkin pie spice and cinnamon — Pumpkin pie spice does the heavy lifting, and the extra cinnamon sharpens the flavor without making it taste like perfume. Fresh spice matters here more than in a lot of desserts because the filling is simple and nothing hides stale spices.
- Eggs — These set the custard. Whisk them until fully blended into the pumpkin mixture so you don’t end up with little streaks of egg in the baked filling.
The Short Bake That Keeps the Centers Creamy
Cutting and Pressing the Crust
Cut the pie crust into 3.5-inch circles and press each one into a greased mini muffin cup, letting the dough come up the sides without tearing. If the dough cracks, pinch it back together with your fingers. You want a snug fit, because loose dough can slide down as it bakes and leave you with shallow shells that can’t hold the custard.
Mixing the Custard Without Adding Air
Whisk the pumpkin, eggs, evaporated milk or cream, brown sugar, spices, salt, and vanilla until the mixture looks completely smooth and even. Stop as soon as it’s combined; you’re not trying to whip volume into it. Too much air makes the filling puff in the oven and then collapse as it cools.
Baking Until Just Set
Fill each crust about three-quarters full and bake at 375°F until the filling is just set and the crust edges are golden, usually 18 to 22 minutes. The centers should still have the slightest wobble when you nudge the pan. If they jiggle like liquid, they need a few more minutes; if they’re fully firm in the oven, they’ll bake up dry after cooling.
Cooling and Chilling for a Clean Finish
Let the pies cool completely before refrigerating them for an hour. That chill time is what gives the custard its final texture and helps the pies release from the pan cleanly. Top them with whipped cream and a dusting of cinnamon right before serving so the garnish stays fluffy and doesn’t melt into the filling.
Three Ways to Make These Mini Pumpkin Pies Work for Your Table
Dairy-Free Version
Use full-fat canned coconut milk in place of the evaporated milk or cream. The filling will still set, but it will taste a little more coconut-forward and slightly softer when chilled. If you want the cleanest slice, keep the chill time full and don’t skip it.
Gluten-Free Crust Swap
Use a gluten-free pie crust that rolls well and doesn’t crack too easily when cut into small circles. The filling is naturally gluten-free, so this swap changes only the shell. Expect a slightly more delicate crust, and chill the cut rounds before pressing them into the tin.
Using Heavy Cream for a Richer Custard
Heavy cream makes the filling silkier and a little more decadent than evaporated milk. The pies will still bake up neatly, but the texture will lean softer and richer, almost like a pumpkin pot de crème in pie form. This is the version I’d use for a dessert tray where you want extra creaminess.
Storage and Reheating
- Refrigerator: Store covered for up to 4 days. The crust softens slightly after the first day, but the filling stays smooth and sliceable.
- Freezer: Freeze without the whipped cream for up to 2 months. Freeze in a single layer until solid, then transfer to an airtight container. Thaw overnight in the refrigerator.
- Reheating: These are best served cold or cool, not hot. If you want to take the chill off, let them sit at room temperature for 15 to 20 minutes. Microwaving tends to make the custard grainy and the crust soggy.
Questions I Get Asked About This Recipe
Mini Pumpkin Pies
Ingredients
Equipment
Method
- Preheat the oven to 375F and grease a mini muffin tin. Press the 3.5-inch pie crust circles into the cups so they line the sides neatly.
- Whisk pumpkin puree, eggs, evaporated milk or heavy cream, brown sugar, pumpkin pie spice, cinnamon, salt, and vanilla until smooth. Stop when the mixture looks uniform with no streaks.
- Fill each crust about 3/4 full with the pumpkin custard. Tap the tin gently so the filling settles evenly.
- Bake at 375F for 18-22 minutes, until the filling is just set and the pastry cups are golden. Look for a slight jiggle in the center rather than sloshing.
- Cool the mini pies completely in the muffin tin. Let them come to room temperature before chilling for clean set centers.
- Refrigerate for 1 hour to chill and firm the custard. Keep them covered to prevent drying out.
- Top each mini pumpkin pie with whipped cream and finish with a dusting of cinnamon. Serve chilled for the best texture contrast.