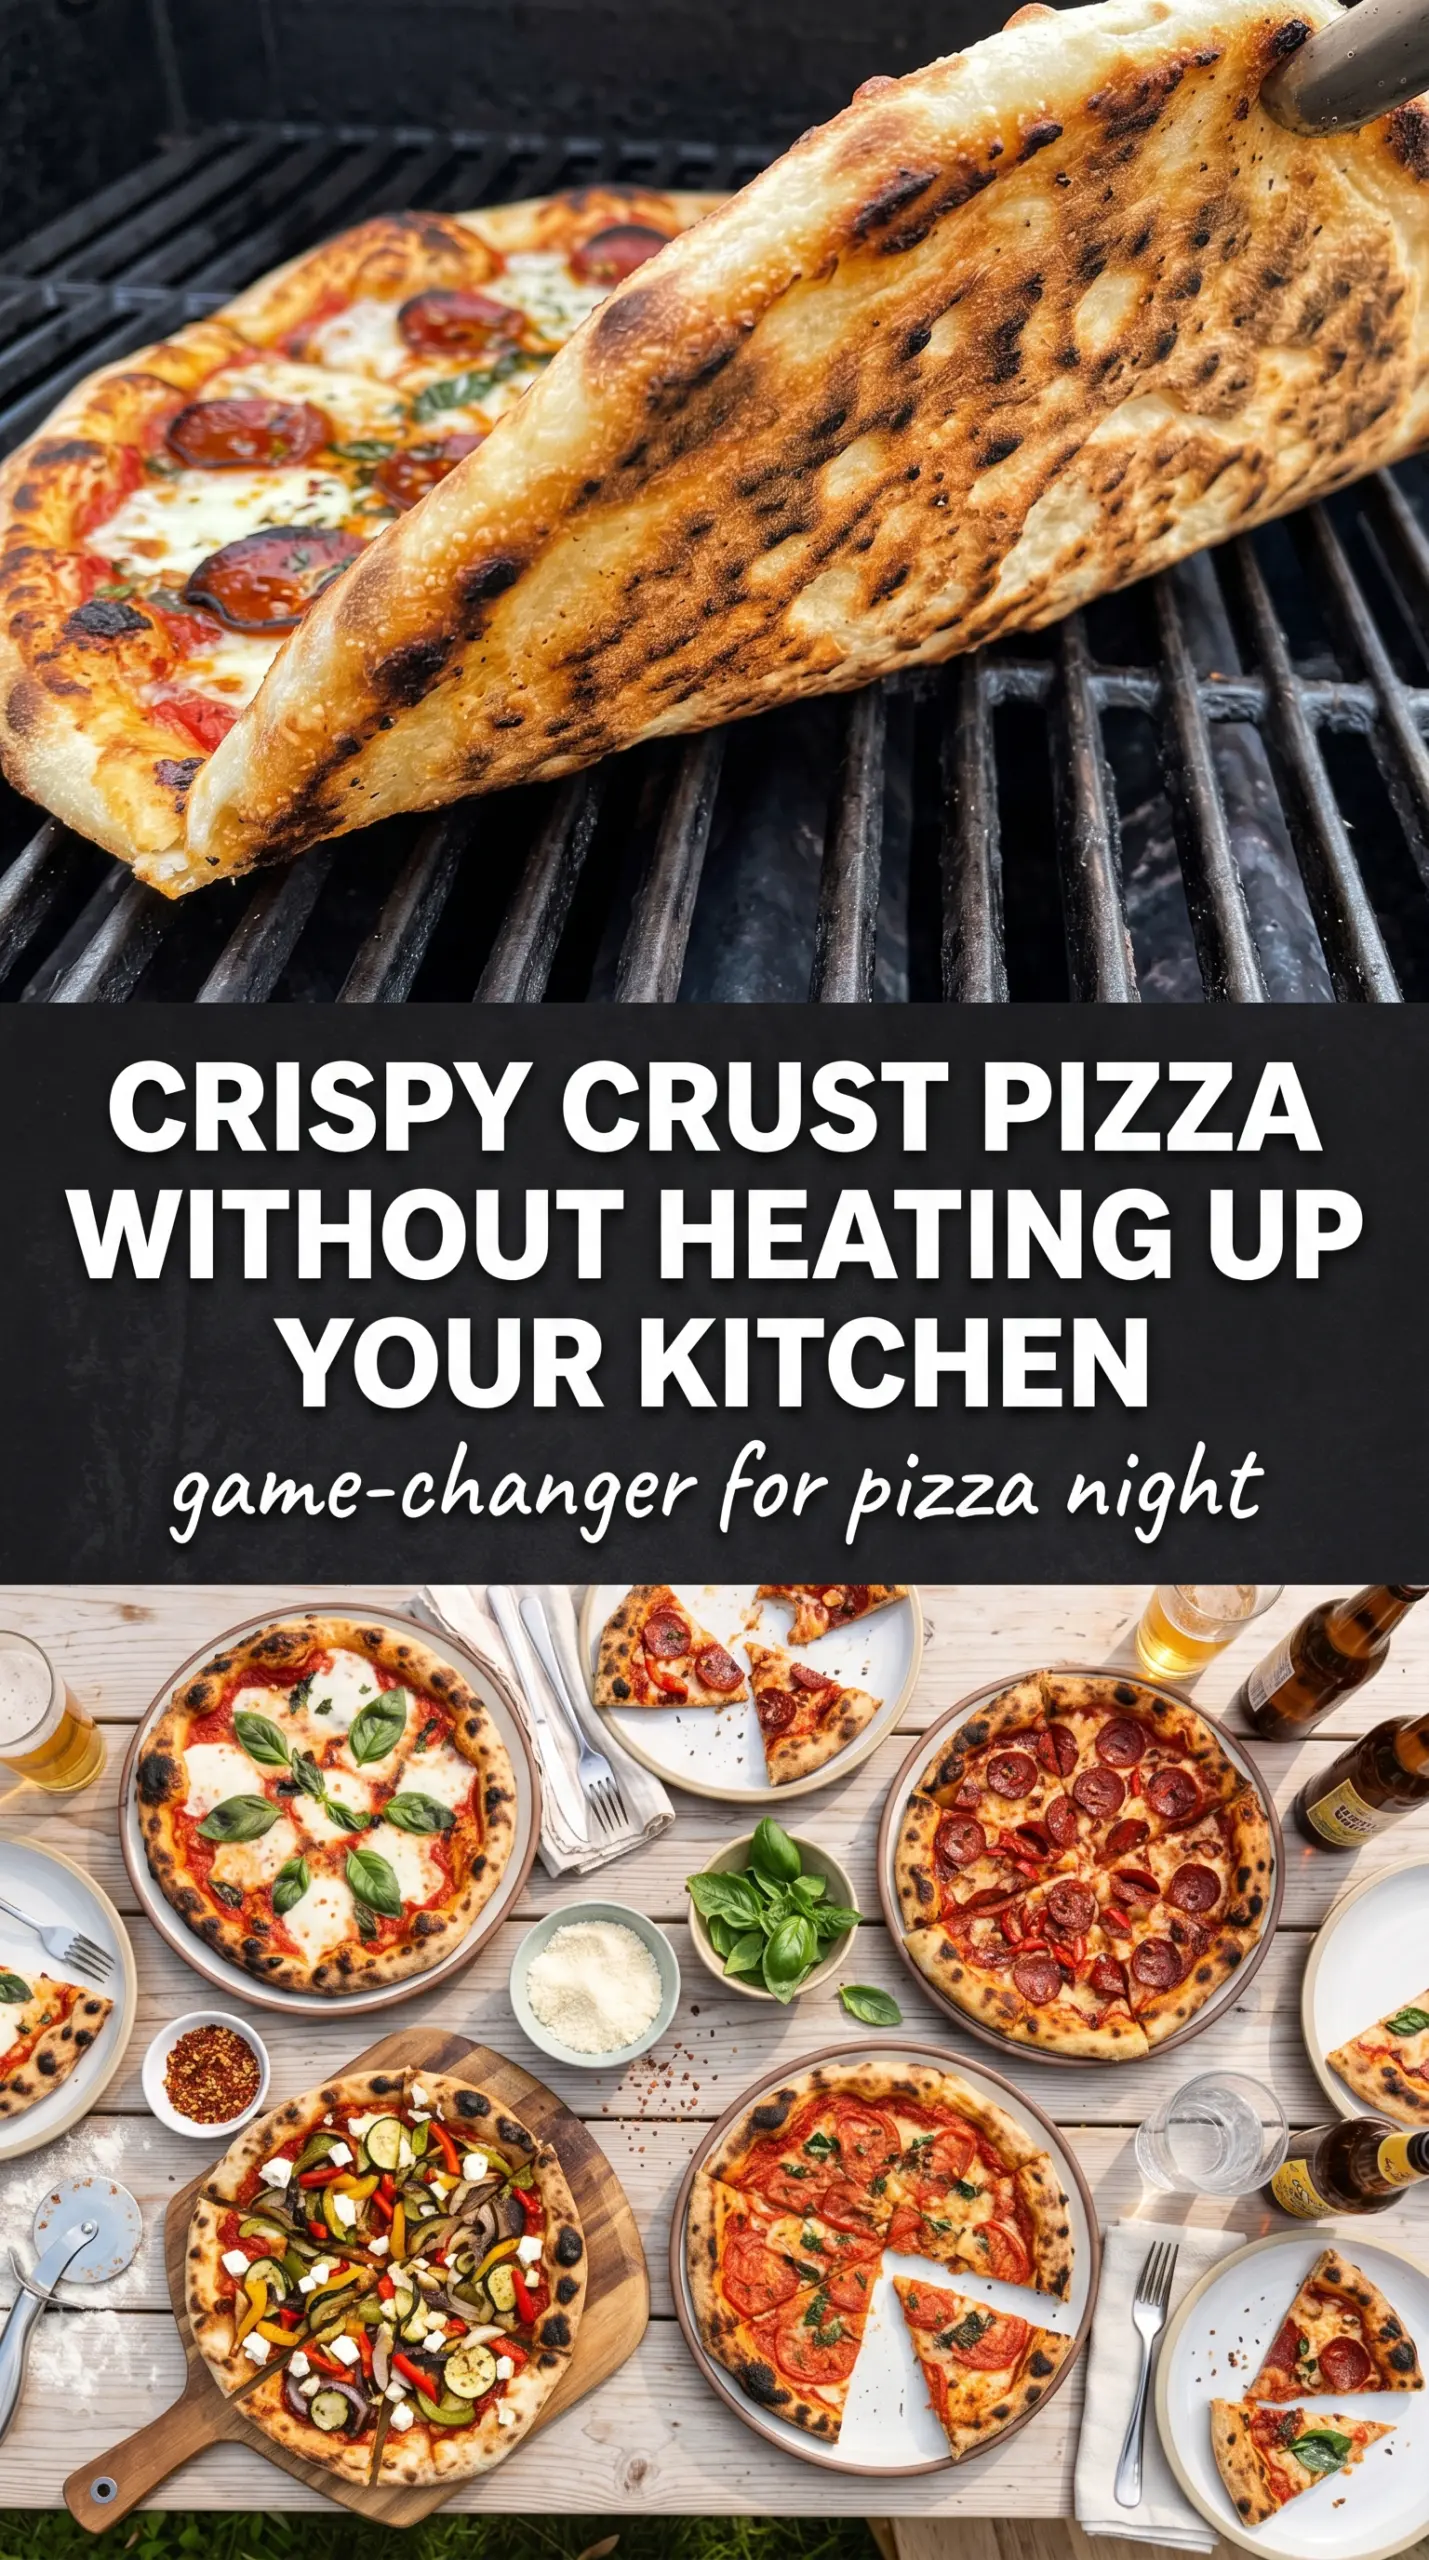
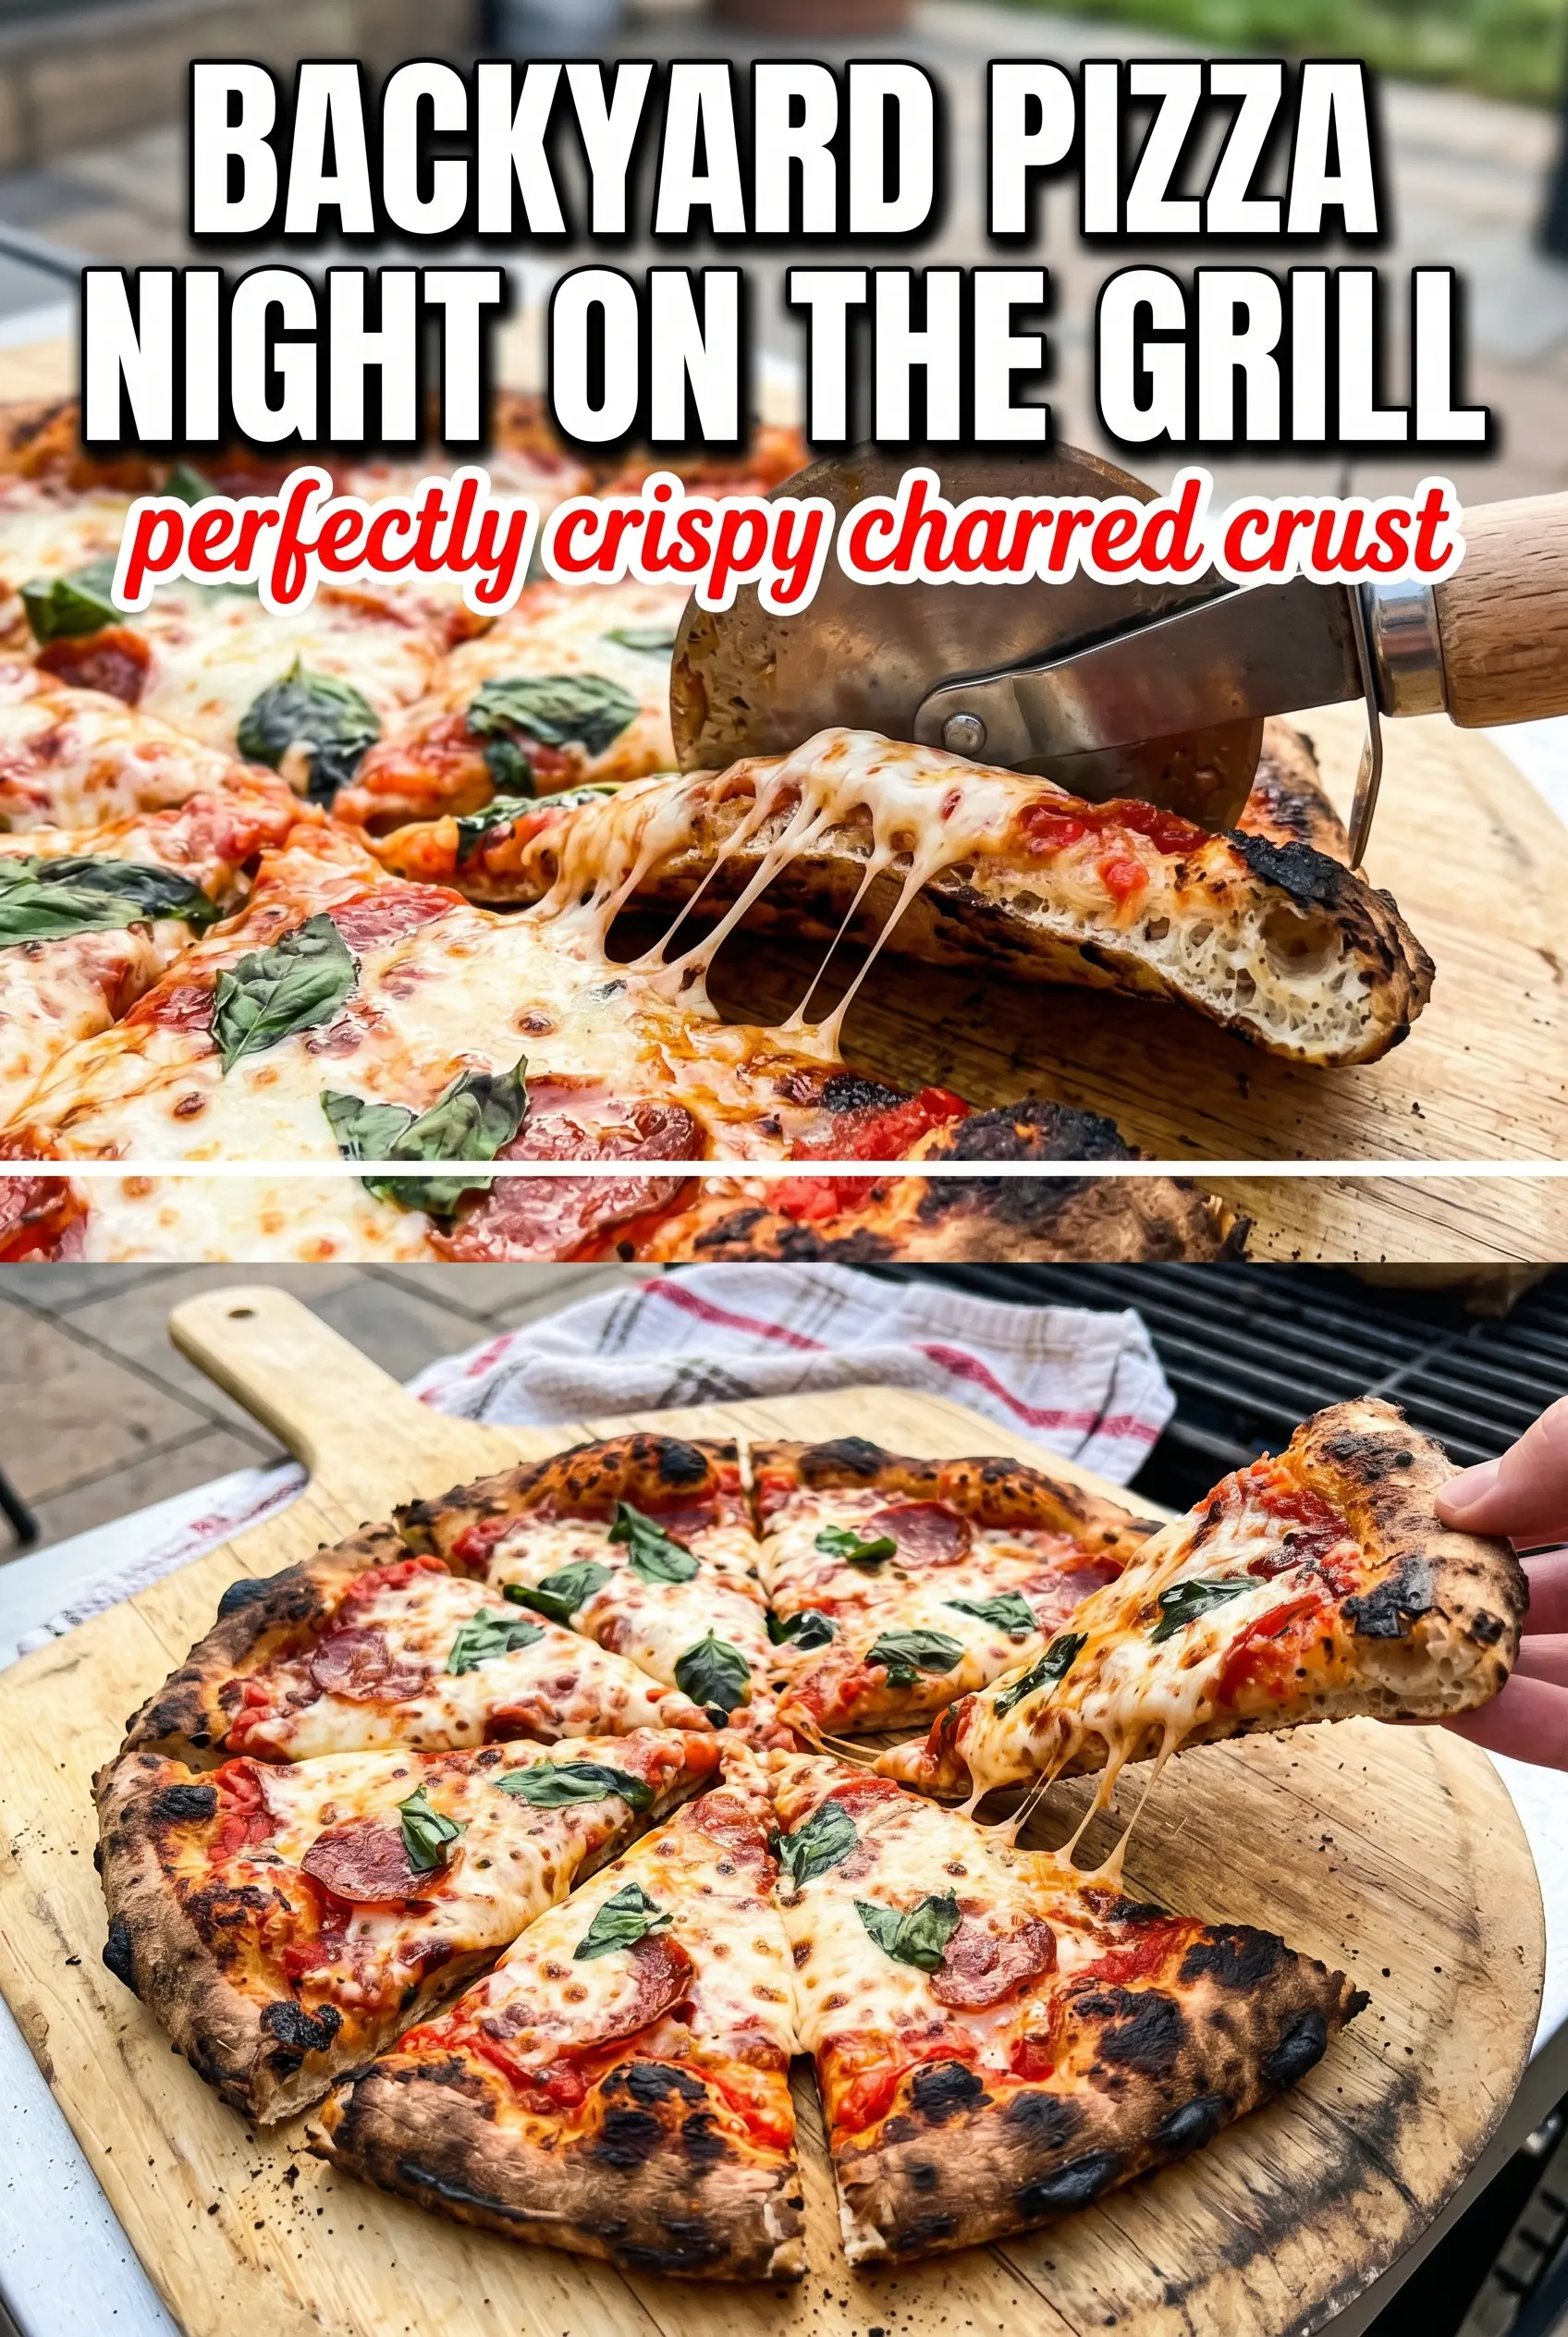
Grilled pizza gives you the kind of crust that oven pizza can’t quite match: crisp at the edges, blistered in spots, and smoky enough to taste like it came off a wood fire. The cheese melts fast, the sauce stays bright, and the toppings pick up just enough char to keep every bite interesting.
The trick is getting the dough onto the grates before it gets too soft and making peace with a fast cook time. You’re not baking this pizza in the usual sense. You’re using the grill like a pizza stone, which means the dough needs a light hand, hot grates, and toppings that are ready to go before the crust comes back off the fire.
Below, I’ll walk through the part that matters most: how to keep the dough from sticking, how to build the pizza after the first side is grilled, and what to change if you want to make this with different toppings or on a weeknight.
The crust picked up those grill marks fast and stayed crisp under the sauce instead of turning soggy. I loved how the cheese melted before the bottom burned, which never happens when I try pizza on my grill.
Grilled pizza with smoky crust, bubbling cheese, and fast-topping timing is made for summer dinners and backyard cooking.
The Reason the Crust Gets Crispy Before the Toppings Overcook
The biggest mistake with grilled pizza is trying to build the whole thing before the dough has a chance to set. Raw dough on hot grates needs a quick first contact on the oil-brushed side so it firms up and releases cleanly. If you wait too long to flip it, the crust gets fragile and tears when you add sauce.
Once the first side is charred, move fast. Sauce, cheese, and toppings go on the grilled side while the lid is closed so the heat traps around the pizza and finishes the cheese before the bottom burns. That short covered finish is what gives you a crisp base without a dry top.
What Each Ingredient Is Actually Doing on the Grill
- Pizza dough — A simple dough works best because it stretches thin and cooks quickly. If yours keeps springing back, let it rest for 10 to 15 minutes before stretching again so the gluten relaxes.
- Olive oil — This is what helps the first side release from the grates and brown instead of sticking. Don’t skip brushing the dough and the grates; that thin layer is the difference between charred crust and torn dough.
- Pizza sauce — Use a sauce that isn’t watery. A loose sauce steams the crust and can make the center soggy, so thick sauce or even a lightly reduced jarred sauce works better here.
- Mozzarella — Low-moisture shredded mozzarella melts smoothly and gives you that classic stretchy top. Fresh mozzarella tastes great, but it releases more water, so pat it dry if you use it.
- Toppings — Keep them cooked or thinly sliced. The grill finish is short, and raw vegetables like mushrooms or peppers should be sliced small enough to soften before the cheese is done.
- Basil and Parmesan — Add both at the end. Basil burns and Parmesan can turn bitter if it sits too long on the heat, so these finish the pizza after it comes off the grill.
How to Move Fast Without Losing the Crust
Getting the Grates Ready
Preheat the grill until it’s properly hot and then oil the grates well. That heat gives you the char marks and quick cooking you want, while the oil helps the dough release when it’s time to flip. If the grill isn’t hot enough, the dough can absorb oil and turn dense instead of blistering.
Stretching and Prepping the Dough
Divide the dough into four pieces and stretch each one into a thin round. Dust the dough and your hands with flour just enough to keep it moving, but don’t overload it or you’ll end up with dry, dusty crust. Thin dough cooks best here; thick dough tends to char before the center is ready.
The First Side on the Grate
Brush one side of the dough with olive oil and lay it oil-side down on the grill. Leave it alone for 2 to 3 minutes until the bottom shows firm grill marks and the dough lifts easily. If it sticks, give it another 20 to 30 seconds; forcing it off too soon is how the crust tears.
Building and Finishing the Pizza
Flip the crust quickly, spread on the sauce, then add cheese and toppings right away. Close the lid and let the pizza cook for another 3 to 5 minutes until the cheese is melted and the underside is crispy. Pull it off as soon as the cheese is bubbling and the edges look set, because even a minute too long can push the crust from crisp to burnt.
Ways to Change the Toppings Without Breaking the Method
Dairy-Free Grilled Pizza
Use a dairy-free mozzarella that melts well and keep the toppings light. Some plant-based cheeses brown faster than dairy cheese, so watch the lid-cooked finish closely and pull the pizza when the top is melted, not when it looks deeply browned.
Vegetarian With More Bite
Load it with thin slices of zucchini, bell pepper, red onion, or mushrooms, but keep the layer light. Too many vegetables release steam and water down the crust, so it helps to pre-cook watery toppings or slice them very thin.
Gluten-Free Crust
Use a gluten-free pizza dough that’s made for shaping and grilling, then handle it gently because it usually tears more easily than wheat dough. Let it set fully on the first side before flipping, since GF dough often needs that extra structure before toppings go on.
Pepperoni and Extra Crispy Edges
Lay the pepperoni in a single layer so it curls and crisps instead of steaming in piles. If you want more crackly edges, brush the outer rim with a little extra oil before the first grill contact.
Storage and Reheating
- Refrigerator: Store leftovers in an airtight container for up to 3 days. The crust softens a bit, but it still reheats well.
- Freezer: Freeze slices wrapped tightly for up to 2 months. Separate layers with parchment so the cheese doesn’t weld them together.
- Reheating: Reheat in a hot skillet or a 400°F oven until the crust crisps again and the cheese loosens. The usual mistake is microwaving it, which turns the grilled crust chewy and dulls the char.
Questions I Get Asked About This Recipe
Grilled Pizza
Ingredients
Equipment
Method
- Preheat your grill to medium-high heat and oil the grates well with olive oil. Keep the lid closed between steps to hold the heat while you portion the dough.
- Divide the pizza dough into 4 portions and stretch each into a thin round, dusting with flour as needed to prevent sticking. Aim for even thickness so the crust chars without becoming doughy.
- Brush one side of each dough round with olive oil and place oil-side down on the grill for 2-3 minutes until the bottom is charred. Look for distinct grill marks and a set, firm surface.
- Flip the crust and work quickly to add pizza sauce, shredded mozzarella, and your choice of toppings to the grilled side. Keep toppings moderate so they melt through rather than steam.
- Close the grill lid and cook for 3-5 minutes until the cheese is melted and the bottom is crispy. Watch for bubbling cheese and a deeper, crisping color on the crust.
- Remove the grilled pizza from the grill and top with fresh basil leaves and grated Parmesan cheese. Slice and serve immediately for the best cheese pull and crisp texture.