Crispy tacos have a way of disappearing before they even hit the table, and this version earns that kind of attention. The shells shatter lightly when you bite in, then give way to a savory turkey and black bean filling that stays juicy instead of sliding out in a dry pile. A squeeze of lime and a handful of cold toppings finish the job with enough contrast to keep every bite interesting.
What makes these work is the balance. Ground turkey can go bland fast if it’s cooked without enough seasoning or moisture, so the black beans and a splash of water pull the filling together and keep it from tasting flat. The tortillas need to be fried while the oil is steady and hot; if the temperature drops, you get greasy shells instead of crisp ones. That little bit of attention up front makes the whole taco eat like something you’d order at a good neighborhood spot.
Below, I’ve included the timing cues that keep the filling thick and the tortillas crisp, plus a few ways to adapt the tacos if you want to make them lighter, dairy-free, or ahead for a crowd.
The turkey filling thickened up just enough to stay in the shells, and the crispy tortillas stayed crunchy even after we added salsa and sour cream. My husband asked for these again two nights later.
Like this crispy turkey and black bean taco filling? Save it to Pinterest for nights when you want crunchy shells, fast prep, and a topping bar that feels fun without extra work.
The Trick to Keeping the Filling Thick Instead of Watery
Ground turkey releases moisture as it cooks, and black beans bring their own soft liquid if you stir them in too early without enough simmering time. The fix is simple: cook the turkey until it’s no longer pink, then add the garlic briefly so it doesn’t burn, and only after that stir in the seasoning, beans, and water. Let the mixture simmer uncovered until the pan goes from wet and loose to glossy and spoonable. If it still looks soupy, keep it on the heat for another minute or two; stuffing crispy shells with a runny filling is what turns tacos soggy fast.
The other thing that matters is seasoning at the end. Taco seasoning brands vary a lot in salt, and turkey needs enough salt to wake it up. Taste the filling before you pull it off the heat, because once it’s in the shell, there’s no fixing blandness without overloading the toppings.
What Each Ingredient Is Actually Doing in These Tacos

- Ground turkey — This is the main protein, but it needs help because it’s lean. If yours is extra lean, don’t walk away from the skillet; let it brown a little before adding the garlic so you get some of that savory edge instead of boiled-turkey texture.
- Black beans — They stretch the filling and give it a creamier bite without needing extra fat. Canned beans are perfect here; just drain them well so they don’t dilute the sauce.
- Taco seasoning — This does the heavy lifting for flavor, but it also helps the filling cling together once it simmers with the water. If you’re using homemade seasoning, add a little extra cumin and chili powder so the turkey doesn’t taste flat.
- Corn tortillas — Corn is the right choice if you want that crisp, toasty shell that tastes like an actual taco. Flour tortillas won’t fry up the same way and tend to turn chewy instead of brittle-crisp.
- Vegetable oil — Use enough oil to let the tortilla set quickly. The oil has to be hot enough that the tortilla bubbles right away; if it’s too cool, the shell drinks up grease instead of crisping.
- Lime, cilantro, lettuce, and tomatoes — These are not just garnish. They give you freshness and moisture balance, which is what keeps the tacos from eating like a dry, heavy filling in a shell.
Building Crisp Shells and a Filling That Stays Put
Cooking the turkey base
Start by browning the turkey over medium-high heat and break it up into small, even crumbles as it cooks. You want the meat to lose its pink color and pick up a little browning before the garlic goes in; if the garlic hits too early, it can scorch and turn bitter. Once the turkey is cooked through, stir in the garlic for just a minute so it smells fragrant but doesn’t color much.
Simmering until the mixture tightens
Add the taco seasoning, black beans, and water, then let everything simmer for about 5 minutes. The filling should go from loose and glossy to thick enough to mound on a spoon. If there’s still liquid in the pan, keep cooking; wet filling is the main reason crispy tacos collapse.
Frying the tortillas into taco shells
Heat the oil to 350°F and fry each tortilla in a taco shape for 2 to 3 minutes, turning if needed so both sides crisp evenly. The tortilla should blister, hold its curve, and sound firm when lifted from the oil. If the oil is too cool, the shell will absorb grease and stay limp; if it’s too hot, the edges will brown before the center has time to set.
Filling and finishing
Drain the shells on paper towels, then fill them while they’re still warm enough to stay crisp but cool enough to handle. Spoon in the turkey and bean mixture first, then top with lettuce, tomatoes, cheese, cilantro, and lime. Add salsa last so it doesn’t soak the shell before the first bite.
How to Adapt These Tacos Without Losing the Crunch
Make them dairy-free
Leave off the cheese and use extra cilantro, salsa, and lime for brightness. The tacos still work because the filling already has enough body; you’re just swapping the creamy finish for sharper, fresher toppings.
Use ground chicken instead
Ground chicken behaves almost the same way as turkey, so the method stays unchanged. It’s a touch milder, which means you may want a small extra pinch of salt or a little more taco seasoning to keep the filling bold enough against the crisp shell.
Bake the tortillas instead of frying
Brush both sides of the tortillas lightly with oil and drape them over the bars of your oven rack or a taco rack, then bake until crisp. You won’t get quite the same blistered crunch as frying, but you’ll still get a sturdy shell with less mess and less oil.
Storage and Reheating
- Refrigerator: Store the filling for up to 4 days in an airtight container. Keep the shells and toppings separate so nothing softens.
- Freezer: The turkey and black bean filling freezes well for up to 2 months. Freeze it flat in a sealed bag or container, then thaw overnight before reheating.
- Reheating: Warm the filling in a skillet over medium heat with a splash of water if needed. Re-crisp the shells just before serving; if you reheat filled tacos, the shells will go soft fast.
Questions I Get Asked About This Recipe
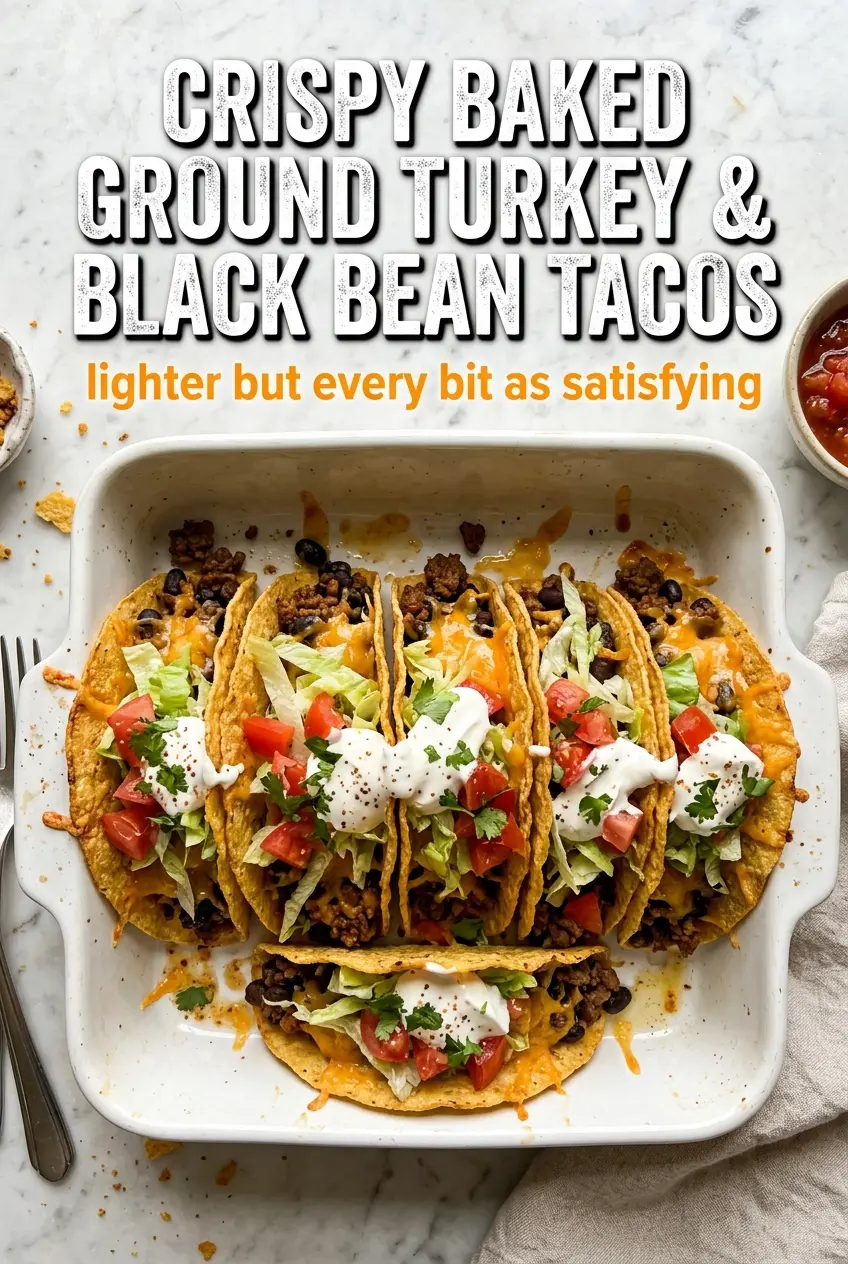
Crispy Baked Ground Turkey & Black Bean Tacos
Ingredients
Equipment
Method
- Heat a cast iron skillet over medium-high heat and add the ground turkey. Cook 8-10 minutes, breaking it apart, until browned and no longer pink.
- Add the minced garlic to the skillet and cook for 1 minute, stirring until fragrant. You should see small bubbles around the garlic and a noticeable aroma.
- Stir in the taco seasoning, black beans, and water. Mix well so the seasoning coats the turkey and beans.
- Simmer the mixture for 5 minutes, stirring occasionally, until thickened. It should look glossy and cling to the spoon.
- Season with salt and pepper to taste. The filling should taste balanced and savory before assembling.
- Heat vegetable oil in the skillet to 350°F for frying. The oil should shimmer steadily with no smoke.
- Fry the corn tortillas in hot oil (350°F) in a taco-shaped form for 2-3 minutes until crispy. Watch for golden-brown edges and a firm, crunchy shell surface.
- Drain the fried tortillas on paper towels. They should stop bubbling and feel crisp to the touch.
- Fill each crispy taco shell with the turkey-bean mixture. Add enough so the filling reaches the taco rim without overflowing.
- Top with lettuce, tomatoes, shredded cheese, cilantro, and a squeeze of lime juice. Finish with bright, colorful toppings so they sit visibly on the filling.
- Serve with salsa on the side or spooned over the top. The tacos are best immediately while the shells stay crisp.