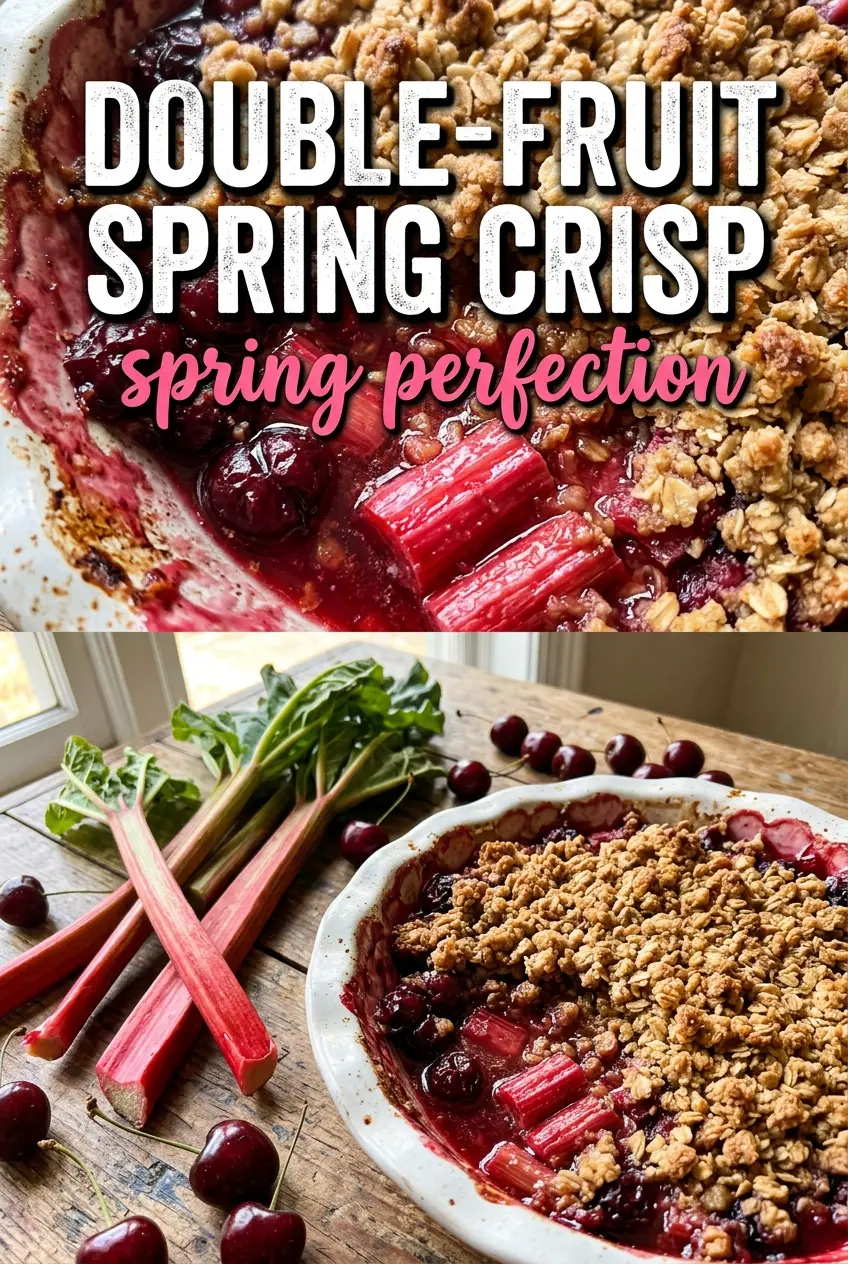
Cherry rhubarb crisp hits that sweet-tart middle ground that keeps people going back for one more spoonful. The filling turns glossy and jammy under a golden oat topping, and the contrast between the soft fruit and the crumbly crust is what makes this one earn a permanent spot in dessert rotation. It tastes bright, homey, and just a little old-fashioned in the best way.
The trick is getting enough cornstarch into the fruit so the juices thicken instead of pooling at the bottom of the pan. Rhubarb brings the sharpness, cherries bring body and sweetness, and a little almond extract quietly boosts the cherry flavor without making the dessert taste like marzipan. Melted butter in the topping keeps the crumble simple and gives you those sandy, nubby clusters that bake up crisp instead of dry.
Below you’ll find the small details that matter here: how to keep the topping from sinking into the fruit, why frozen cherries work just fine, and what to do if your filling looks loose when it comes out of the oven. It’s an easy dessert, but the little choices make the difference between good and worth making again.
The filling set up beautifully and the topping stayed crisp even after it cooled a bit. The almond extract was the little thing that made the cherries taste deeper, and my family wanted it warm with ice cream two nights in a row.
Cherry rhubarb crisp with a bubbling red center and crisp oat crumble is made for warm bowls and melting ice cream.
The Part That Keeps Cherry Rhubarb Crisp From Turning Watery
Most fruit crisps fail in one place: the filling leaks too much juice before the topping has time to set. Rhubarb is especially good at that because it releases a lot of liquid as it bakes, and cherries do the same thing once their skins split. Cornstarch solves the problem, but only if it’s mixed evenly with the fruit before the dish goes into the oven.
The other detail that matters is the bake itself. You want the edges bubbling before you pull it out, not just the top looking done. That bubbling tells you the cornstarch has reached the temperature it needs to thicken. If you stop too early, the crisp will look fine on top and stay loose underneath.
What Each Ingredient Is Actually Doing In This Dessert
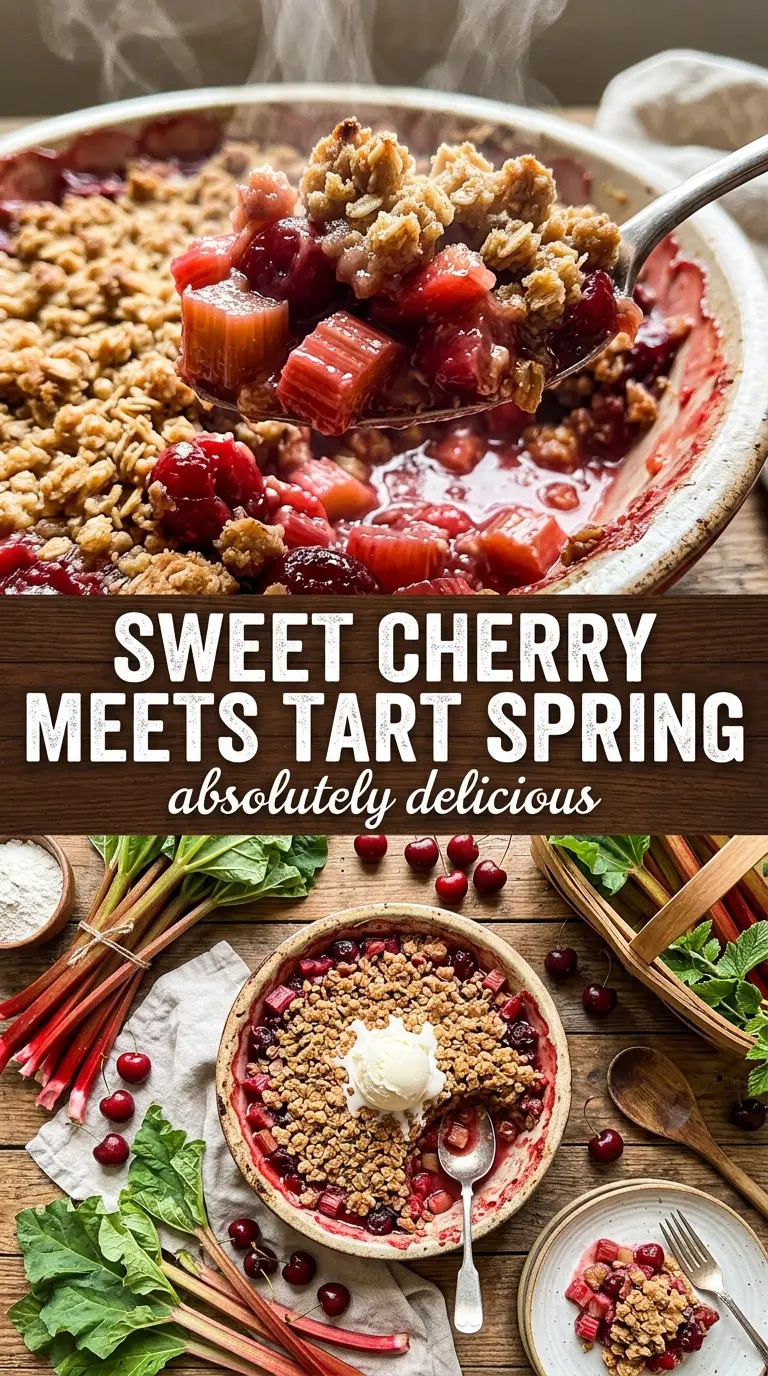
- Rhubarb — This gives the crisp its tart backbone and the soft, almost silky texture that makes the filling interesting. Cut it into even half-inch pieces so it cooks at the same pace as the cherries. Bigger chunks stay too firm; smaller ones melt away.
- Cherries — Fresh or frozen both work here. Frozen cherries do release a bit more juice, which is fine because the cornstarch is built to handle it. If you use frozen fruit, don’t thaw it first or you’ll lose too much liquid before it ever reaches the oven.
- Cornstarch — This is the thickener that turns all that fruit juice into a glossy sauce instead of a puddle. It needs to be tossed thoroughly with the sugar and fruit so it doesn’t clump. Arrowroot can work in a pinch, but the filling will be a little softer.
- Almond extract — You don’t taste almond in a loud way; it sharpens the cherry flavor and makes the fruit taste fuller. A tiny amount is enough. More than that starts to take over.
- Old-fashioned oats — These give the topping its chewy-crisp texture. Quick oats will work, but the crumble comes out finer and less textured. Old-fashioned oats hold up better and bake into more distinct clusters.
- Melted butter — Melted butter makes the topping easy to mix and helps create those sandy pieces that bake into a sturdy crust. Cold butter would give you a more classic streusel, but this version is faster and still crisp.
Building the Fruit Layer And Crisp Topping In the Right Order
Coating the Fruit Evenly
Start by combining the cherries, rhubarb, sugar, cornstarch, vanilla, and almond extract until every piece looks lightly coated and glossy. If you see dry pockets of cornstarch, keep tossing; those turn into pasty lumps after baking. Spread the fruit in the dish in an even layer so the filling cooks at the same rate across the pan.
Mixing the Crumble Without Overworking It
Stir the oats, flour, brown sugar, melted butter, and cinnamon until the mixture looks evenly damp and clumpy. You want loose clusters, not a smooth paste. If you mix until it looks like dough, the topping bakes up heavy instead of crisp. Scatter it over the fruit without packing it down so steam can move through the topping while the fruit bubbles underneath.
Baking Until the Edges Bubble
Bake at 375°F until the topping is deeply golden and the filling is bubbling around the edges and in the center, about 40 to 45 minutes. If the top browns before the fruit is bubbling, tent loosely with foil and keep baking. That bubbling is the signal that the cornstarch has done its job and the crisp will set as it cools.
Letting It Rest Before Serving
The crisp needs about 15 minutes off the heat before you scoop it. Right out of the oven, the filling is too loose and will run across the plate. As it cools, the juices tighten up and the topping stays crisp instead of steaming soft under the ice cream.
Three Smart Ways to Adjust This Crisp Without Losing the Good Part
Make It Dairy-Free
Use a plant-based butter that’s meant for baking, not a soft spread from a tub. The topping still browns and crisps, though the flavor is a little less rich than with real butter. Choose one with a higher fat content so the crumble holds together instead of turning oily.
Use All Frozen Fruit
If cherries are all you have frozen, use them straight from the freezer and keep the rhubarb frozen too if it’s available that way. Frozen fruit releases more juice, so the filling may need the full bake time to thicken. Don’t add extra liquid anywhere else or the crisp can turn soupy.
Gluten-Free Version
Swap the all-purpose flour for a 1:1 gluten-free baking blend that includes xanthan gum, and confirm your oats are certified gluten-free. The texture stays close to the original, though the topping may be a touch more crumbly. Keep the butter measurement the same.
Scale It Into Smaller Ramekins
Divide the filling and topping among ramekins for individual desserts, which gives you more crisp topping per serving. The bake time drops a bit, so start checking early for bubbling edges and a golden top. This is the best move if you want more caramelized surface and less wait at the table.
Storage and Reheating
- Refrigerator: Store covered for up to 4 days. The topping softens a little, but the flavor stays good.
- Freezer: Freeze the baked crisp for up to 2 months, tightly wrapped. Thaw in the refrigerator before reheating, or the center will heat unevenly.
- Reheating: Warm uncovered in a 325°F oven until the fruit is hot and the topping crisps back up, usually 15 to 20 minutes. The microwave works in a pinch, but it softens the crumble and leaves the filling looser.
Answers to the Questions Worth Asking
Cherry Rhubarb Crisp
Ingredients
Equipment
Method
- Preheat oven to 375°F and butter a 9x13-inch baking dish with butter.
- Combine rhubarb, cherries, sugar, cornstarch, vanilla extract, and almond extract, then spread the mixture in the dish.
- Mix old-fashioned oats, all-purpose flour, brown sugar, melted butter, and cinnamon until well combined.
- Spread the oat topping evenly over the fruit mixture.
- Bake at 375°F for 40-45 minutes, until the topping is golden and the filling is bubbling.
- Cool for 15 minutes before serving warm.
- Serve with vanilla ice cream.


