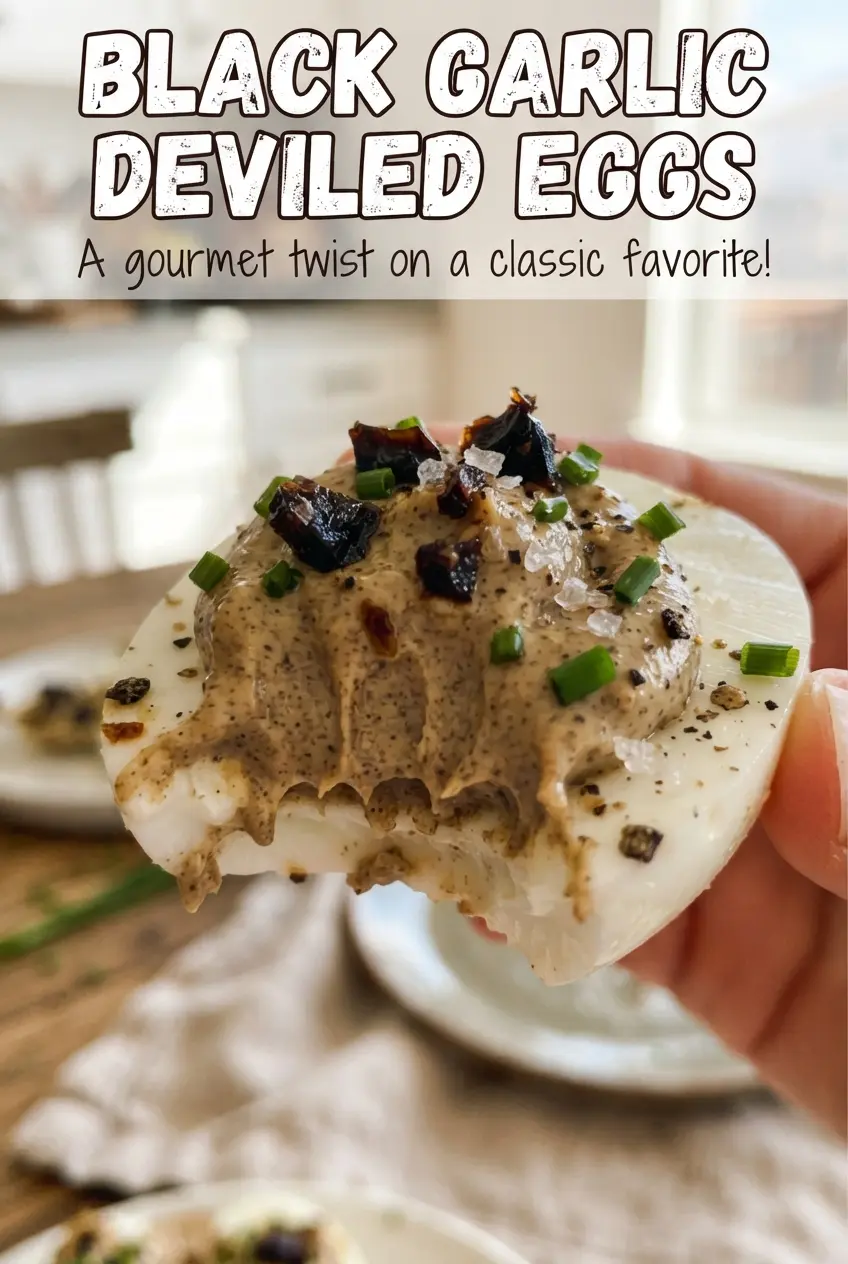
Black garlic deviled eggs land with a softer, deeper kind of savoriness than the usual picnic version. The filling is creamy and silky, but the black garlic gives it a mellow sweetness and a hint of balsamic-like richness that makes each bite taste more composed than standard deviled eggs. They still disappear fast, just with a little more interesting going on.
This version works because the black garlic is mashed into a paste before it ever meets the yolks, so it blends in instead of leaving little chewy bits. Rice vinegar keeps the filling from tasting flat, Dijon brings a clean sharp edge, and the soy sauce adds enough umami to make the garlic taste rounder, not saltier. The eggs themselves matter too: fully chilled, peeled cleanly, and halved with a steady hand so the whites hold a neat shape for piping.
Below, you’ll find the small details that keep the filling smooth, the best way to handle black garlic if you’ve never cooked with it, and a few smart swaps if you need to adapt these for a different crowd.
The black garlic made the filling taste almost caramelized, and piping it in after chilling the yolks gave me the smoothest deviled eggs I’ve made. No grainy texture at all.
Save these black garlic deviled eggs for your next appetizer spread when you want a creamy filling with a deep, savory finish.
The Trick to Keeping Black Garlic Smooth Instead of Speckled
Black garlic behaves differently from fresh garlic, and that’s part of why it works so well here. It’s soft, sticky, and naturally sweet, but if you just chop it up and stir it in, you’ll get little dark flecks instead of the smooth, almost truffle-like filling that makes these eggs stand out. Mash it into a paste first, then work it into the yolks until the mixture looks glossy and uniform.
The other place people go wrong is overthinking the filling texture. Egg yolks need enough mayonnaise to turn creamy, but not so much that the filling goes loose and slides around once piped. Start with the listed amount, then pause and look at the mixture: it should hold its shape on a spoon without feeling stiff or chalky. If the filling seems heavy, a tiny splash of vinegar loosens it better than extra mayo.
What Each Ingredient Is Actually Doing in These Eggs

- Black garlic — This is the whole point of the recipe. It brings sweetness, depth, and a soft jammy texture that fresh garlic can’t mimic. If you can only find whole cloves packed in a little moisture, that’s fine; just mash them thoroughly with the back of a spoon before adding them.
- Mayonnaise — Mayo carries the yolks into a smooth filling and gives the eggs their creamy body. Use a good one here, since there aren’t many ingredients to hide behind. If you need to cut the richness slightly, replace a tablespoon or two with plain Greek yogurt, but the filling will taste tangier and a bit less lush.
- Dijon mustard and rice vinegar — Dijon sharpens the flavor without stealing the spotlight, and rice vinegar keeps the filling bright in a cleaner way than lemon juice would. Either one alone can taste a little flat; together they keep the black garlic from reading as sweet paste. In a pinch, apple cider vinegar works, but use less because it hits harder.
- Soy sauce — This adds umami and rounds out the yolks. It also deepens the color of the filling just enough to hint at what’s inside. Use regular soy sauce, not low-sodium if that’s all you have, but add it slowly so the filling doesn’t get too dark or too salty.
- Eggs — Slightly older eggs peel more cleanly than very fresh ones. If your eggs are new from the store, the ice bath matters even more because it helps the whites contract away from the shell. That’s the difference between neat halves and ragged edges.
How to Build the Filling and Finish the Eggs Cleanly
Cooking the Eggs for Clean, Tender Whites
Put the eggs in cold water, bring them to a boil, then pull the pot off the heat and cover it. That gentle finish keeps the whites tender and helps prevent the rubbery edge that comes from a hard, rolling boil. The 12-minute rest is enough to set the yolks all the way through without turning them chalky. As soon as the time is up, move them into an ice bath so the yolks stop cooking and the shells loosen.
Mashing the Yolks Until They Turn Silky
Peel the eggs once they’re fully chilled, then split them lengthwise and pop the yolks into a bowl. Mash them first on their own so you don’t chase stubborn lumps around the bowl later. Add the mayonnaise, black garlic paste, Dijon, rice vinegar, soy sauce, and salt, then stir until the mixture looks smooth and creamy. If you see streaks of black garlic or tiny yellow crumbs, keep going; those little bits show up in the finished piping.
Piping for a Neater, More Elegant Finish
Spoon the filling into a piping bag or a zip-top bag with the corner snipped off, then pipe in a slow spiral. A good swirl sits high in the egg white and holds its shape, but it shouldn’t look whipped or airy. If the filling feels too thick to pipe smoothly, stir in a teaspoon of mayonnaise at a time. If it’s too loose, chill it for a few minutes before filling the whites.
The Garnish That Makes the Flavor Clear
Top each egg with a thin slice of black garlic and a little microgreens or chives. That garnish isn’t just decoration; it signals the flavor before the first bite and adds a fresh bite against the creamy filling. Keep the black garlic slices thin so they don’t overpower the balance you’ve built in the filling. If you’re serving these on a platter, chill them after assembling so the swirl stays sharp.
How to Adapt These Deviled Eggs for Different Crowds
Dairy-Free Version Without Losing Creaminess
These are already dairy-free as written, so you don’t need to change a thing for that swap. That’s one reason black garlic works well in appetizer food: it delivers a rich, rounded flavor without relying on cheese or cream.
Lower-Mayo Filling That Still Pipes Well
Replace up to half the mayonnaise with plain Greek yogurt if you want a lighter filling. The texture gets a little brighter and tangier, but it also loosens faster, so add the yogurt gradually and stop as soon as the mixture still holds a firm swirl.
Making Them Ahead for a Party Tray
Cook and peel the eggs up to two days ahead, then keep the whites and filling separate until the day you serve them. The filling can darken a bit in the fridge, but the flavor stays excellent. Assemble a few hours before serving so the garnishes stay fresh and the tops don’t dry out.
Storage and Reheating
- Refrigerator: Store assembled deviled eggs in a single layer, covered, for up to 2 days. The whites stay best within that window; after that, they start to weep a little and the filling can loosen.
- Freezer: Don’t freeze deviled eggs. The whites turn rubbery and watery once thawed, and the filling loses its smooth texture.
- Reheating: These are meant to be served cold. If they’ve been chilled hard, let them sit at room temperature for 10 to 15 minutes before serving so the filling tastes softer and the black garlic comes through.
Answers to the Questions Worth Asking
Black Garlic Deviled Eggs
Ingredients
Equipment
Method
- Place eggs in a pot and cover with cold water, then bring to a boil over high heat. Once boiling, cover and remove from heat, then let stand for 12 minutes until yolks are fully set (no wet centers).
- Chill the eggs in an ice bath for 10 minutes to stop cooking and make peeling cleaner. Visual cue: shells should feel cool to the touch and whites look firm.
- Peel the eggs and halve them lengthwise. Arrange the halves cut-side up so the yolk grooves catch the filling.
- Mash the yolks with mayonnaise, black garlic paste, Dijon mustard, rice vinegar, soy sauce, and salt until smooth. Visual cue: the mixture should look pale and creamy with no yolk lumps.
- Pipe or spoon the filling into the egg whites, mounding slightly for a neat finish. Visual cue: each white should be evenly filled and level.
- Top each egg with a thinly sliced piece of black garlic. Visual cue: the garnish should be a dark slice centered on the filling.
- Garnish with microgreens or chives. Visual cue: add a small tuft or sprinkle right before serving for the freshest look.