
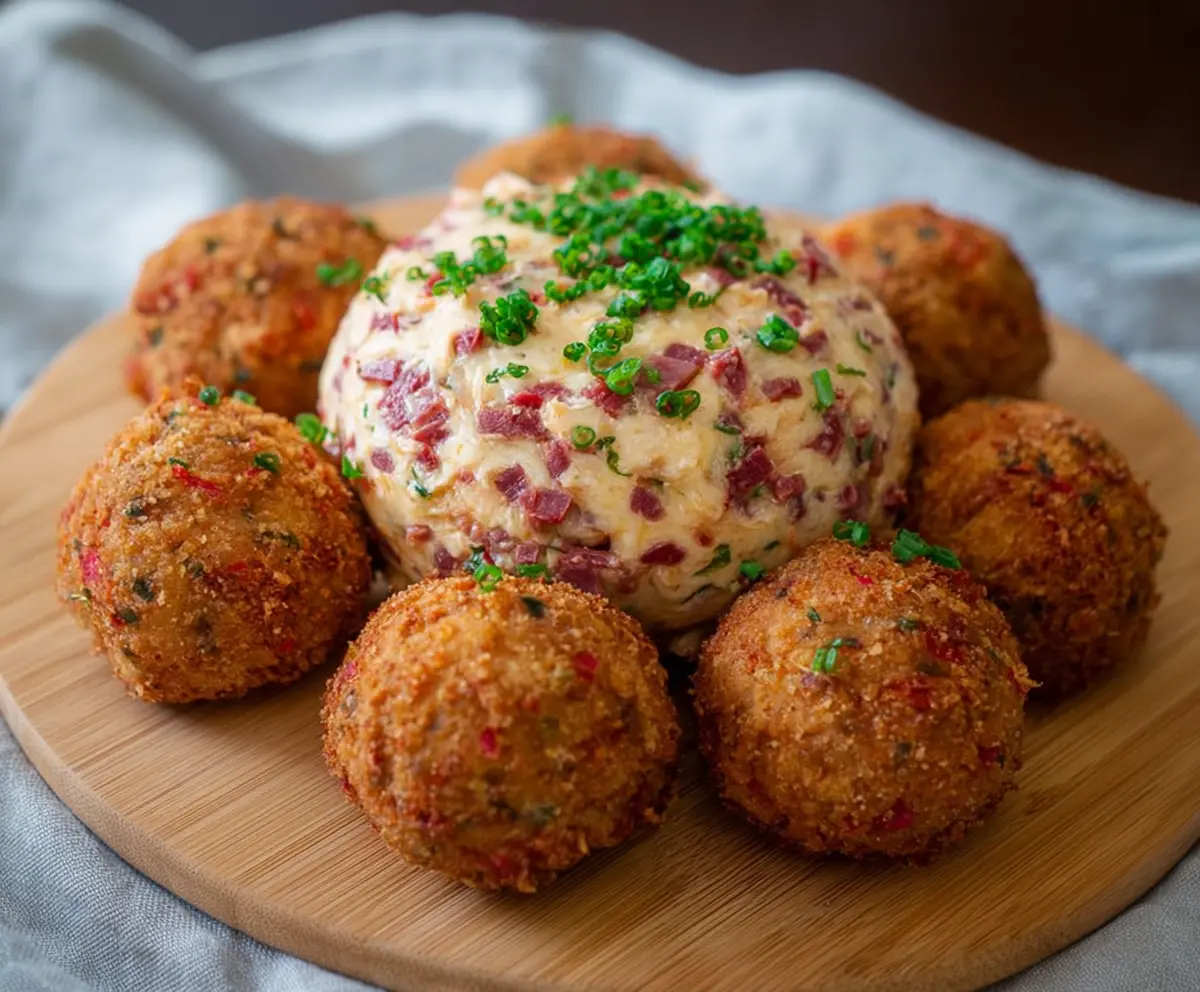
These corned beef and cheese balls are packed with flavor and are super fun to eat! With tender corned beef and creamy cheese all rolled into neat little bites, they’re perfect for parties.
Honestly, who can resist a cheesy snack? I love serving these with a tasty dip on the side. You’ll see everyone reaching for more—just be prepared to share! 😄
Key Ingredients & Substitutions
Corned Beef: This dish shines with cooked corned beef. If you don’t have it, try using leftover brisket or even canned corned beef for a quicker option. I sometimes go for the deli slices when I’m short on time.
Cheddar Cheese: While shredded cheddar gives a great flavor, feel free to swap it with Monterey Jack, Gouda, or even a spicy pepper jack for a kick! I love mixing cheeses for extra depth.
Mashed Potatoes: Leftover mashed potatoes are perfect here, but if you need a quick option, instant mashed potatoes can do the trick. Just make sure they’re well-mixed and chilled before use.
Green Onions: These add a nice fresh touch. You can substitute with chives or shallots if you’re out. Adding some diced bell pepper will give a colorful twist!
Breadcrumbs: Italian-style breadcrumbs can add extra flavor. If you don’t have breadcrumbs, crushed crackers or panko work well too. I often use panko for an extra crunch.
How Do I Get the Corned Beef and Cheese Balls Crispy?
Getting these balls crispy is all about the coating and frying method. It’s crucial to properly coat each ball before frying to achieve that delicious crunch. Here’s a detailed way to get it just right:
- Use a light hand when coating each ball with flour; it should just be a thin layer.
- Allow excess egg wash to drip off before moving to breadcrumbs. This helps the coating stick better.
- Make sure your oil is hot enough—around 350°F (175°C) is ideal. Use a kitchen thermometer for accuracy.
- Fry in small batches. Overcrowding lowers the oil temperature, leading to soggy balls. Keep them moving gently if needed.
- Drain on paper towels promptly after frying to keep them crispy.
How to Make Corned Beef and Cheese Balls
Ingredients You’ll Need:
For the Mixture:
- 1 cup cooked corned beef, finely chopped or shredded
- 1 cup shredded cheddar cheese (or your favorite cheese)
- 2 cups mashed potatoes (preferably cooled)
- 1/4 cup chopped green onions (plus extra for garnish)
- 1/4 cup chopped fresh parsley
- 1 teaspoon garlic powder
- 1/2 teaspoon black pepper
- 1/2 teaspoon salt (adjust to taste)
For Coating:
- 1/2 cup all-purpose flour (for coating)
- 2 eggs, beaten
- 1 to 1 1/2 cups breadcrumbs (for coating)
- Oil for deep frying
How Much Time Will You Need?
This recipe takes about 20 minutes of preparation time, plus around 10 minutes of frying time. You’ll need an additional few minutes for setting everything up, so plan for about 30 minutes in total to enjoy these delicious bites!
Step-by-Step Instructions:
1. Mixing the Ingredients:
In a large mixing bowl, combine the cooled mashed potatoes, chopped corned beef, shredded cheese, chopped green onions, chopped parsley, garlic powder, salt, and pepper. Use a spoon or your hands to mix everything together until it’s well combined and all the ingredients are evenly distributed. It should be a nice, fluffy mixture!
2. Shaping the Balls:
With clean hands, take a portion of the mixture and shape it into small balls, about the size of a golf ball. Try to make them uniform in size so they cook evenly. Place them on a plate as you go along; don’t worry about them being perfect!
3. Setting Up for Coating:
Prepare three separate bowls: one with all-purpose flour, another with the beaten eggs, and the third with breadcrumbs. This is your assembly line! Mixing it up here ensures the balls get a perfect crispy coating.
4. Coating the Balls:
Take each ball and roll it in the flour first, covering it lightly. Then dip it into the beaten egg, letting any excess drip off. Finally, coat it thoroughly with breadcrumbs, ensuring it’s well covered. This triple coating helps achieve that golden, crispy texture that we all love!
5. Heating the Oil:
In a deep frying pan or pot, heat the oil over medium heat until it reaches about 350°F (175°C). If you don’t have a thermometer, you can test the oil by dropping in a small piece of bread; if it sizzles immediately, you’re ready to fry!
6. Frying the Balls:
Carefully add the coated balls to the hot oil in batches. Be careful not to overcrowd the pan; this will keep the temperature consistent and ensure they cook evenly. Fry them for about 3-4 minutes, or until they are golden brown and crispy on all sides. Keep an eye on them to avoid burning!
7. Draining Excess Oil:
Once they’re done frying, use a slotted spoon to remove the balls from the oil and place them on paper towels to drain any excess oil. This step helps keep them crispy and not greasy!
8. Serving:
Serve the corned beef and cheese balls warm, garnished with extra chopped green onions if you’d like. They’re delicious on their own but also pair wonderfully with a creamy cheese dip or your favorite dipping sauce. Enjoy every cheesy, crispy bite!
Can I Use Leftover Corned Beef for This Recipe?
Absolutely! Leftover corned beef works perfectly for these cheese balls. Just ensure it’s finely chopped or shredded to mix well with the other ingredients.
What Can I Substitute for Mashed Potatoes?
If you don’t have mashed potatoes, you can use instant mashed potatoes or even sweet potatoes for a different flavor. Just make sure they’re well-mixed and cooled before using.
How Can I Make These Gluten-Free?
To make this recipe gluten-free, you can use a gluten-free all-purpose flour and gluten-free breadcrumbs. Look for certified options to ensure safety!
Can I Bake These Instead of Frying?
Yes, you can bake these cheese balls! Preheat your oven to 400°F (200°C) and place the coated balls on a parchment-lined baking sheet. Bake for about 20-25 minutes or until they’re golden brown, flipping halfway through for even cooking.


