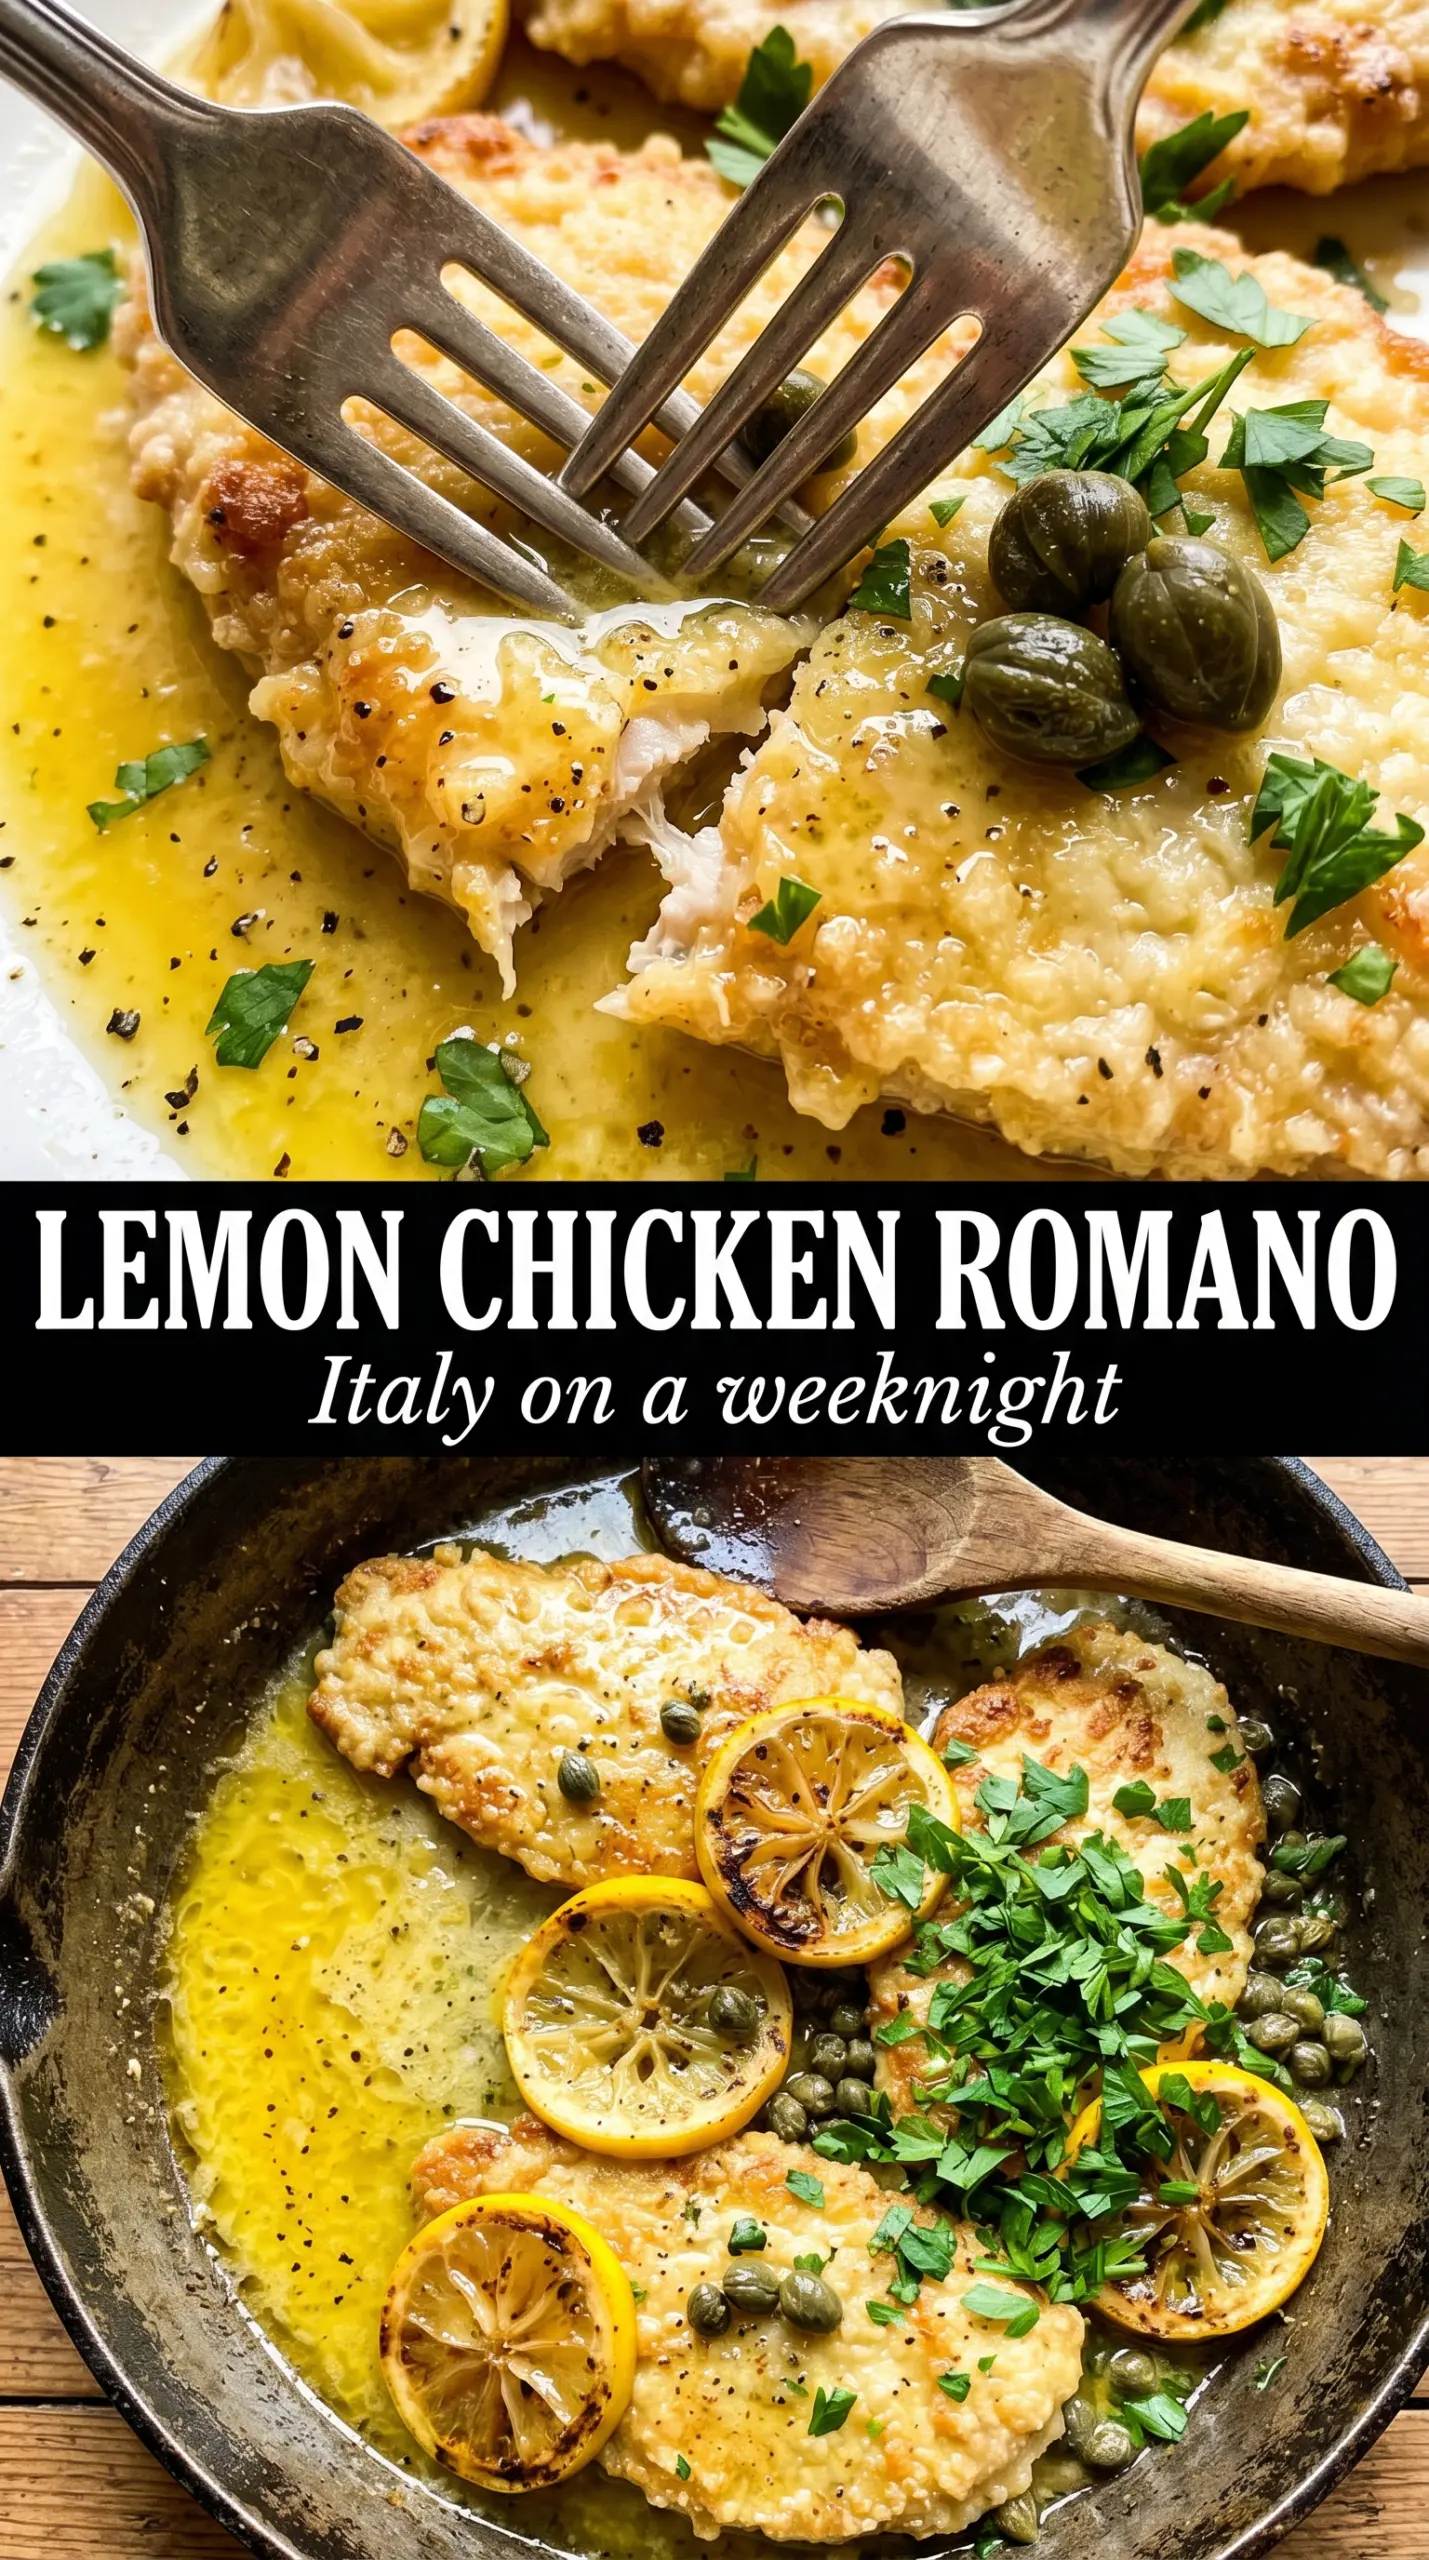
Thin chicken cutlets with a crisp Romano crust and a sharp lemon-butter pan sauce hit that sweet spot between restaurant-level and weeknight practical. The coating turns deeply golden before the chicken overcooks, and the sauce clings to every ridge instead of sliding off the plate. You get crunch first, then a bright, salty finish from the cheese, capers, and lemon.
What makes this version work is the balance in the breading and the way the sauce is built in the same skillet. Romano brings a sharper, saltier edge than milder cheeses, while a little panko keeps the crust from turning dense or leathery. The cutlets cook fast because they’re thin, which is exactly what you want here: enough time to brown the coating, not enough time to dry out the chicken.
Below, I’ll walk you through the part that matters most — keeping the crust crisp while the sauce stays glossy — plus a few smart swaps if you need to work with what’s already in your kitchen.
The chicken stayed crisp even after I spooned on the lemon sauce, and the capers kept it from tasting heavy. I used thin cutlets like you said and they cooked perfectly in about 8 minutes total.
Save this Lemon Chicken Romano for the nights when you want a shattering Romano crust and a bright lemon-caper pan sauce without a lot of cleanup.
The Crust Stays Crisp Because the Sauce Never Touches the Pan Too Soon
The biggest mistake with breaded chicken is rushing the sauce before the crust has set. If the cutlets go straight from the pan into liquid, steam softens that cheese coating and you lose the best part of the dish before dinner even starts. Here, the chicken comes out first and rests while the pan is used for the sauce, which keeps the crust intact and gives you better control over the final texture.
Thin cutlets matter here more than almost anything else. They cook through quickly, so the coating has time to brown properly without the chicken getting tough. If your cutlets are uneven, pound them lightly or trim them into pieces that are close in thickness so the pan doesn’t give you one dry piece and one undercooked one.
- Cutlets — Halving the chicken breasts gives you faster, more even cooking and a better crust-to-meat ratio. Thick pieces will brown before the center is done.
- Pecorino Romano — This is the flavor anchor. It’s sharper and saltier than Parmesan, which is why the crust tastes bold instead of bland. Finely grate it so it blends with the panko and clings evenly.
- Panko — A little panko keeps the coating light and crisp. Regular breadcrumbs work in a pinch, but the crust will be denser and less jagged.
- Wine and lemon juice — The wine lifts the browned bits from the pan, and the lemon juice brings the sauce into focus. If you skip the deglazing step, the sauce tastes flat and one-note.
What Each Ingredient Is Actually Doing in This Chicken
- Chicken breasts (the protein) — Let them sit at room temperature 15 minutes before cooking. This helps them cook evenly without drying.
- Oil or butter (the cooking medium) — This prevents the chicken from drying out and carries herb and spice flavors throughout.
- Garlic (the aromatic foundation) — Fresh minced garlic mellows and becomes sweet when cooked. Don’t brown it or it turns bitter.
- Cream or sauce (the moisture keeper) — This prevents the chicken from drying out during cooking. Balance richness with acid.
- Lemon, wine, or acid (the brightness) — This prevents heavy cream sauces from tasting flat. Add at the end to preserve freshness.
- Fresh herbs (basil, thyme, parsley) — Add some during cooking and some after so you get both cooked and fresh flavors.
- Cheese or toppings (optional richness) — These add creaminess and depth. Don’t overdo it or the dish becomes heavy.
- Proper oven temperature (375-400°F) or pan heat — This cooks chicken through without drying the edges. Use a thermometer for 165°F.
Getting the Romano Coating Golden Before the Sauce Goes In
Set Up a Dry, Clean Breading Line
Season the chicken first, then set out flour, beaten egg, and the Romano-panko mixture in separate shallow dishes. The flour gives the egg something to grip, and the egg gives the cheese coating a chance to adhere instead of sliding off in the pan. If the cutlets look damp before breading, pat them dry with paper towels; extra surface moisture turns the coating gummy.
Press the Coating On, Don’t Sprinkle It On
After the flour and egg, press each cutlet firmly into the Romano mixture so the crumbs and cheese actually bond to the surface. A light dusting leaves bare spots and patchy browning. Let the coated cutlets sit for a few minutes while the pan heats; that short rest helps the crust set so it doesn’t fall off the moment it hits the oil.
Fry Until the Crust Is Deep Gold
Use a mix of olive oil and butter in a hot skillet over medium-high heat. You want a steady sizzle as soon as the chicken goes in, not a violent pop and not a lazy whisper. Cook until the crust is deep golden and the chicken releases easily from the pan, about 3 to 4 minutes per side for thin cutlets. If it sticks, it’s not ready to flip yet.
Build the Sauce in the Same Pan
Pull the chicken out and lower the heat a touch before adding the garlic. Thirty seconds is enough; once garlic starts to brown, it turns bitter fast. Pour in the wine and scrape up every browned bit, then add lemon juice and capers and let the mixture reduce for a few minutes until it looks slightly syrupy. Finish with cold butter off the heat or on very low heat so the sauce turns glossy instead of broken.
Make it with Parmesan Instead of Romano
Parmesan will give you a milder, less salty crust, which some people prefer. The chicken still fries up crisp, but you lose a little of the sharp edge that makes Romano chicken stand out. If you swap cheeses, add a pinch more salt to the flour so the breading doesn’t taste flat.
Gluten-Free Version
Use a gluten-free all-purpose flour blend for dredging and gluten-free breadcrumbs or crushed gluten-free crackers in place of panko. The crust will still brown well, but it may be a little more fragile, so let each piece rest briefly after breading before frying. Keep the pan at medium-high, not screaming hot, or the coating can burn before the chicken cooks through.
Dairy-Free Adaptation
This one is harder to turn fully dairy-free because the Romano is carrying a lot of the flavor, but you can get close with a seasoned breadcrumb coating and a dairy-free butter substitute for the sauce. Add a little nutritional yeast to the crumbs for a savory edge. The result won’t taste exactly like the original, but it still gives you crisp chicken with a bright lemon pan sauce.

Lemon Chicken Romano
Ingredients
Equipment
Method
- Season the chicken cutlets with salt and pepper to taste, then set up three stations: flour, beaten egg, and a mix of Pecorino Romano with panko.
- Dredge each cutlet in flour, dip into the beaten egg, and press firmly into the Romano coating so it adheres.
- Heat olive oil and 2 tablespoons butter in a cast iron skillet over medium-high heat, then pan-fry cutlets for 3-4 minutes per side until deeply golden and crisp; remove to a plate.
- In the same pan, cook garlic for 30 seconds, then deglaze with dry white wine and add fresh lemon juice and capers.
- Simmer the sauce for 3 minutes, then swirl in the remaining 2 tablespoons cold butter until glossy; plate the cutlets and pour sauce over, garnishing with fresh parsley.