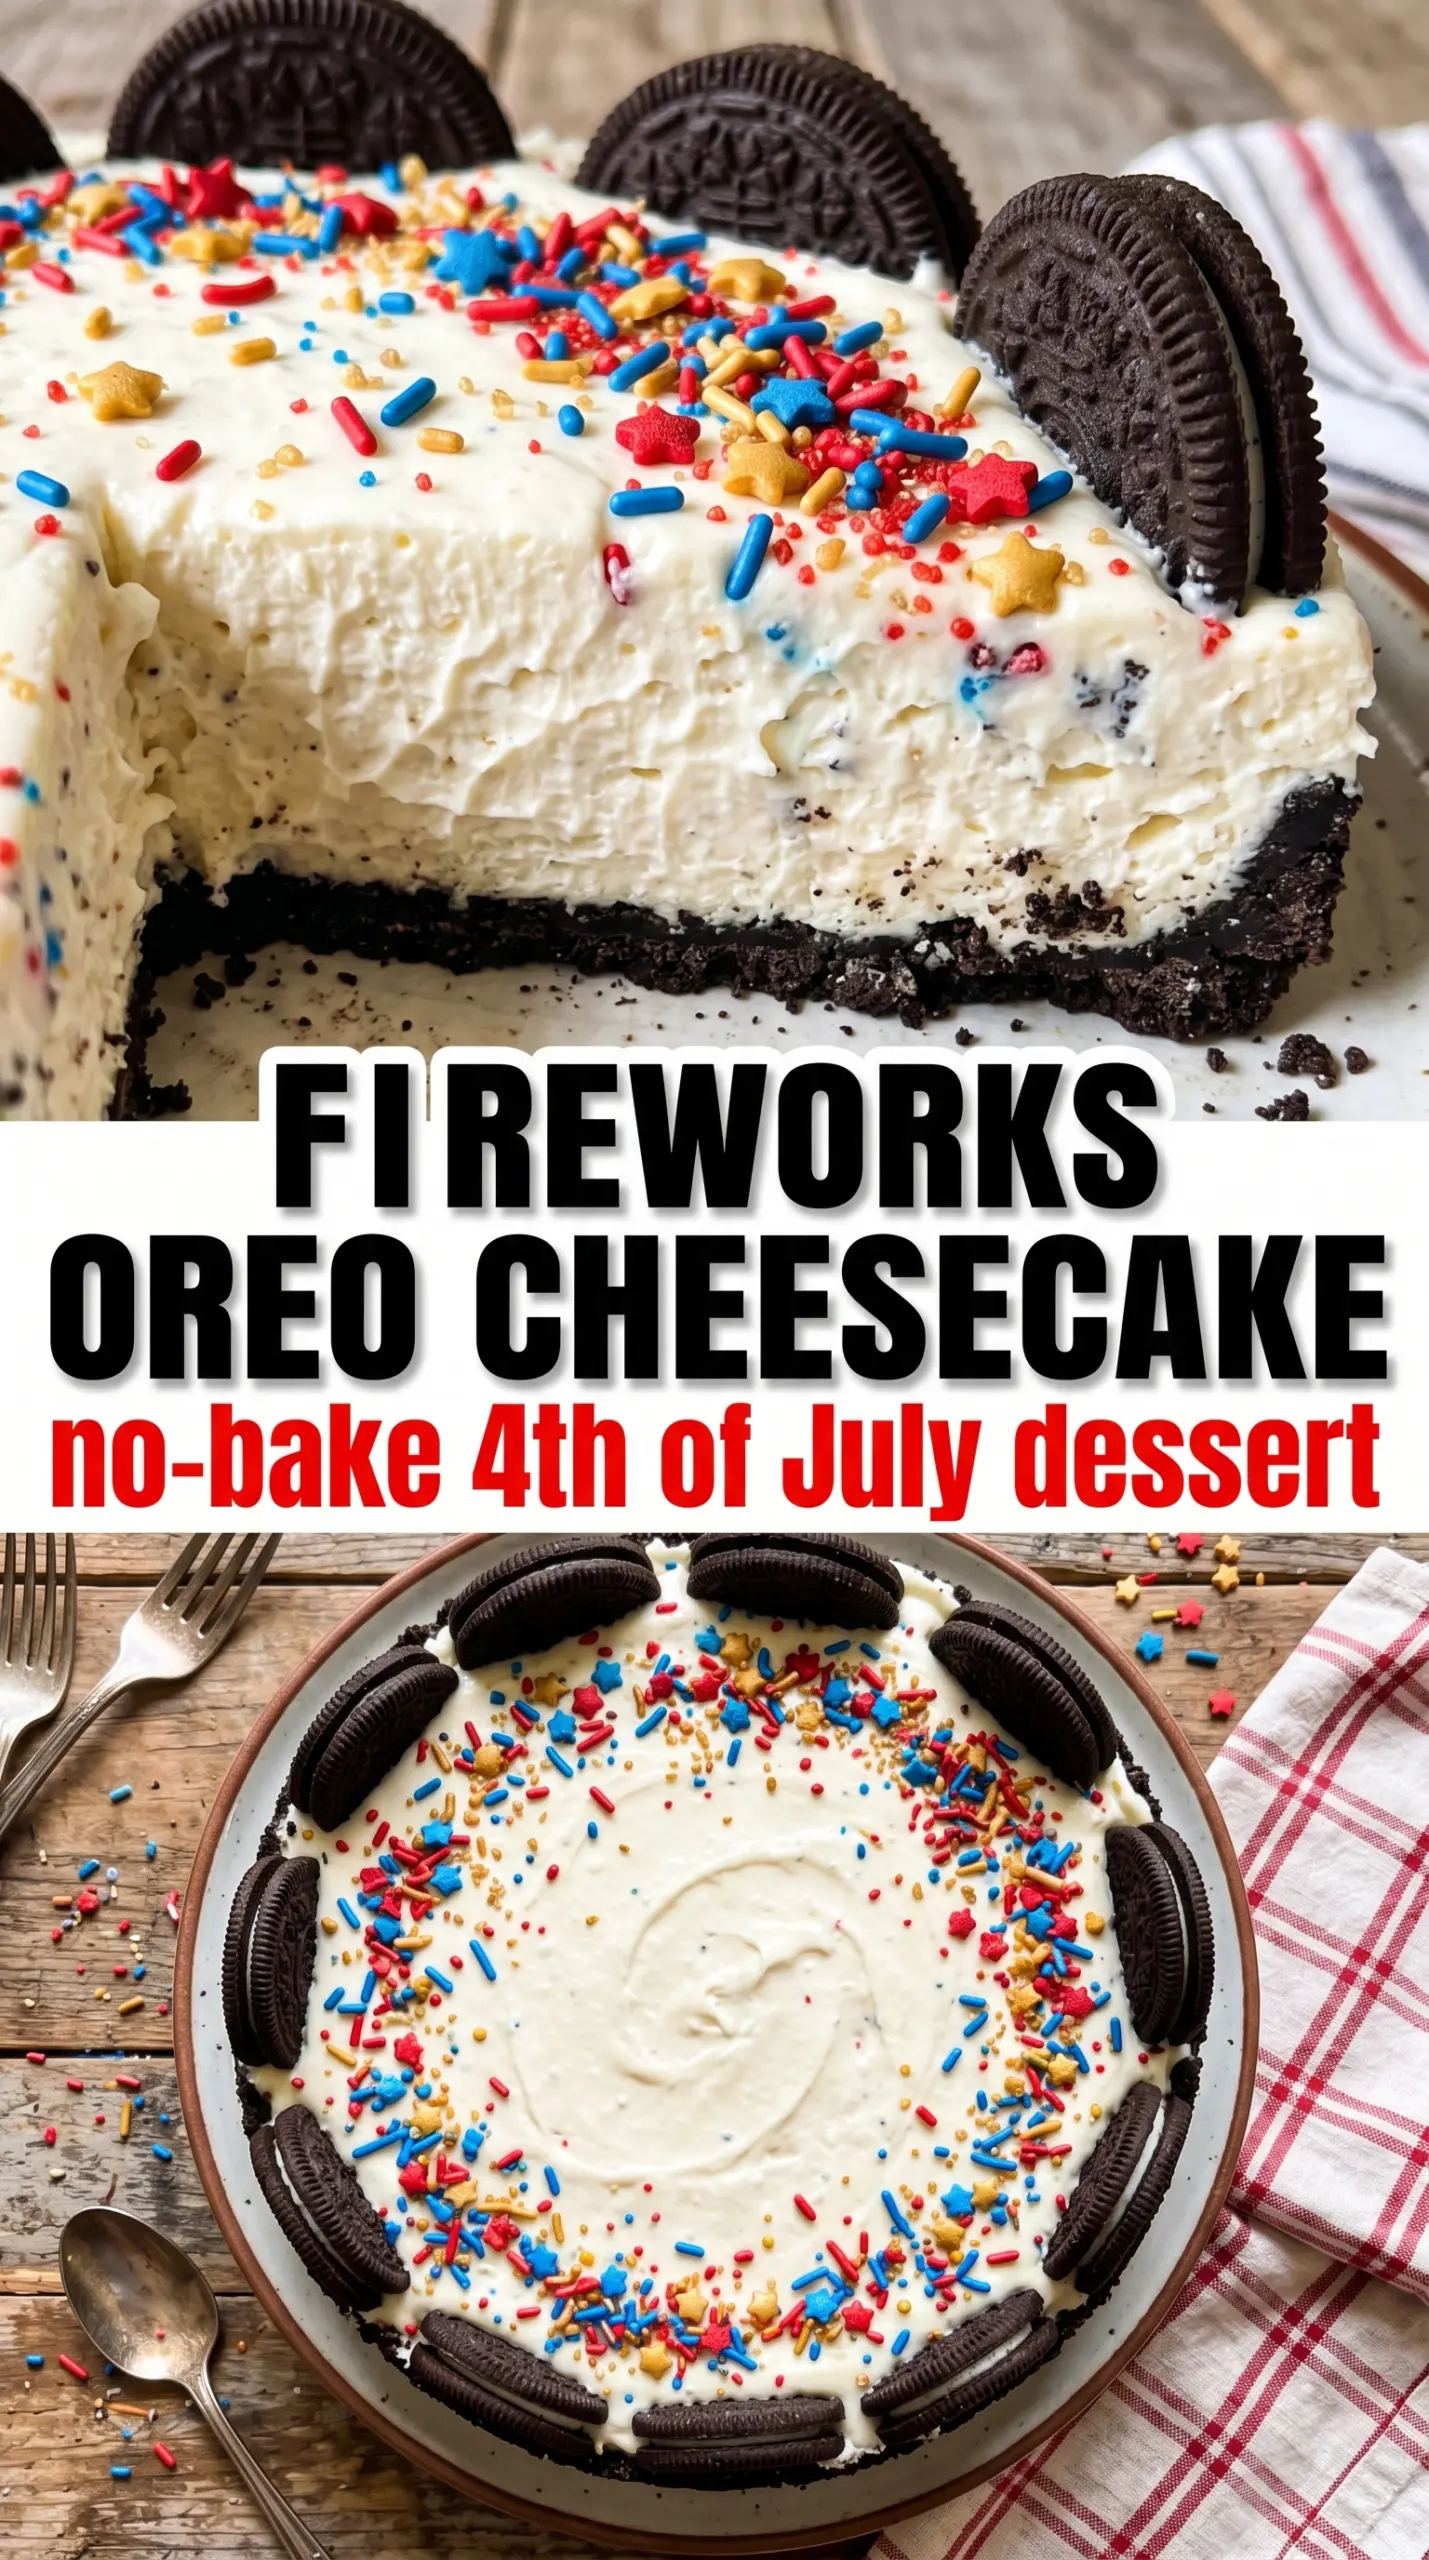
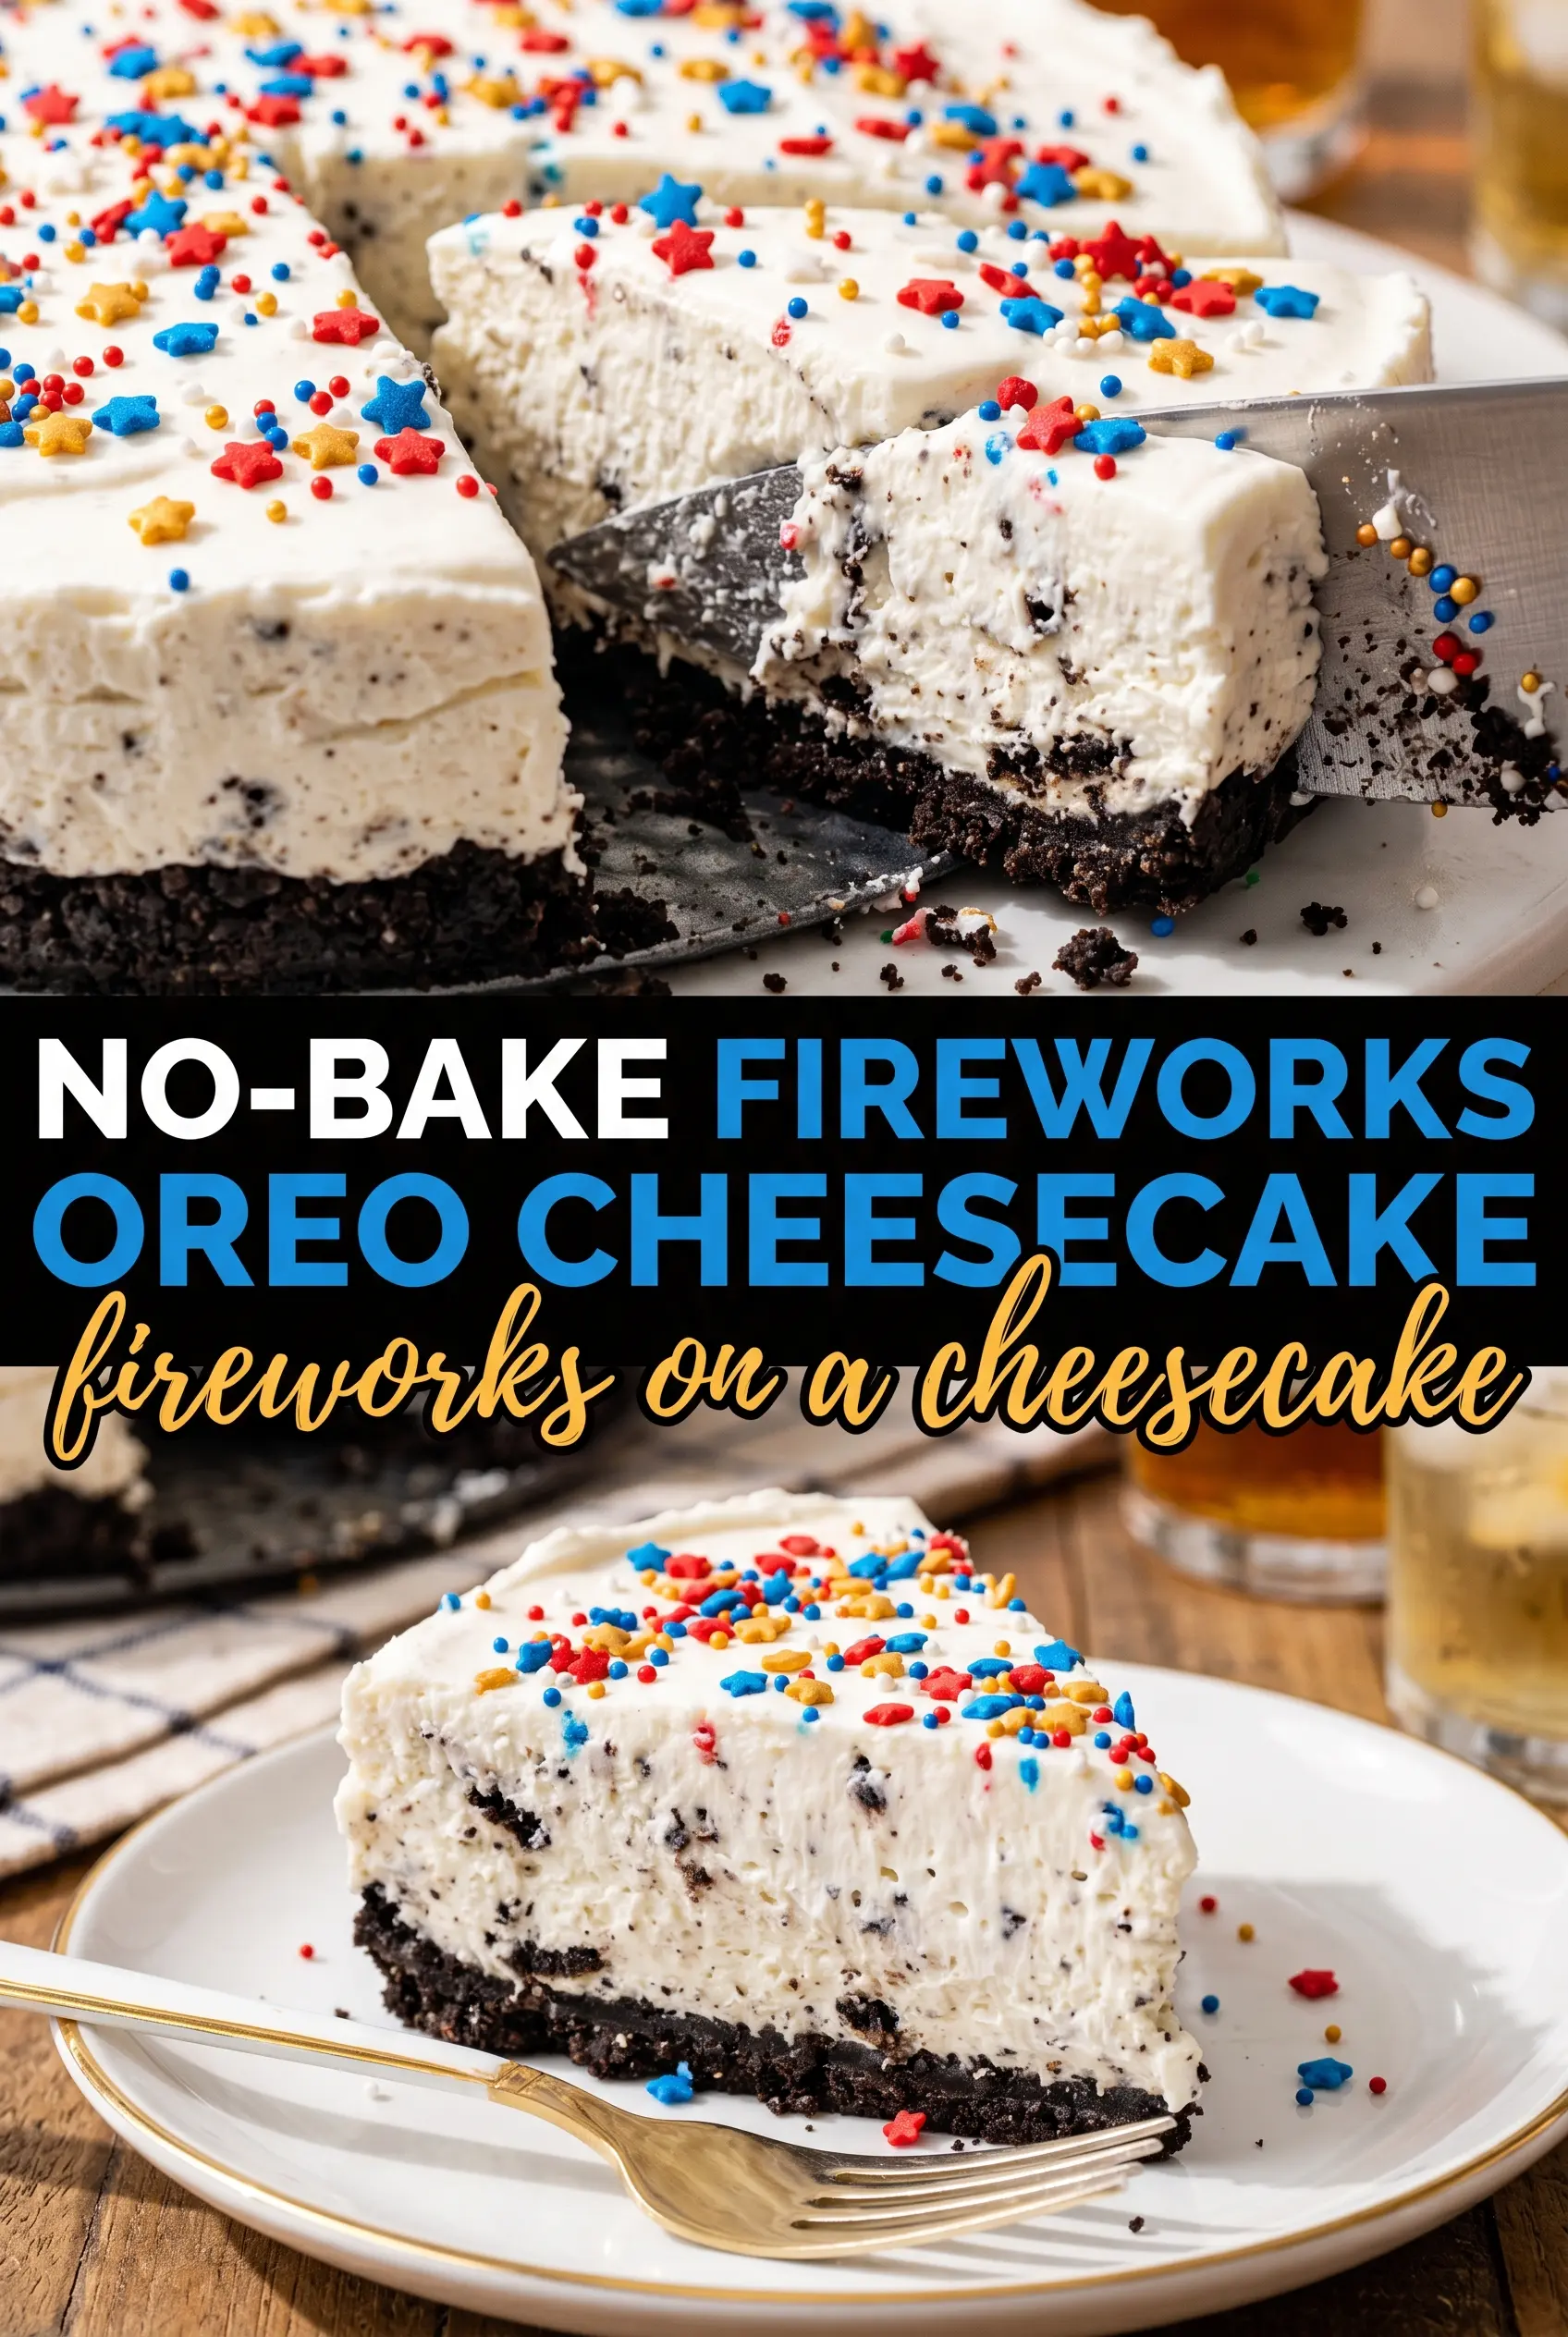
Cold, creamy cheesecake against a dark Oreo crust is already a strong combination, but the real payoff here is the finish: a slice that cuts cleanly, holds its shape, and still tastes light enough that people go back for a second piece. The whipped cream folded into the filling keeps it airy instead of dense, so you get that cheesecake richness without needing to turn on the oven.
The crust works because the melted butter coats every crumb and sets up firm in the fridge. The filling depends on two separate textures coming together at the right time: the cream cheese base has to be perfectly smooth first, and the whipped cream needs to hold stiff peaks before you fold it in. Rush either part and the cheesecake ends up grainy or loose.
Below, I’ve included the little details that matter most here: how to keep the crust from crumbling, how to fold the filling without knocking out the air, and how to decorate it so the top looks like a fireworks burst instead of a random sprinkle job.
The filling set up beautifully after overnight chilling, and the Oreo crust stayed firm enough to slice cleanly without falling apart. I also loved that the whipped cream stayed light instead of turning heavy.
Love the Oreo crust and fireworks topping? Save this no-bake Fireworks Oreo Cheesecake for the next time you want a chilled dessert that slices clean and looks party-ready.
The Filling Sets Because the Air Goes In Last
A no-bake cheesecake can go wrong long before it ever reaches the fridge. If the cream cheese is even a little lumpy, those lumps stay there forever. If the whipped cream is folded in too aggressively, the filling loses the structure that helps it slice cleanly after chilling.
The trick is to build the base smooth first, then add the whipped cream in two additions with a light hand. That keeps the filling stable without making it heavy. The other place people lose the texture is the crust: press it firmly into the pan, all the way to the edges, or it will crumble when you serve it.
- Oreos — Use the whole cookie, filling and all. The cream in the cookies helps the crust bind better than plain crumbs would, and it gives the dessert its deep chocolate base.
- Cream cheese — Let it soften fully before beating. Cold cream cheese leaves tiny bits behind, and those bits show up in the final slice. If you’re in a hurry, cut it into cubes so it softens faster.
- Heavy whipping cream — This is what gives the filling its lift and makes the texture feel mousse-like. Lower-fat cream won’t whip to the same stable peaks, so this is one place not to cut corners.
- Butter — Melted butter is what holds the crust together after chilling. If the crumbs still look dry after mixing, the crust will be sandy instead of compact.
What Each Ingredient Is Actually Doing in This Dessert
- Sugar (the sweetness and structure) — Sugar tenderizes baked goods and creams into butter to create air. Don’t skip it or reduce it too much.
- Fat (butter, oil, or cream cheese) — This carries flavors and creates tender crumb. Proper creaming with sugar adds volume to cakes.
- Eggs (the binder and lift) — Eggs create structure and help baked goods rise. Room temperature eggs incorporate better than cold ones.
- Flour (the structure) — This is what makes baked goods hold together. Don’t overmix or the texture becomes tough and dense.
- Flavoring (vanilla, chocolate, fruit, spices) — These define the personality of the dessert. Use good quality flavorings so they shine.
- Leavening (baking powder, baking soda, whipped eggs) — This creates rise and light crumb. Too much makes the dessert taste bitter.
- Liquid (milk, water, or fruit juice) — This hydrates flour and carries flavors. Too much makes the dessert dense; too little makes it dry.
- Final finish (frosting, glaze, fruit, whipped cream) — The topping adds moisture, flavor, and visual appeal. Don’t skip it or the dessert feels incomplete.
Getting the Crust Firm, the Filling Smooth, and the Top Party-Ready
Building the Oreo Base
Mix the crushed Oreos with the melted butter until every crumb looks damp, like wet sand. When you press it into the springform pan, use the bottom of a measuring cup to pack it down evenly. If you skip the firm press, the crust will loosen when you cut the first slice. Chill it before adding the filling so it sets enough to support the cheesecake layer.
Whipping the Cheesecake Filling
Beat the cream cheese, powdered sugar, and vanilla until the mixture looks completely smooth and a little glossy. Stop and scrape the bowl a few times; unmixed cream cheese likes to hide along the bottom and sides. In a separate bowl, whip the heavy cream to stiff peaks, where the whisk leaves a clear trail and the peaks stand straight up. If the cream is underwhipped, the filling can slump before it sets.
Folding Without Deflating
Add the whipped cream to the cream cheese mixture in two additions and fold with a spatula from the bottom of the bowl upward. Keep the motion deliberate and gentle. Overmixing here knocks out the air and leaves you with a dense filling instead of that light, sliceable texture. Once the mixture looks uniform, stop folding immediately.
Chilling Until It Slices Cleanly
Spread the filling over the chilled crust and smooth the top with an offset spatula. Cover the pan and refrigerate for at least 6 hours, though overnight gives the cleanest slices. If you try to serve it too early, the center will look set on top but collapse when you cut in. A fully chilled cheesecake should feel firm all the way through when you gently tap the pan.
Decorating the Fireworks Finish
Pipe whipped cream around the edge in swirls or rosettes, then scatter red and blue star sprinkles across the center. Finish with a light dusting of crushed Oreos so the top has contrast and texture. The decoration works best when the cheesecake is cold and firm; if it softens too much, the whipped cream will slide and the sprinkles will sink.
Three Ways to Adjust the Cheesecake Without Losing the Set
Make it gluten-free with certified gluten-free chocolate sandwich cookies
Swap the Oreos for a certified gluten-free version and keep the butter amount the same. The texture and flavor stay almost identical, so this is an easy change that doesn’t affect the set.
Use whipped topping for a softer, sweeter filling
You can replace the whipped cream with an equal amount of thawed whipped topping if you want a slightly sweeter, more stable filling. The texture will be lighter and a little less rich, but it’s convenient if you want a dependable no-whisk shortcut.
Turn it into individual cheesecake cups
Divide the crust and filling between small jars or dessert cups instead of using a springform pan. They chill faster and are easier to serve at a party, though you lose the tall sliced presentation.
Storage and Reheating
- Refrigerator: Store covered for up to 4 days. The crust stays crisp enough for the first couple of days, then softens slightly underneath the filling.
- Freezer: This cheesecake freezes well. Freeze the whole cheesecake or individual slices until firm, wrap tightly, and thaw overnight in the refrigerator before serving.
- Reheating: No reheating needed. Serve it chilled straight from the refrigerator, and don’t leave it out too long before slicing or the filling will start to soften.
Answers to the Questions Worth Asking
No-Bake Fireworks Oreo Cheesecake
Ingredients
Equipment
Method
- Mix the finely crushed Oreo cookies with the melted unsalted butter until the texture resembles wet sand, then press firmly into the bottom of a 9-inch springform pan.
- Refrigerate the crust until firm, about 30 minutes.
- Beat the softened cream cheese, powdered sugar, and vanilla extract until completely smooth with no lumps.
- In a separate bowl, whip the heavy whipping cream to stiff peaks.
- Fold the whipped cream into the cream cheese mixture in two additions until evenly combined and fluffy.
- Pour the filling over the chilled crust and smooth the top with an offset spatula.
- Cover and refrigerate for at least 6 hours (or overnight) until fully set and sliceable.
- Before serving, pipe whipped cream around the edge in a starburst pattern.
- Scatter red and blue star sprinkles across the center to create the fireworks look.
- Dust with crushed Oreos in a fireworks burst pattern, then slice and serve.


