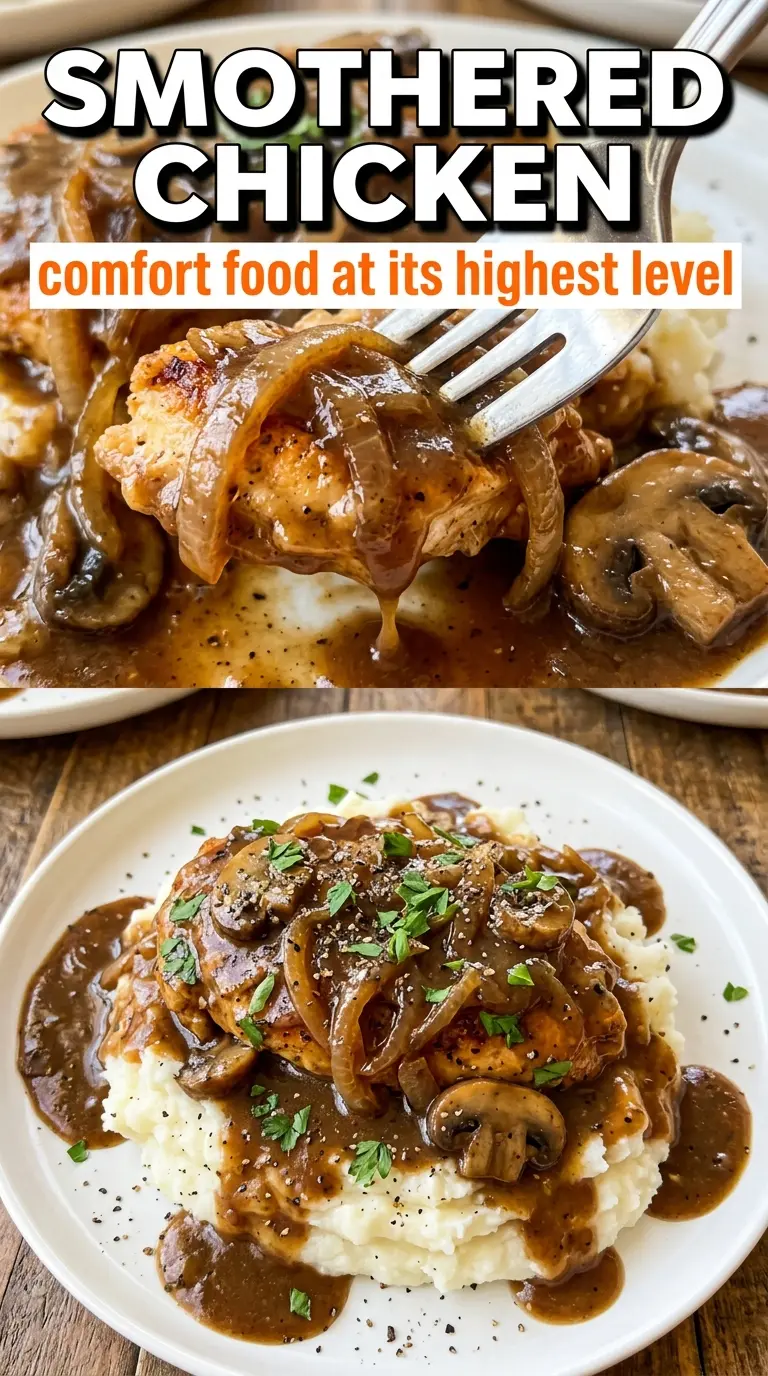
Fork-tender chicken thighs under a dark onion gravy earn a permanent place at the table because they hit the part of comfort food people keep chasing: crisp skin, juicy meat, and a sauce that tastes like it cooked all afternoon even when it didn’t. The onions melt into the broth, the mushrooms deepen the savory base, and the gravy clings to every bite instead of sliding off the plate.
This version works because the chicken gets a hard sear before anything touches the pan. That first step leaves behind browned bits that turn into the backbone of the gravy, and the flour goes in after the vegetables have cooked down so it can coat everything without tasting raw. A small splash of cream softens the edges at the end, but the sauce still stays brown, rich, and chicken-forward instead of turning pale and flat.
Below, you’ll find the timing that keeps the chicken juicy, the point where the onions need patience instead of heat, and a few smart ways to adapt the dish when you want it lighter, gluten-free, or better for leftovers.
The gravy thickened up beautifully and didn’t turn gummy at all. I used the skillet over mashed potatoes like you suggested, and the chicken stayed juicy even after the simmer.
Save this smothered chicken for the nights when you want crispy thighs, a dark onion-mushroom gravy, and one skillet doing all the work.
The Sear Is the Difference Between Gravy and Gray Sauce
A proper smothered chicken starts with color on the chicken, not just seasoning. If the thighs go into the pan and you rush them, the skin steams, the fat never renders cleanly, and the gravy later has nothing deep to build on. Give the first side time until it releases on its own and the skin looks mahogany and crisp around the edges.
The other place people lose this dish is the onion stage. The onions need to soften, then slowly go deep gold before the mushrooms and garlic go in. If you add the flour too early, the vegetables stay pale and the sauce tastes dusty instead of rich. The goal is a skillet base that already smells sweet and savory before the liquid hits the pan.
- Chicken thighs — Bone-in, skin-on thighs stay juicy through the simmer and give you enough fat for the sauce. Boneless thighs work in a pinch, but they cook faster and won’t give the gravy the same body.
- Cremini mushrooms — These add a darker, earthier note that keeps the gravy from tasting one-dimensional. White mushrooms work, but they’re milder and need a little longer in the pan to lose their moisture.
- Worcestershire sauce — This is the quiet ingredient that makes the gravy taste finished. Don’t skip it unless you have to; a tiny splash of soy sauce can stand in, but the flavor will be sharper and less rounded.
- Heavy cream — The cream smooths the gravy without turning it pale or thin. Half-and-half can work, but add it off the heat or over very low heat so it doesn’t split.
What Each Ingredient Is Actually Doing in This Recipe
- Primary ingredient (the star) — This carries the main flavor and defines the dish. Quality matters here.
- Base sauce or cooking medium (the carrier) — This brings all flavors together and keeps the dish from being dry.
- Aromatics (onion, garlic, ginger) — These add depth and complexity. They mellow and become sweet when cooked.
- Seasonings (salt, spices, herbs) — These define the personality and prevent the dish from tasting one-dimensional.
- Vegetables (nutrition and texture) — These add freshness and color. Cut to size so they cook evenly.
- Acid (lemon, vinegar, tomato, wine) — This brightens the dish and prevents it from tasting heavy or flat.
- Fat (oil, butter, cream) — This carries flavors and creates a satisfying mouthfeel. Don’t skip it.
- Proper technique (heat, time, temperature) — The right method turns good ingredients into great food. Follow the instructions carefully.
Building the Gravy in the Same Skillet
Seasoning and Searing the Chicken
Pat the thighs dry, then season them all over so the spices stick to the skin and the meat itself, not just the surface fat. Lay them skin-side down in the hot oil and leave them alone until the skin turns deeply golden and pulls away easily from the pan. If you try to flip too soon, the skin tears and you lose the clean, crisp finish that makes the whole dish better.
Working the Onions Down Slowly
After the chicken comes out, the onions go into the same skillet and pick up all the flavor left behind. Cook them over medium heat until they turn soft and brown at the edges, then add the mushrooms and garlic just long enough to drive off their moisture and build a darker base. If the pan looks dry, a splash of broth can keep the onions from scorching while they finish softening.
Thickening the Sauce Without Lumps
Sprinkle the flour over the vegetables and stir until it disappears into the fat in the pan. Let it cook for a full minute before the broth goes in so the finished gravy doesn’t taste raw or pasty. Add the broth gradually while whisking and scraping the bottom, then stir in the cream, Worcestershire, and thyme once the sauce looks smooth and starts to thicken.
Returning the Chicken to Finish
Set the chicken back in skin-side up so the top stays crisp while the bottom bathes in the gravy. Cover the skillet and let it simmer gently until the thighs are cooked through and the meat yields easily at the bone. If the sauce gets too thick before the chicken is done, thin it with a splash of broth instead of turning the heat up and risking a broken gravy.
Make It Gluten-Free With One Swap
Use a gluten-free all-purpose flour blend in place of regular flour. The gravy will still thicken, but some blends need an extra minute of simmering to lose the grainy edge, so cook it until the sauce looks smooth before the chicken goes back in.
Dairy-Free Smothered Chicken
Skip the cream and finish with a little extra broth for a looser onion gravy, or use an unsweetened dairy-free cooking cream if you want the sauce to stay richer. The flavor stays deep and savory, but the texture will be a touch lighter and less plush.
Boneless Thighs or Chicken Breasts
Boneless thighs work well and need less simmer time, which makes them a good weeknight swap. Chicken breasts can be used, but they dry out faster and need gentler heat, so pull them as soon as they reach doneness and don’t let them bubble hard in the gravy.
What to Serve It With
Mashed potatoes are the classic landing spot because they catch the gravy, but rice, buttered noodles, or even skillet biscuits work just as well. Pick something plain and starchy so the onion gravy stays the main event.
Storage and Reheating
- Refrigerator: Keep in an airtight container for up to 4 days. The gravy will thicken as it chills, which is normal.
- Freezer: It freezes well for up to 2 months, though the cream may look a little less silky after thawing. Freeze the chicken and gravy together, then thaw overnight in the fridge.
- Reheating: Warm gently on the stove over low heat with a splash of broth to loosen the sauce. High heat is what dries out the chicken and can make the gravy separate.
Answers to the Questions Worth Asking

Smothered Chicken
Ingredients
Equipment
Method
- Season chicken thighs all over with garlic powder, onion powder, smoked paprika, salt, and cracked black pepper to taste.
- Heat vegetable oil in a cast iron skillet over medium-high heat and sear chicken skin-side down for 6-7 minutes until deeply golden, then flip and sear 4 minutes; remove to a plate.
- In the same skillet, cook the onion over medium heat for 6-7 minutes until deeply caramelized.
- Add mushrooms and garlic and cook 4-5 minutes, stirring until the mushrooms release their juices.
- Sprinkle all-purpose flour over the vegetables and stir for 1 minute to cook out the raw flour taste.
- Gradually whisk in chicken broth while scraping up the browned bits from the skillet.
- Stir in heavy cream, Worcestershire sauce, and dried thyme.
- Return chicken to the skillet skin-side up, cover, and simmer for 15 minutes until cooked through.
- Garnish with fresh parsley and serve over mashed potatoes or rice, spooning the thick dark gravy over the top and around the edges.