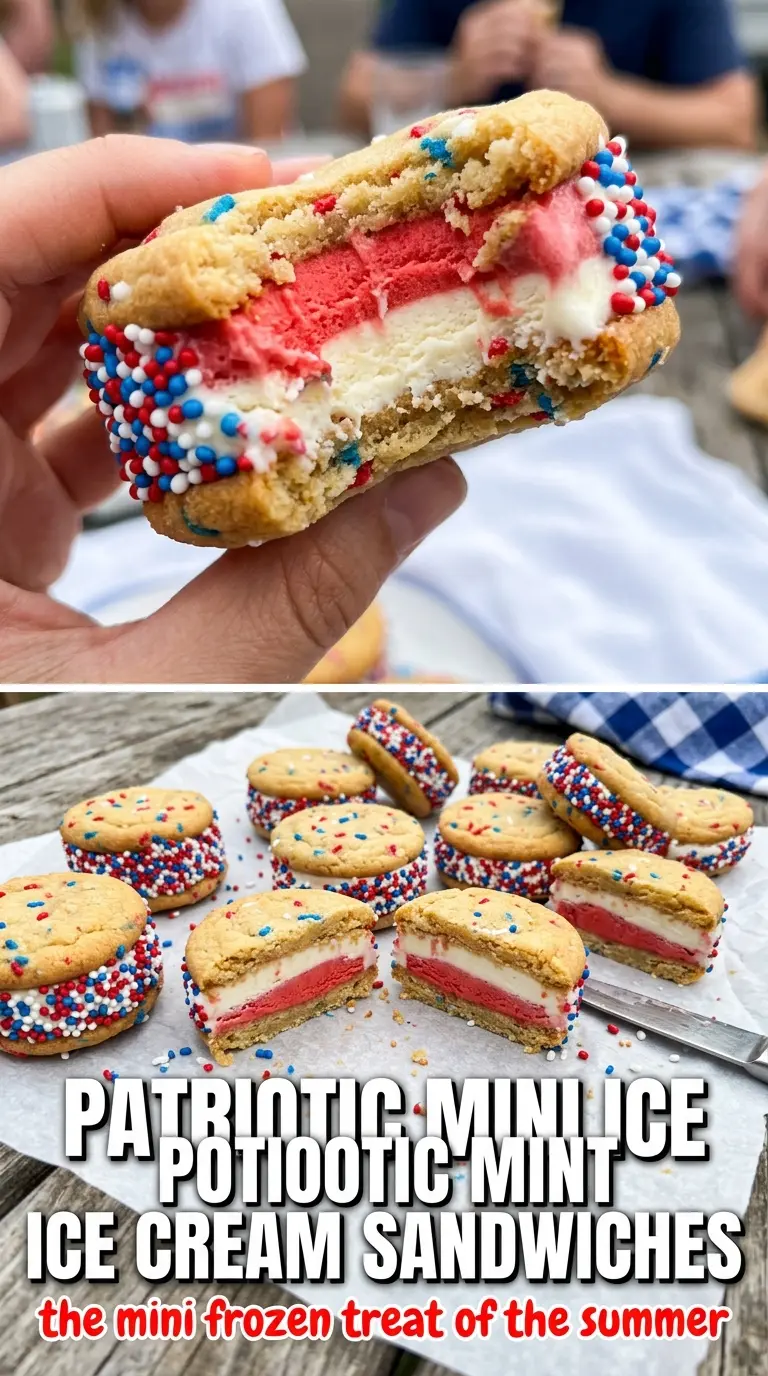
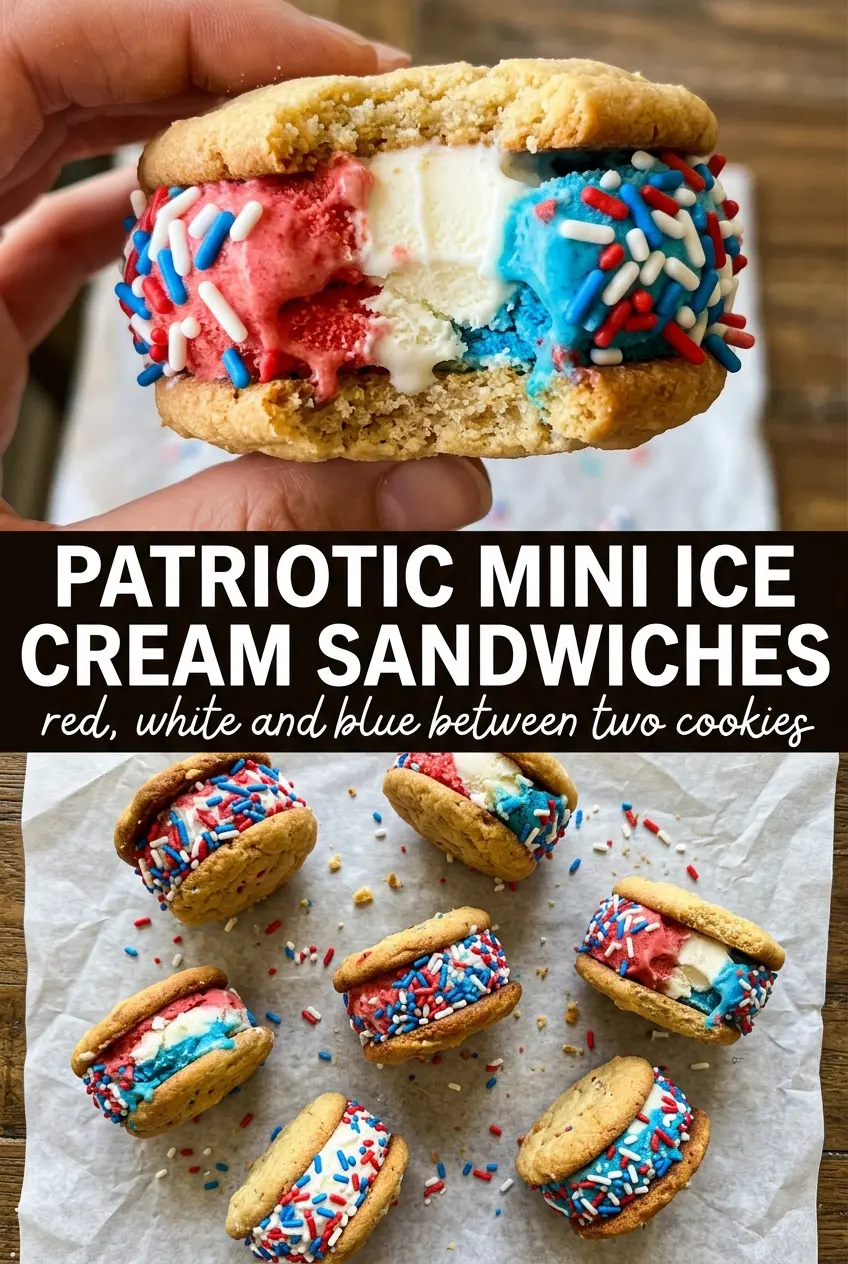
Patriotic mini ice cream sandwiches hit that sweet spot between nostalgic and party-ready: soft, chewy cookies, cold vanilla ice cream, and a bright sprinkle border that makes every bite look as festive as it tastes. The mini size matters here. You get the full ice cream sandwich experience without the mess that comes from trying to wrestle a giant frozen slab after the first minute on the table.
The cookie base starts with cake mix, which keeps the texture tender and gives you consistent results with very little effort. The key is not overbaking them; you want them set at the edges and still soft enough to stay pleasant once frozen. A quick freeze on the cookies before assembly helps them handle the ice cream without cracking, and wrapping each sandwich tight keeps the cookies from drying out while the filling firms up.
Below, you’ll find the small details that make these work smoothly, including the best way to soften the ice cream just enough for scooping, how to keep the sprinkle coating neat, and a few smart variations if you want to change the cookie base or make them ahead for a crowd.
The cookies stayed soft after freezing, and the sprinkle edge held on better than I expected. I let the ice cream soften for about 10 minutes and the sandwiches came together fast without squishing out the filling.
Save these patriotic mini ice cream sandwiches for a red, white, and blue dessert that stays neat, chewy, and crowd-friendly.
The Part That Keeps Ice Cream Sandwiches from Turning Sloppy
The difference between a clean sandwich and a messy one comes down to temperature control. Warm cookies, ice cream that is too soft, or a long pause between assembly and freezing all lead to squishing and leak-out. These mini sandwiches work because the cookies are cooled completely, then briefly frozen before filling so they can support the ice cream without bending or cracking.
The other piece people miss is cookie thickness. Thin cookies freeze hard and become brittle. Thick cookies never sit flat and push the ice cream out the sides. A quarter-inch thickness gives you a cookie that stays soft enough to bite but sturdy enough to hold the filling once everything firms up.
- Freeze the cookies before assembly — A 30-minute chill helps them stay intact when you press in the ice cream.
- Work in small batches — Assemble a few at a time, then return the rest to the freezer. Heat from your hands adds up fast.
- Don’t overbake — The cookies finish setting as they cool. If they go too far in the oven, they’ll turn dry after freezing.
What Each Ingredient Is Actually Doing in This Dessert
- Red velvet or chocolate cake mix — This gives you a soft, rich cookie base with very little fuss. Red velvet makes the color pop, while chocolate gives a deeper cookie flavor. Either one works because the mix already contains the flour and cocoa balance that keeps the cookies tender after freezing.
- Eggs and vegetable oil — The eggs bind the dough, and the oil keeps the cookies chewy instead of cakey. Butter will work in a pinch, but it changes the texture a bit and can make the cookies spread less evenly.
- Vanilla ice cream — Use a good vanilla you’d happily eat on its own, because it’s the center of the whole dessert. Let it soften just until scoopable, not melty. If it gets soupy, the sandwiches won’t seal cleanly.
- Red and blue sprinkles — These do more than decorate. They grip the ice cream edge and make the sandwiches look finished with almost no extra effort. Use jimmies rather than tiny nonpareils if you want cleaner rolling and less color bleeding.
- Parchment paper — It keeps the cookies from sticking and makes it easier to move them once baked. Don’t skip it unless you enjoy prying warm cookies off a pan.
Building the Cookies, Filling Them Fast, and Freezing Them Clean
Mixing the Dough Without Overworking It
Stir the cake mix, eggs, and oil just until a thick dough comes together and no dry patches remain. It will look dense, almost like a soft playdough, and that’s exactly what you want. If you keep mixing after it’s combined, the dough gets greasy and the cookies spread unevenly. A spoon or sturdy spatula works better than trying to beat it hard with a mixer.
Baking for Soft Centers
Scoop tablespoon-sized portions onto a parchment-lined sheet, then flatten them to about 1/4-inch thick circles before baking. Pull them from the oven when the tops are set and the edges are just barely firm; they should still look soft in the center. If they brown deeply, they’ll freeze into hard discs instead of pliable sandwich cookies. Let them cool completely on a wire rack before you move them to the freezer.
Assembling While Everything Is Cold
Freeze the cooled cookies for 30 minutes so they handle the ice cream better. Work with slightly softened ice cream and keep your scoops small enough that the filling sits just inside the cookie edge. Press the top cookie down gently until the ice cream reaches the rim, then roll the exposed edge in sprinkles right away. If the ice cream is too warm, the sandwich will slump before the sprinkles can stick.
Wrapping and Hardening the Finish
Wrap each sandwich tightly in plastic wrap and freeze for at least 2 hours, or until firm enough to pick up without shifting. This step matters because the wrap protects the cookies from freezer air and keeps the ice cream from picking up that stale, icy texture. If you serve them too early, the centers slide around and the edges smear. Solid, fully frozen sandwiches are cleaner to eat and easier to store.
How to Adapt These Mini Ice Cream Sandwiches for Different Crowds
Chocolate cookie version
Use a chocolate cake mix instead of red velvet if you want a darker, more classic cookie base. The chocolate flavor plays nicely with vanilla ice cream and gives the sandwiches a stronger cocoa note without changing the method.
Gluten-free swap
Use a gluten-free cake mix that bakes up in a similar soft cookie. The texture usually turns a touch more delicate, so chill the baked cookies well before filling them and handle them with a lighter hand when sandwiching.
Different ice cream flavors
Vanilla keeps the patriotic color contrast clean, but strawberry or cherry ice cream works if you want more color inside the sandwich. Just avoid mix-ins with big chunks, since they make it harder to seal the cookies neatly.
Storage and Reheating
- Refrigerator: Don’t store these in the fridge. They soften too fast and the cookies lose their shape.
- Freezer: Freeze wrapped sandwiches for up to 2 weeks. After that, the texture is still safe, but the cookies start to pick up freezer dryness.
- Reheating: No reheating needed. Let them sit at room temperature for 3 to 5 minutes before serving so the cookies soften just enough to bite cleanly without the filling sliding out.
Answers to the Questions Worth Asking
Patriotic Mini Ice Cream Sandwiches
Ingredients
Equipment
Method
- Preheat oven to 350°F and line baking sheets with parchment paper.
- Mix cake mix, eggs, and oil together until a thick dough forms.
- Scoop tablespoon-sized balls onto prepared baking sheets, flatten to about 1/4-inch thick circles, and bake for 8–10 minutes until set—do not overbake.
- Let cookies cool completely on a wire rack, then freeze for 30 minutes.
- Working quickly, place a scoop of slightly softened vanilla ice cream on the flat side of one cookie and press another cookie on top to sandwich.
- Roll the exposed ice cream edge in red and blue sprinkles to form a colorful border.
- Wrap each sandwich in plastic wrap and freeze for at least 2 hours until solid before serving.


