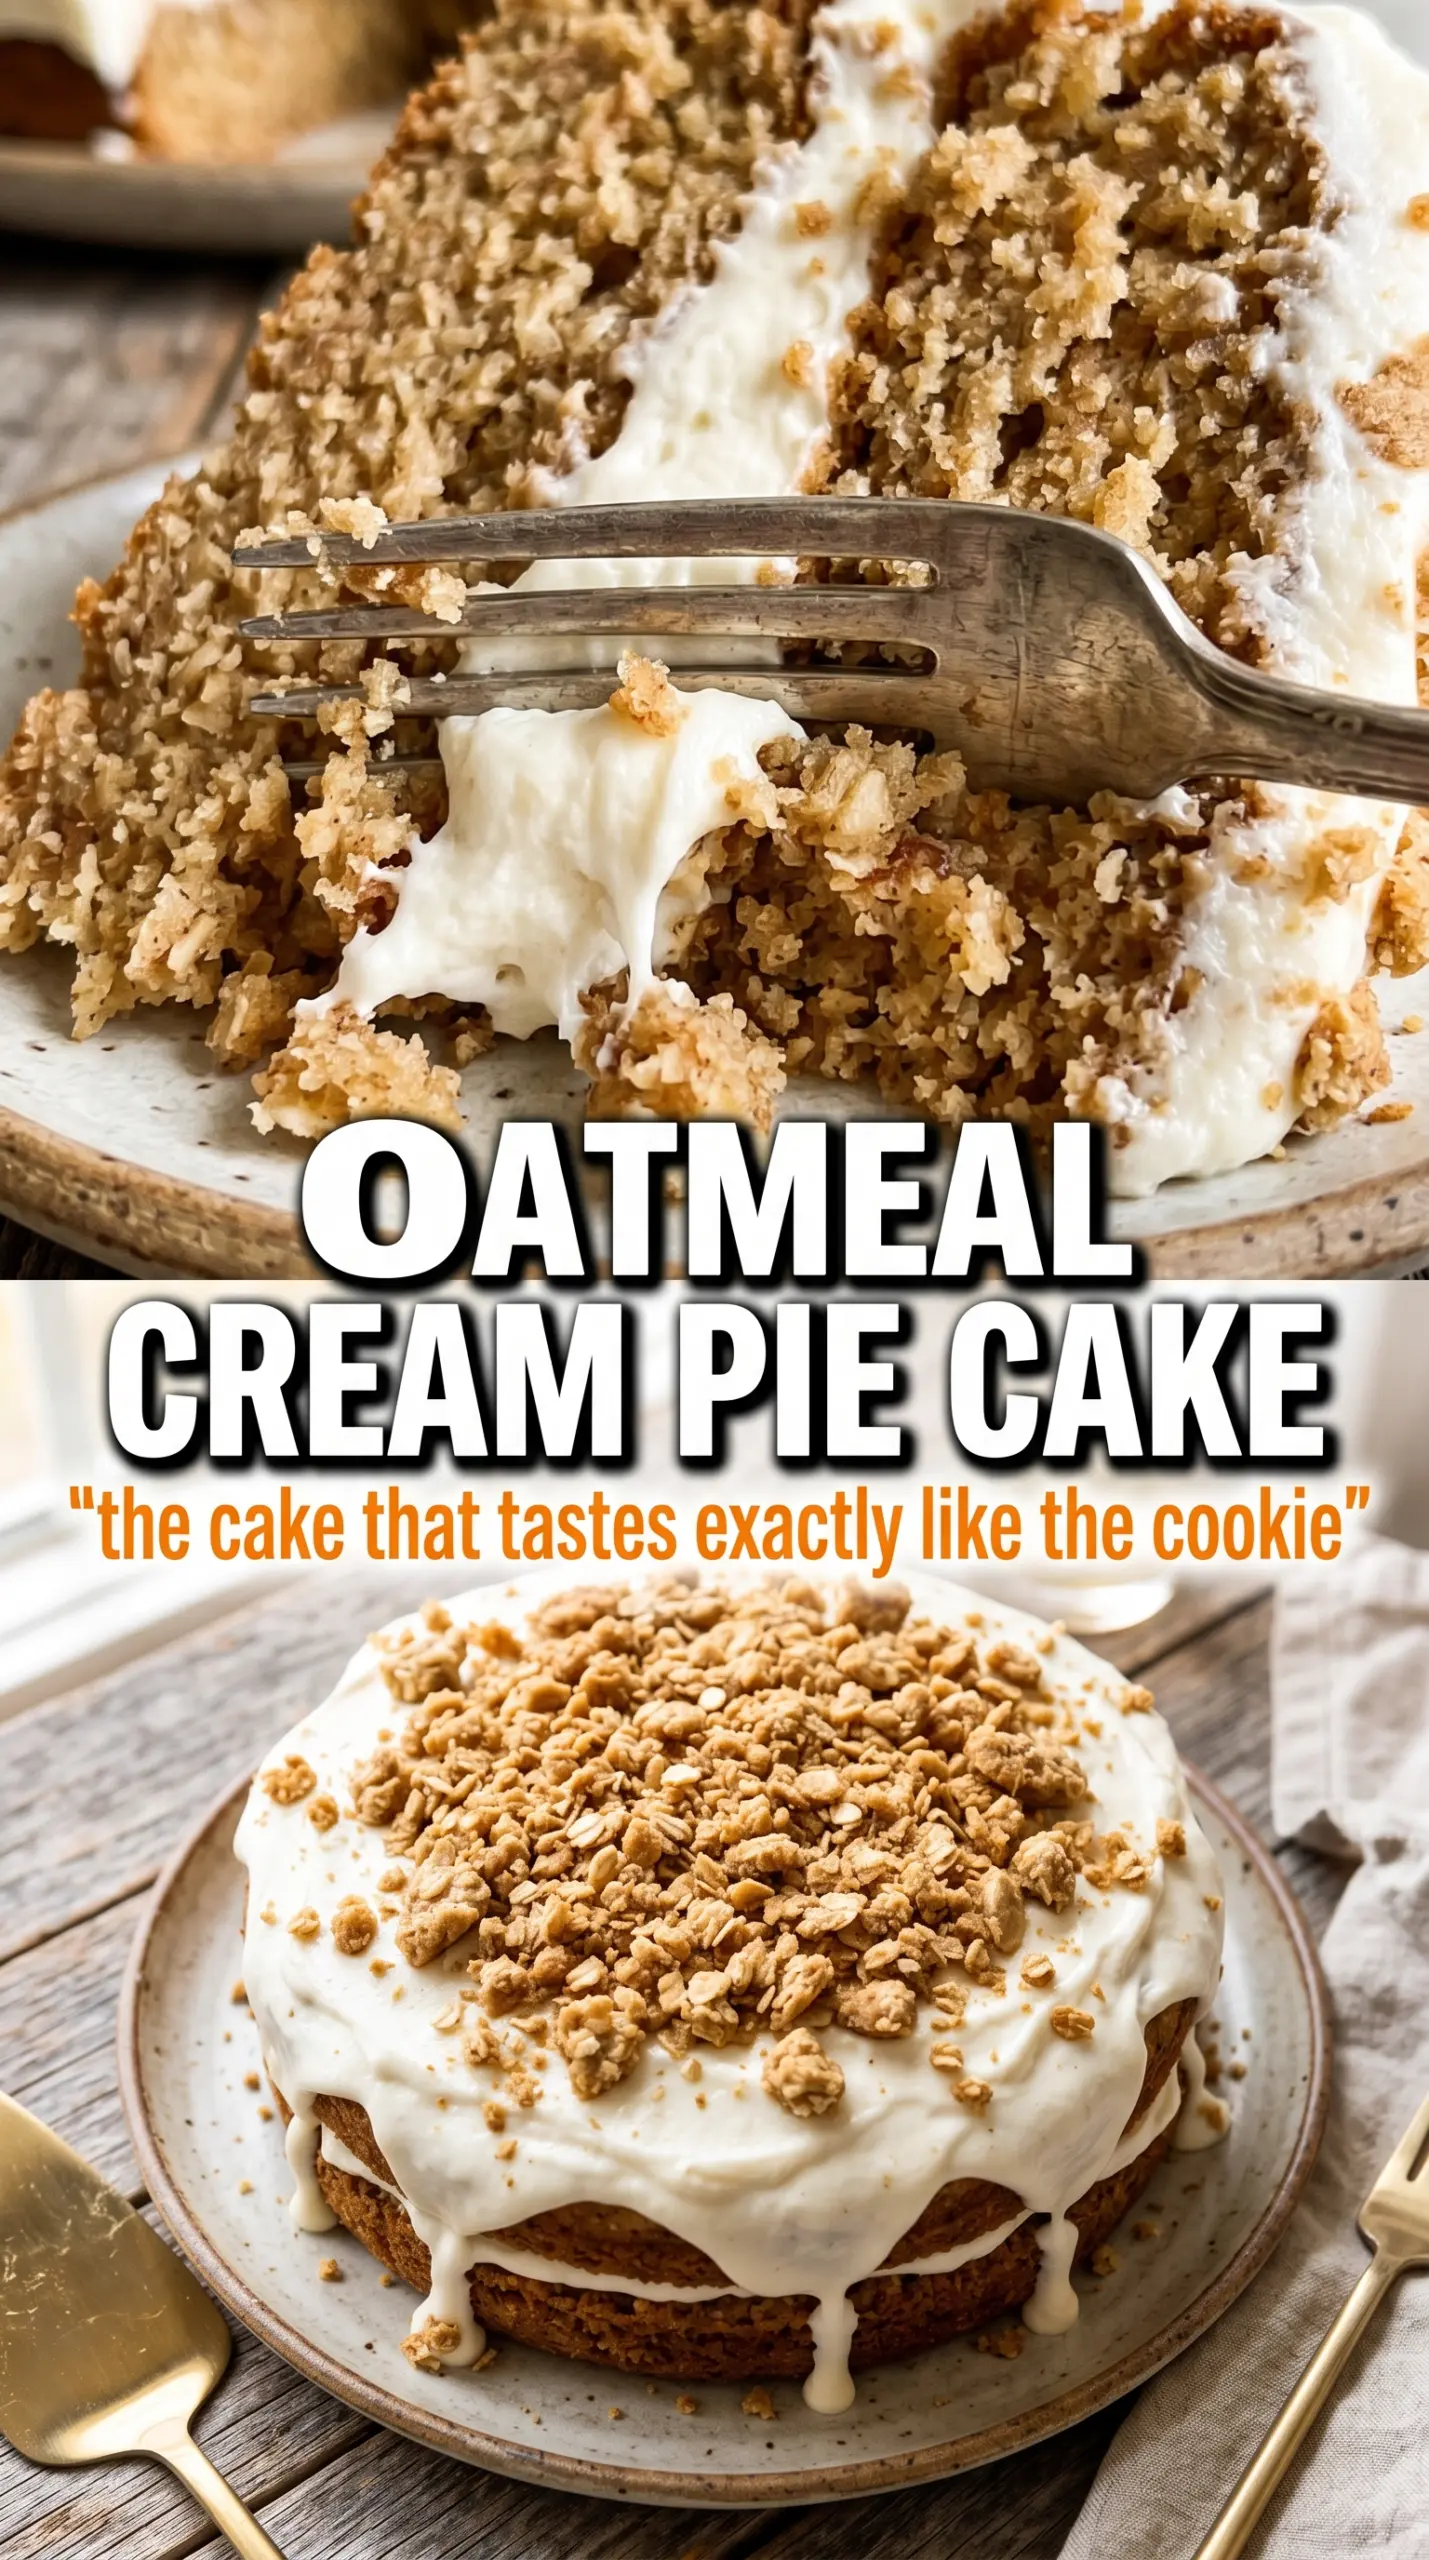
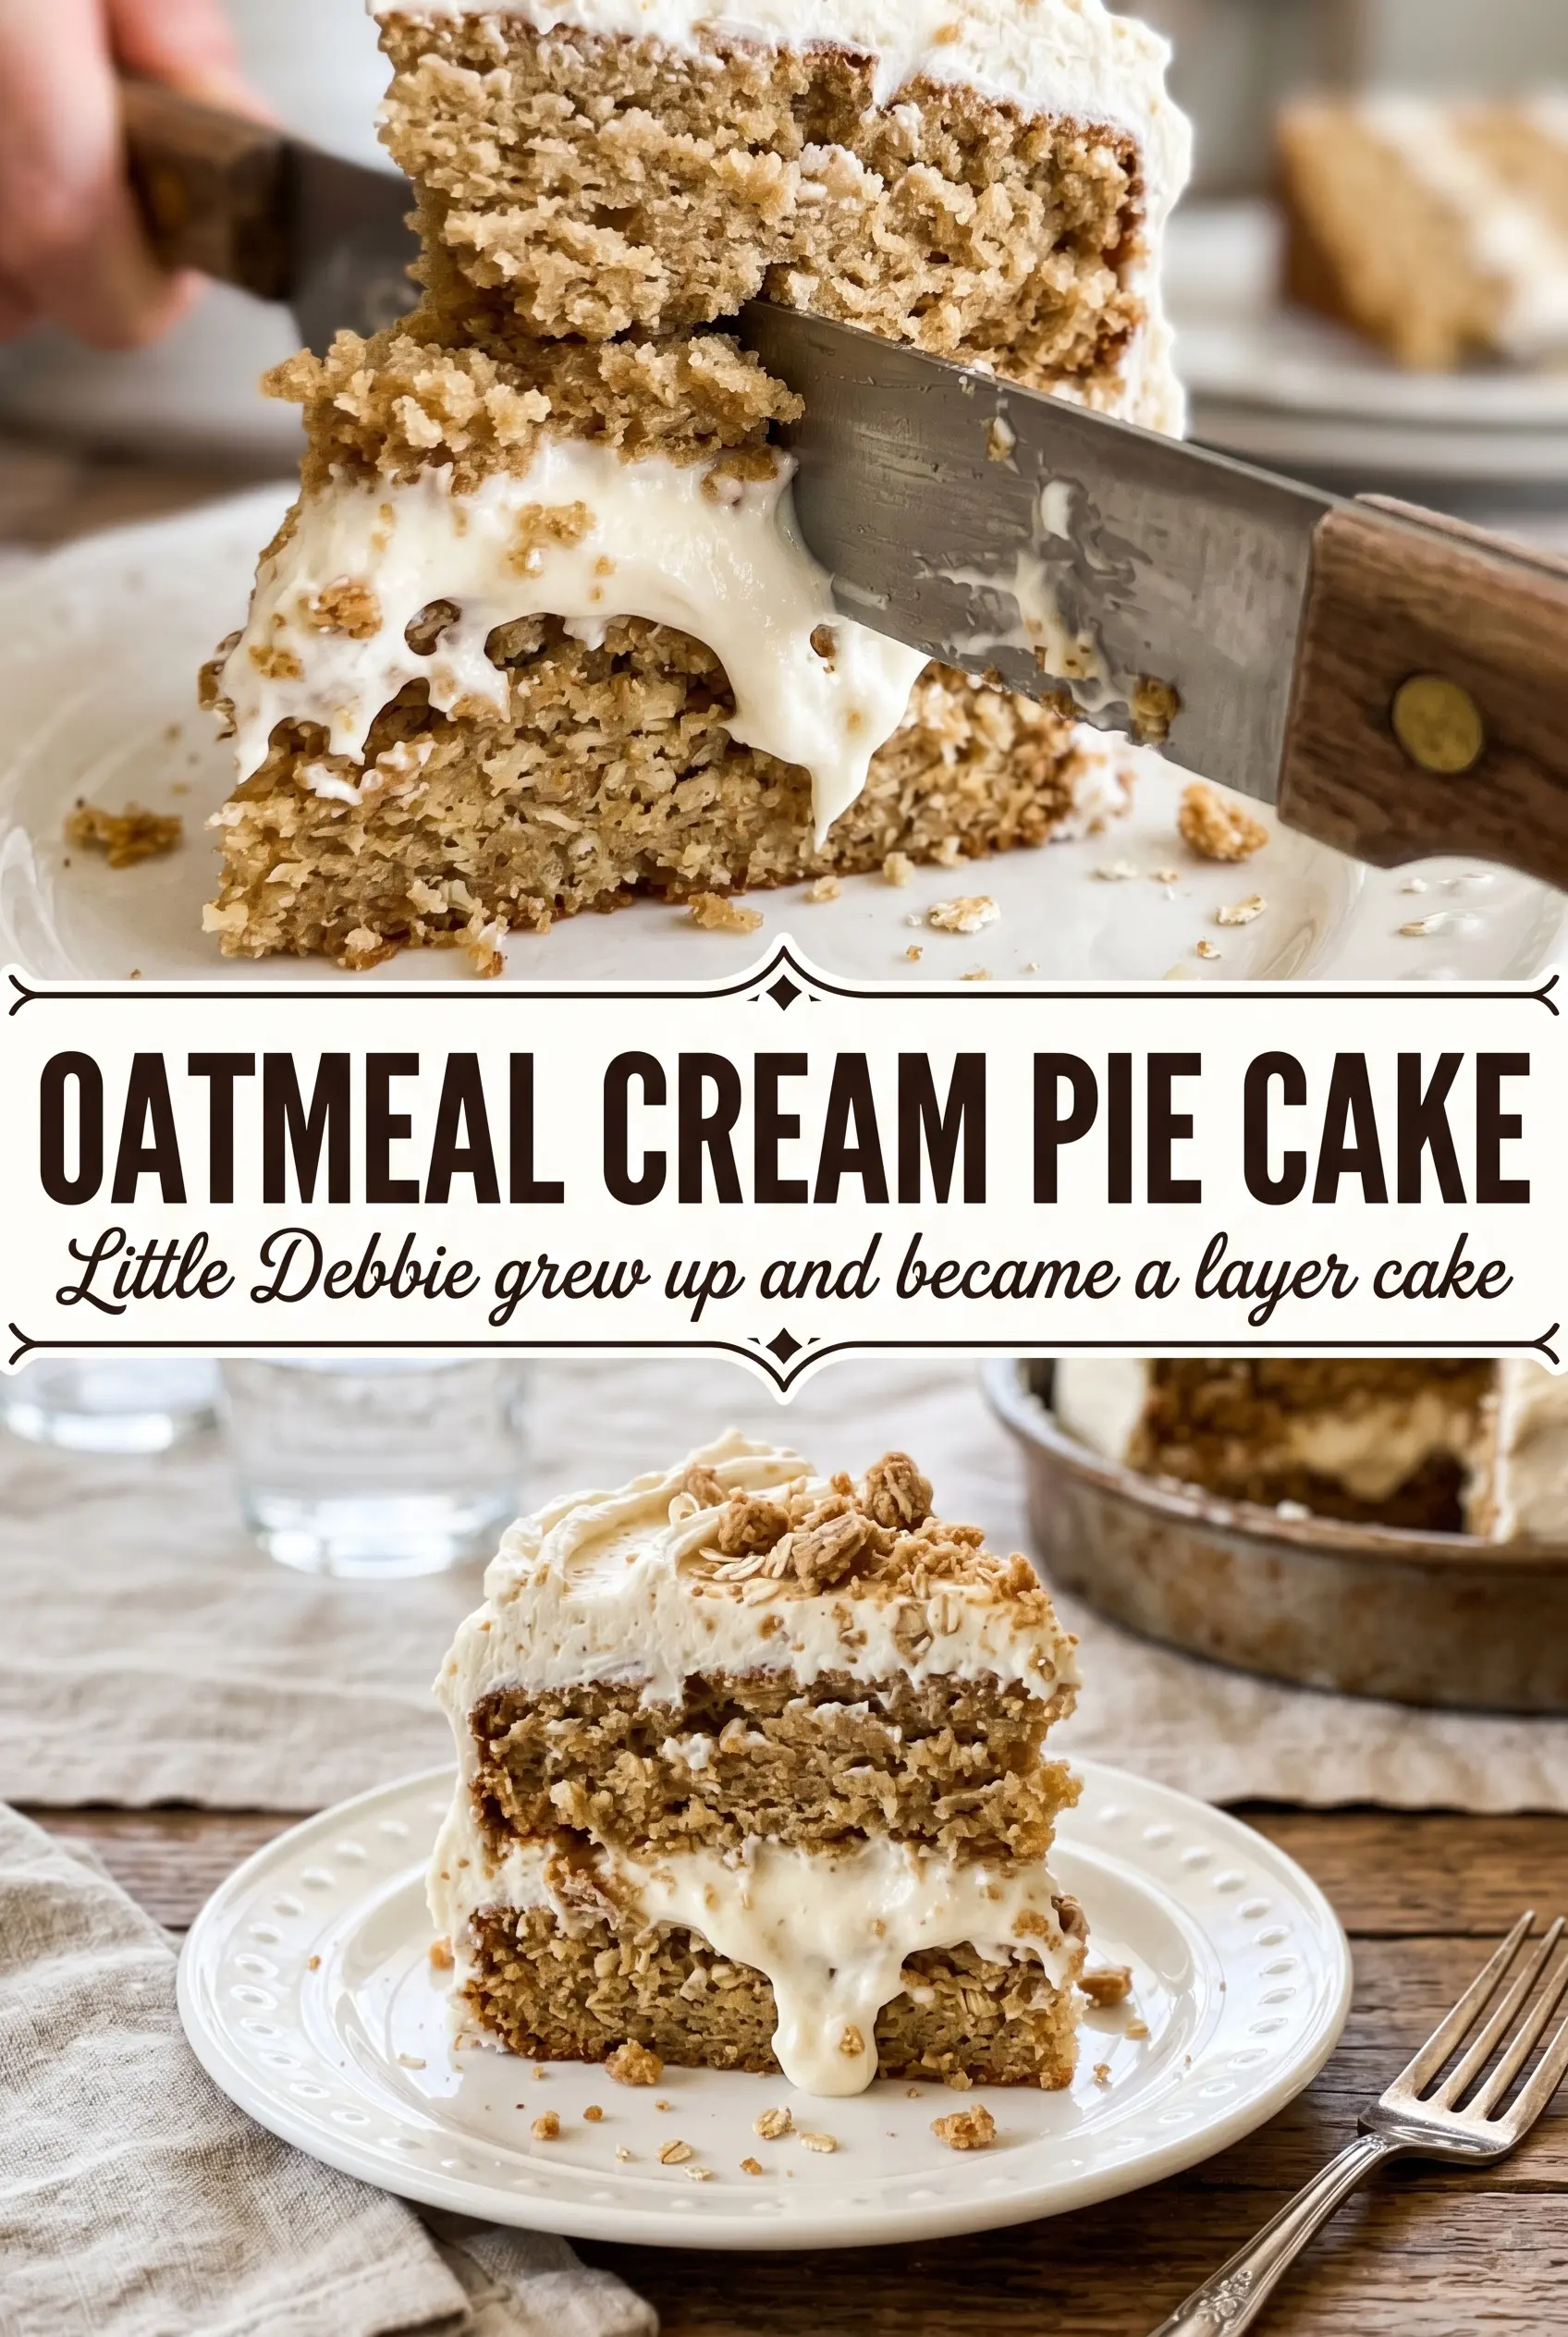
Moist oatmeal spice cake and a thick marshmallow cream filling make this cake taste like the cookie aisle version of a layer cake, only fresher and a lot more generous. The cake stays tender for days thanks to the oats, brown sugar, and buttermilk, and the filling lands somewhere between frosting and marshmallow fluff in the best possible way.
The trick is blending the oats fine so they soften into the batter instead of turning the crumb coarse or heavy. Brown sugar brings the right molasses note, but the real payoff comes from the buttermilk and oil working together: one adds tang and structure, the other keeps the layers soft even after chilling. The filling also needs a little heavy cream so it spreads without tearing the cake.
Below, I’ll walk through the one part that matters most for a clean slice and show you how to adapt this cake if you want a stronger spice note or a more classic cream pie finish.
The filling was thick and fluffy, and the cake stayed soft even after chilling overnight. I sliced it the next day and the layers held their shape without drying out.
Save this Oatmeal Cream Pie Cake for the days when you want tall oatmeal layers, fluffy marshmallow filling, and a nostalgic cookie-shop finish.
The Oats Need to Disappear Into the Batter, Not Stand Out
The difference between a cake that tastes like an oatmeal cookie in the best way and one that eats like breakfast bread is all in the oats. Blending the rolled oats fine lets them hydrate evenly in the batter, which gives you a soft, sturdy crumb instead of chewiness in random pockets. That step matters because this is a layer cake, and the layers need to slice cleanly under a thick filling.
Brown sugar carries the warm molasses note that makes the cake taste nostalgic, but the structure comes from the oil and buttermilk working together. Oil keeps the crumb supple after chilling, while buttermilk gives just enough acidity to lift the cake and keep the sweetness from feeling flat. If your layers dome hard or turn dry at the edges, the oven is too hot or the batter was mixed past smooth. Stop as soon as the dry streaks disappear.
What Each Ingredient Is Actually Doing in This Dessert
- Sugar (the sweetness and structure) — Sugar tenderizes baked goods and creams into butter to create air. Don’t skip it or reduce it too much.
- Fat (butter, oil, or cream cheese) — This carries flavors and creates tender crumb. Proper creaming with sugar adds volume to cakes.
- Eggs (the binder and lift) — Eggs create structure and help baked goods rise. Room temperature eggs incorporate better than cold ones.
- Flour (the structure) — This is what makes baked goods hold together. Don’t overmix or the texture becomes tough and dense.
- Flavoring (vanilla, chocolate, fruit, spices) — These define the personality of the dessert. Use good quality flavorings so they shine.
- Leavening (baking powder, baking soda, whipped eggs) — This creates rise and light crumb. Too much makes the dessert taste bitter.
- Liquid (milk, water, or fruit juice) — This hydrates flour and carries flavors. Too much makes the dessert dense; too little makes it dry.
- Final finish (frosting, glaze, fruit, whipped cream) — The topping adds moisture, flavor, and visual appeal. Don’t skip it or the dessert feels incomplete.
What Each Ingredient Is Really Doing in This Cake
- Rolled oats, blended fine — This is the ingredient that gives the cake its oatmeal identity without turning the crumb rough. A food processor works well; you want the oats broken down until they look almost like coarse flour.
- Brown sugar — It adds moisture and that deep caramel note you expect from an oatmeal cream pie. Light or dark brown sugar both work, but dark brown sugar gives the most cookie-like finish.
- Buttermilk — It softens the crumb and helps the baking soda do its job. If you don’t have it, mix 1 cup milk with 1 tablespoon lemon juice or vinegar and let it sit for 5 minutes.
- Marshmallow fluff — This is what makes the filling taste like the inside of the snack cake instead of plain buttercream. Regular marshmallow creme is the right thing here; melted marshmallows won’t spread the same way.
- Heavy cream — Just a couple tablespoons turn the filling from stiff to billowy. Add it slowly so the frosting stays thick enough to hold between the layers.
- Oatmeal cream pie cookies — The garnish is optional, but it brings the whole cake back to the original snack cake idea and adds a little crunch on top. Crumble them right before serving so they stay crisp.
Building the Layers Without Crushing the Filling
Mixing the Cake Batter
Whisk the dry ingredients together first so the cinnamon, leaveners, and oat flour distribute evenly. In a second bowl, whisk the eggs, buttermilk, oil, and vanilla until smooth, then add the dry mixture and stir just until the batter looks uniform. The batter will be thick and spoonable, not pourable. If you keep stirring after that point, the cake can bake up tight instead of tender.
Baking for Soft, Even Layers
Divide the batter evenly between two greased 9-inch pans and smooth the tops with a spatula. Bake until the centers spring back and a toothpick comes out clean or with a few moist crumbs, usually 28 to 32 minutes. Pull them before the edges dry out. If the tops brown too fast, your oven runs hot, so start checking at the 25-minute mark and rotate the pans only if your oven bakes unevenly.
Whipping the Marshmallow Cream
Beat the butter first until it looks pale and fluffy. That step keeps the filling from tasting dense, and it gives the marshmallow fluff something light to sit on. Add the powdered sugar gradually, then the fluff, vanilla, and cream. If the filling looks grainy or loose, keep beating for another minute; if it turns soupy, the butter was too warm, so chill the bowl for 10 minutes and beat again.
Assembling and Finishing
Put the first layer on your stand and spread the filling all the way to the edge, leaving just enough room that it doesn’t squeeze out in a flood when the second layer goes on. Chill the cake for 15 to 20 minutes if the filling feels soft, then frost the outside with the remaining cream. Finish with cookie crumbs and a dusting of powdered sugar. A sharp knife wiped clean between cuts gives you the cleanest slice and keeps the cream layer from smearing.
Three Smart Ways to Change the Cake Without Losing the Point
Make it dairy-free
Use a plain unsweetened dairy-free milk with 1 tablespoon vinegar in place of the buttermilk, and swap the butter in the filling for a good plant-based butter block. The cake still bakes up soft, but the filling will be a little less rich and a little more sweet-forward, so keep the vanilla strong.
Lean into the spice-cookie side
Add 1/4 teaspoon nutmeg and a pinch of cloves to the dry ingredients. That pushes the cake closer to a soft oatmeal spice cake, which tastes great if you want more warmth and less straight vanilla-marshmallow nostalgia.
Turn it into cupcakes
Bake the batter in lined muffin tins for about 18 to 22 minutes, then core the center and fill each cupcake with the marshmallow cream. You lose the dramatic layer cake look, but you gain easy serving and a better filling-to-cake ratio in every bite.
Storage and Reheating
- Refrigerator: Store covered for up to 4 days. The cake stays moist, and the filling firms up slightly, which actually helps the slices hold together.
- Freezer: Freeze individual slices wrapped tightly for up to 2 months. Thaw in the refrigerator overnight; whole-layer freezing works, but the crumb topping softens.
- Reheating: This cake is best served chilled or at cool room temperature, not warmed. If you want to take the edge off a cold slice, let it sit out for 20 to 30 minutes instead of microwaving it, which can melt the filling and make the layers slide.
Answers to the Questions Worth Asking
Oatmeal Cream Pie Cake
Ingredients
Equipment
Method
- Preheat oven to 350°F. Grease two 9-inch round pans.
- Whisk together all-purpose flour, blended fine rolled oats, brown sugar, cinnamon, baking soda, baking powder, and salt until evenly combined.
- Whisk eggs, buttermilk, vegetable oil, and vanilla extract in a separate bowl until smooth.
- Pour the wet ingredients into the dry ingredients and mix until smooth, with no visible flour pockets.
- Divide batter between the pans and bake 28–32 minutes, until a toothpick comes out clean.
- Cool the cakes completely before assembling so the filling doesn’t melt.
- Beat softened butter until fluffy, about 1–2 minutes.
- Add powdered sugar, marshmallow fluff, vanilla extract, and heavy cream, then beat until smooth and spreadable.
- Place one cake layer on a stand and spread the cream filling generously over the top.
- Place the second layer on top and frost the outside with the remaining cream.
- Crumble oatmeal cream pie cookies over the top for garnish.
- Dust with powdered sugar and serve.


