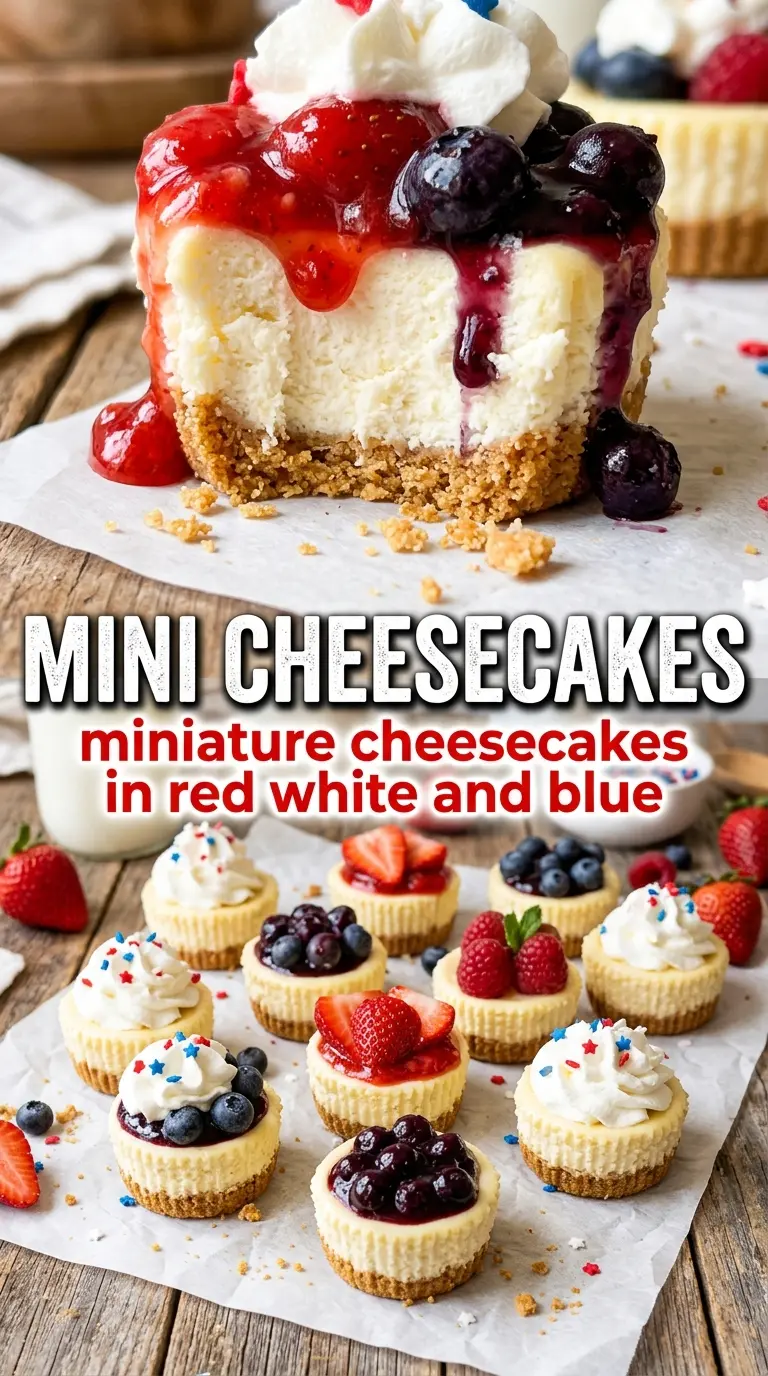
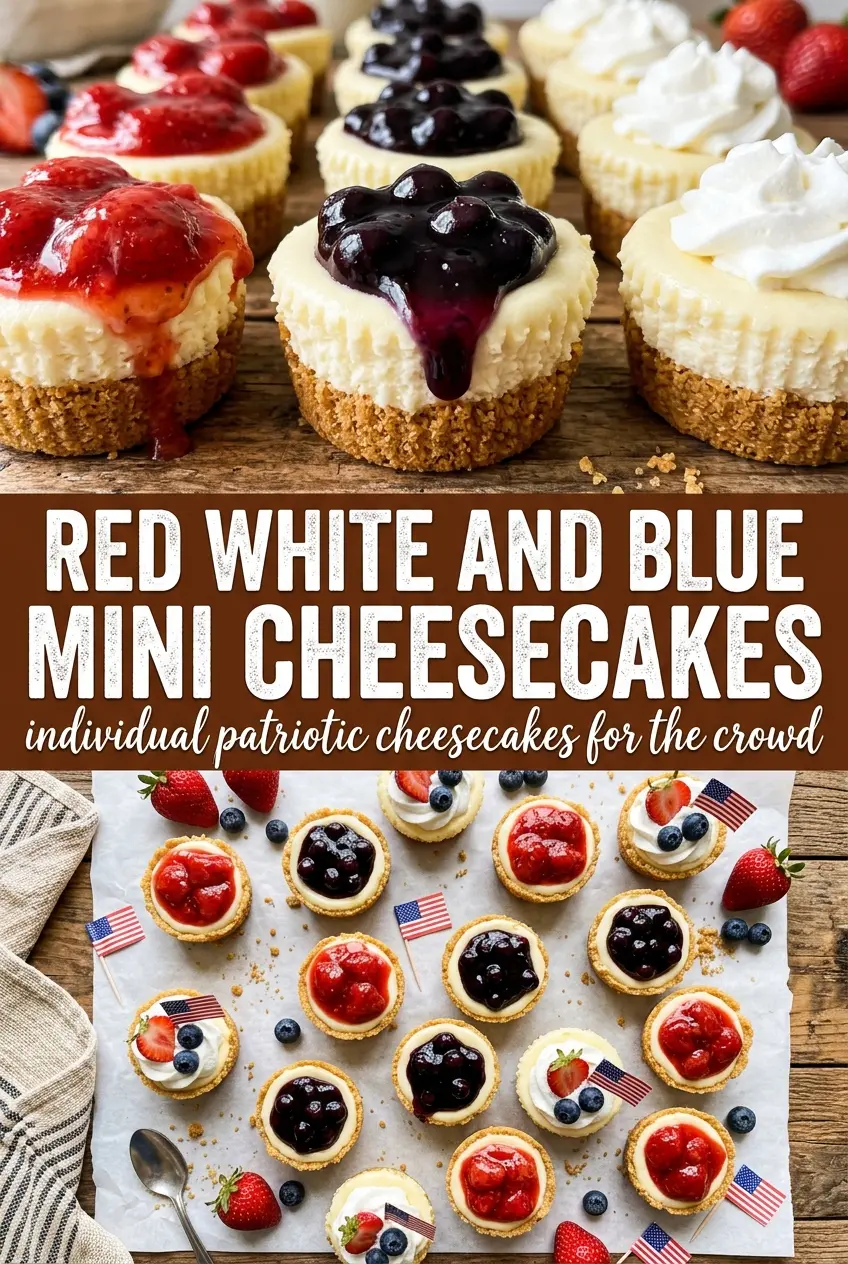
These red, white and blue mini cheesecakes bake up with a creamy center, a clean cookie crust, and just enough lift to feel special without turning fussy. The single-cookie base keeps the crust crisp under the filling, so each bite gives you that neat contrast of crunch and cheesecake instead of a soggy bottom. The fruit on top adds freshness that keeps the whole dessert from feeling heavy.
The trick here is stopping the bake when the centers still have a slight wobble. Mini cheesecakes keep cooking from residual heat after they leave the oven, and that short rest in the pan helps them set without cracking or drying out. Room-temperature cream cheese matters too; cold cream cheese leaves tiny lumps that never fully disappear, no matter how long you beat the batter.
Below, you’ll find the little details that make these cupcakes-style cheesecakes come out neat and glossy every time, plus the swaps I use when I want to change the crust or make them ahead for a party tray.
The centers set up perfectly after chilling, and the Oreo base stayed crisp even after I topped them with whipped cream and berries. I brought them to a cookout and they disappeared fast.
Love the creamy filling and berry topping on these red, white and blue mini cheesecakes? Save them to Pinterest for your next patriotic party tray.
The Small Bake Window That Keeps Mini Cheesecakes Creamy
Mini cheesecakes can go from silky to dry in a matter of minutes, which is why the center should still look slightly underdone when you pull the pan from the oven. The tops will look set, but if you wait until they seem fully firm, they usually end up overbaked after cooling. That short, careful bake is what keeps the filling dense and creamy instead of grainy.
The other thing people miss is the cooling step. Pulling the cheesecakes straight from the pan while they are still hot can cause sinking or splitting, but letting them sit in the muffin tin for 30 minutes lets the structure settle. After that, the chill time finishes the job and gives you clean, neat cheesecakes that release from the liners without sticking.
- Golden Oreo cookies — These give you a buttery vanilla crust that fits the look of the dessert and stays a little firmer than a graham crust. Regular Oreos work too, but they change the flavor and color.
- Cream cheese — Full-fat cream cheese is the ingredient that gives these their classic cheesecake body. The low-fat version tends to bake up looser and less smooth.
- Sour cream — This adds a slight tang and keeps the filling from tasting flat. Plain Greek yogurt can stand in, but the texture is a touch less rich.
- Strawberries and blueberries — Fresh fruit matters here because frozen berries release too much juice and can bleed onto the tops. Slice the strawberries just before serving so they stay bright.
What Each Ingredient Is Actually Doing in This Dessert
- Sugar (the sweetness and structure) — Sugar tenderizes baked goods and creams into butter to create air. Don’t skip it or reduce it too much.
- Fat (butter, oil, or cream cheese) — This carries flavors and creates tender crumb. Proper creaming with sugar adds volume to cakes.
- Eggs (the binder and lift) — Eggs create structure and help baked goods rise. Room temperature eggs incorporate better than cold ones.
- Flour (the structure) — This is what makes baked goods hold together. Don’t overmix or the texture becomes tough and dense.
- Flavoring (vanilla, chocolate, fruit, spices) — These define the personality of the dessert. Use good quality flavorings so they shine.
- Leavening (baking powder, baking soda, whipped eggs) — This creates rise and light crumb. Too much makes the dessert taste bitter.
- Liquid (milk, water, or fruit juice) — This hydrates flour and carries flavors. Too much makes the dessert dense; too little makes it dry.
- Final finish (frosting, glaze, fruit, whipped cream) — The topping adds moisture, flavor, and visual appeal. Don’t skip it or the dessert feels incomplete.
Building the Batter Without Whipping Too Much Air Into It
Starting With a Smooth Base
Beat the cream cheese and sugar until the mixture looks glossy and no visible lumps remain. If the cream cheese is still cold, tiny bits will cling to the bowl and never fully break down, which shows up later as specks in the finished cheesecake. Scrape the bowl well before moving on so the batter stays even from edge to edge.
Adding the Eggs the Right Way
Add the eggs one at a time and mix just until each one disappears. Overbeating at this stage traps extra air, and that extra air is what leads to puffing, then cracking, once the cheesecakes cool. The batter should look smooth and thick, not airy or foamy.
Filling and Baking to the Barely-Set Stage
Divide the batter evenly among the liners and stop at about three-quarters full. The cheesecakes are done when the edges look set and the centers still jiggle just a little when you tap the pan. If the middle looks completely firm in the oven, it has probably gone too far, and the texture will be tighter after chilling.
Make Them With a Graham Cracker Crust
Swap the whole-cookie base for a tablespoon of graham cracker crumbs mixed with a little melted butter in each liner. You’ll lose the neat, built-in cookie layer, but you gain a more classic cheesecake flavor and a softer bite under the filling.
Use Plain Mini Cheesecakes for Any Topping
Leave off the red, white, and blue toppings and you’ve got a clean little cheesecake base for any fruit or sauce. This is the best route if you want to serve them with cherry topping, lemon curd, or chocolate drizzle later in the week.
Dairy-Free Version
Use dairy-free cream cheese and a dairy-free sour cream alternative with the same measured amounts. The texture will be a little softer and the tang slightly different, but this still gives you a creamy, sliceable result as long as you chill them fully.
Storage and Reheating
- Refrigerator: Store covered for up to 4 days. The fruit stays best for the first 1 to 2 days, and the whipped cream may soften after that.
- Freezer: Freeze the plain cheesecakes without toppings for up to 1 month. Wrap them individually, then thaw in the refrigerator so the filling doesn’t turn watery.
- Reheating: These are meant to be served cold, not reheated. If you need to soften them slightly after chilling, leave them at room temperature for 10 to 15 minutes; warming them in the microwave can make the filling loose and the crust soggy.
Answers to the Questions Worth Asking
Red, White and Blue Mini Cheesecakes
Ingredients
Equipment
Method
- Preheat the oven to 325°F and line a 12-cup muffin tin with cupcake liners, setting the tin on a stable baking surface.
- Place one Oreo or Golden Oreo cookie flat in the bottom of each liner so it covers the base evenly.
- Beat the cream cheese and granulated sugar until smooth, scraping the bowl as needed to remove lumps.
- Add the eggs one at a time and mix well after each addition until fully incorporated.
- Beat in the vanilla extract and then mix in the sour cream until the batter looks glossy and uniform.
- Divide the batter evenly among the 12 cups, filling each about 3/4 full.
- Bake at 325°F for 18–20 minutes, until the centers are just barely set and still look slightly soft.
- Cool in the pan for 30 minutes before moving the cheesecakes to the refrigerator.
- Refrigerate for at least 2 hours to fully set the filling.
- Swirl whipped cream over the top of each mini cheesecake.
- Top each one with a strawberry slice and a few blueberries.
- Finish each cheesecake with a pinch of red and blue sprinkles right before serving.


