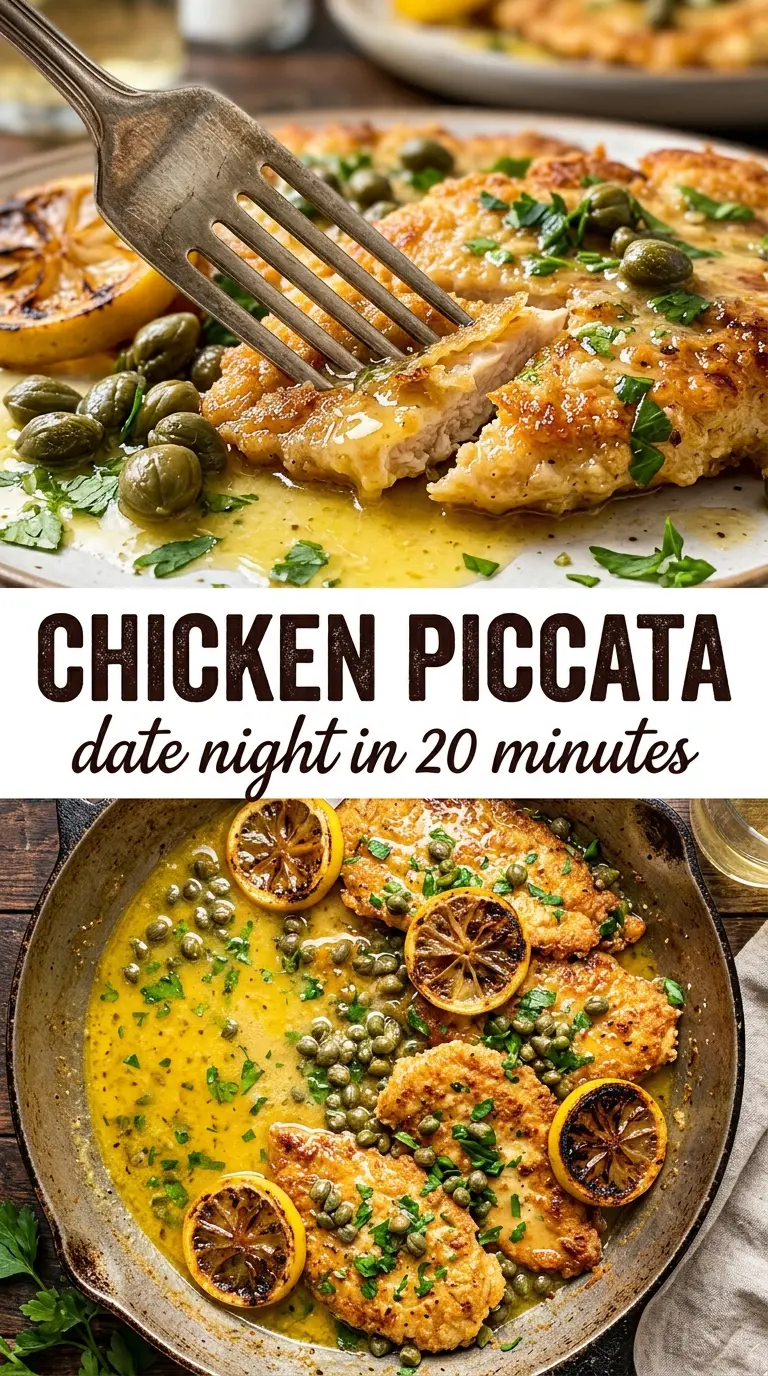
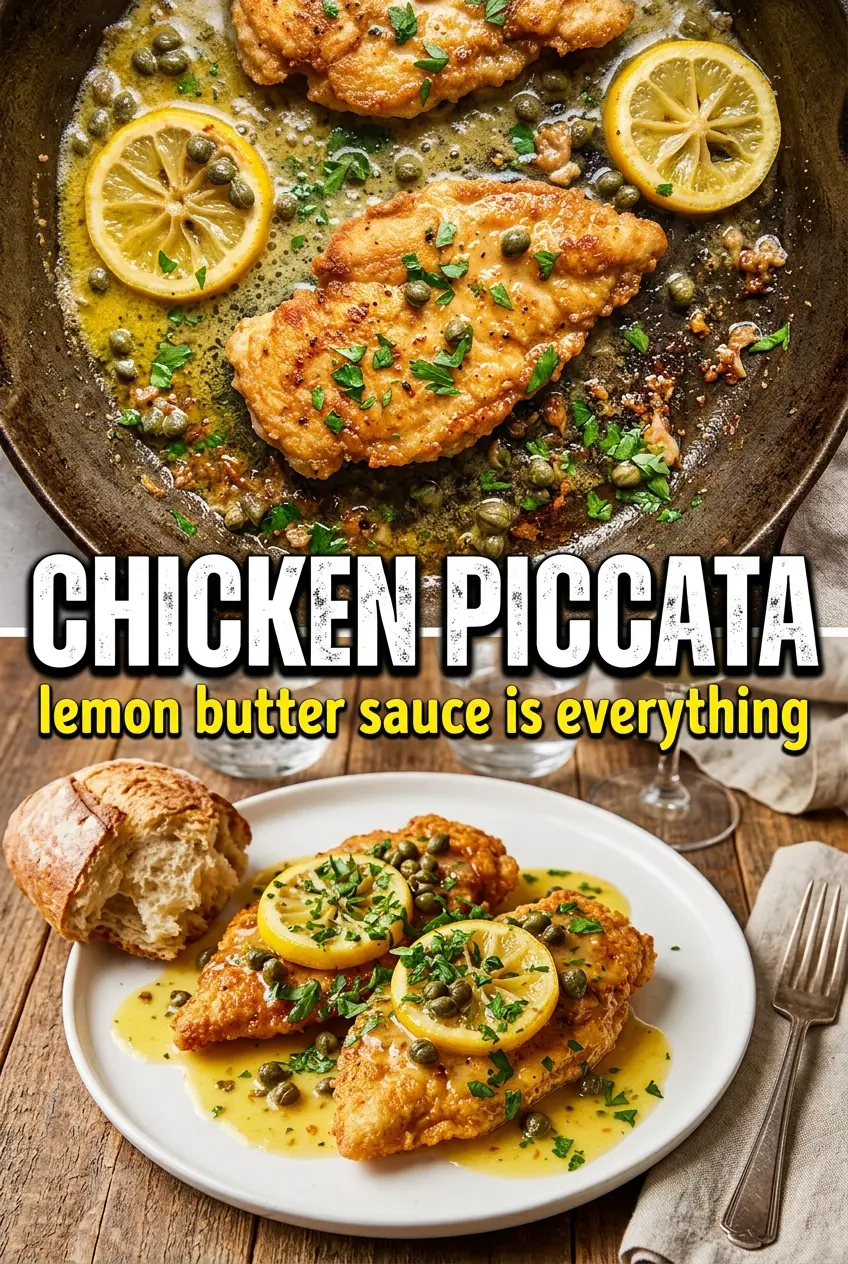
Chicken piccata lands on the plate with crisp, lightly floured cutlets and a lemon-butter sauce that tastes sharp, salty, and bright without turning thin or greasy. The best versions don’t drown the chicken; they glaze it, letting the sauce cling to the golden edges and pool just enough on the plate to catch with a fork or a piece of bread.
What makes this version work is the sequence. The chicken gets a quick flour coating for browning and for a little body in the sauce, then the pan is deglazed with white wine before the broth, lemon, and capers go in. That order matters because the browned bits from the skillet carry most of the flavor, and the final swirl of cold butter gives the sauce its shine without breaking it.
Below, you’ll find the small details that keep the cutlets tender, the sauce balanced, and the whole dish weeknight-friendly. If you’ve ever ended up with soggy chicken or a lemon sauce that tasted flat, this version will steer you around both problems.
The sauce thickened just enough to coat the chicken, and the lemon kept it bright instead of heavy. I used the extra spooned over pasta, and my husband asked if I could put this on the menu again next week.
Pin this lemony chicken piccata for the nights when you want crisp cutlets, a silky pan sauce, and dinner on the table fast.
The Reason the Sauce Stays Bright Instead of Going Flat
Chicken piccata gets ruined most often in one of two ways: the chicken goes into the pan too crowded and steams instead of browning, or the sauce gets boiled hard after the lemon goes in and turns sharp, thin, and a little bitter. This version avoids both. The cutlets are thin enough to cook quickly, and the sauce is reduced just enough before the butter goes in, so it stays glossy and balanced.
The flour on the chicken does more than help with browning. It leaves behind a fine starch coating in the pan that gives the sauce a little body without making it heavy. When you deglaze with wine and scrape up every browned bit, you’re building the backbone of the sauce right there in the skillet, which is why this dish tastes deeper than the ingredient list looks.
- Thin cutlets — Halving the chicken breasts is worth the extra minute. Thin pieces cook fast and stay tender, while thicker pieces need more time and are more likely to dry out before the coating turns golden.
- White wine — Use a dry one you’d actually drink. It adds acidity and helps lift the browned bits from the pan. If you skip it, the sauce can taste a little one-note, but you can replace it with extra broth plus a teaspoon of white wine vinegar.
- Cold butter at the end — This is what turns the sauce silky. Add it off the heat and swirl it in. If the pan is still boiling, the butter can separate and the sauce will look oily instead of glossy.
- Capers — Drain them well, but don’t rinse them unless they taste extremely salty. Their briny punch is what keeps the sauce from tasting like lemon butter alone.
What Each Ingredient Is Actually Doing in This Skillet
- Chicken breasts — Halving them into cutlets gives you even cooking and more surface area for browning. That crisp edge is part of the whole dish.
- Flour — A light dredge is all you need. Too much flour turns pasty and ends up thickening the sauce in a dusty way rather than giving it a clean gloss.
- Olive oil and butter — Oil helps keep the butter from burning, while butter gives the chicken flavor and color. Use both together; butter alone is too fragile over medium-high heat.
- Lemon juice and lemon slices — Fresh juice matters here. Bottled lemon juice tastes flat in a sauce this simple, and the slices simmer gently enough to perfume the pan without turning the sauce harsh.
- Garlic — It only needs 30 seconds. If it browns, it turns bitter and takes the whole sauce with it.
- Chicken broth — This stretches the lemon and wine into a proper pan sauce. Homemade isn’t required, but a broth with good body will give you a better finish than a watery one.
Building the Pan Sauce Without Losing the Crust
Season and Dredge the Cutlets
Pat the chicken dry before you season it. Moisture on the surface keeps the flour from clinging evenly, which means patchy browning later. A light dredge is the goal, not a thick breading; shake off the excess so the coating turns crisp instead of gummy. If the flour looks caked on, it’s too much.
Brown in Batches, Not All at Once
Heat the oil and butter until the butter foams, then add the chicken in a single layer. If the skillet is crowded, the temperature drops and the cutlets steam before they can color. Cook each side until deep golden at the edges and the chicken releases easily from the pan. If it sticks, give it another minute; forcing it early tears the coating.
Deglaze, Reduce, and Finish Off Heat
Once the chicken is out, add the garlic briefly, then pour in the wine and scrape the pan until the browned bits dissolve into the liquid. That’s where the depth comes from. Let the sauce simmer until it reduces by about a third, then turn off the heat before adding the cold butter. Stir until the sauce looks glossy and slightly thickened; if it turns greasy or broken, the heat was too high when the butter went in.
Return the Chicken and Spoon Generously
Slide the cutlets back into the pan just long enough to warm through and pick up the sauce. Spoon the lemon-caper sauce over the top rather than letting the chicken sit and boil in it. That keeps the crust from softening. Finish with parsley for freshness and color, then serve right away while the sauce is still silky.
How to Adapt Chicken Piccata Without Losing What Makes It Work
Gluten-Free Piccata
Swap the all-purpose flour for a gluten-free flour blend or very fine rice flour. Rice flour gives the chicken a slightly crisper crust and keeps the sauce from tasting starchy. Use the same light dredge and shake off the excess so the coating doesn’t turn sandy.
Dairy-Free Version
Replace the butter with a good olive oil or a plant-based butter that handles heat well. You’ll lose a little of the classic silky finish, but the lemon, wine, and capers still carry the dish. Pull the pan off the heat before stirring in the final fat so it stays emulsified.
No-Wine Shortcut
Use extra chicken broth with a teaspoon of white wine vinegar or a small splash of apple cider vinegar. The vinegar replaces the sharp edge wine brings, but add it carefully so the sauce doesn’t get too sour. Let the broth reduce first, then taste before adding more acid.
Storage and Reheating
- Refrigerator: Store leftovers for up to 3 days. The coating softens as it sits, but the flavor holds up well.
- Freezer: It freezes, but the sauce loses some of its silky texture and the chicken can dry out. Freeze in an airtight container for up to 2 months if needed.
- Reheating: Warm it gently in a covered skillet over low heat with a splash of broth or water. High heat will break the sauce and toughen the chicken, especially once the lemon and butter are already combined.
Questions I Get Asked About This Recipe
Chicken Piccata
Ingredients
Equipment
Method
- Season the chicken cutlets with salt and pepper, then dredge lightly in flour and shake off the excess.
- Leave the cutlets ready to cook while you heat the skillet and gather the remaining ingredients.
- Heat olive oil and 2 tablespoons butter in a large skillet over medium-high heat until hot and shimmering.
- Cook the chicken in batches for 3-4 minutes per side, until golden and cooked through, then remove and set aside.
- Add the garlic to the skillet and cook for 30 seconds, until fragrant but not browned.
- Pour in the white wine and scrape up the browned bits from the bottom of the skillet, then simmer for 2 minutes.
- Add the chicken broth, lemon juice, capers, and lemon slices, then simmer for 4-5 minutes until the sauce reduces by a third.
- Remove from heat and swirl in the remaining 2 tablespoons cold butter until the sauce looks glossy.
- Return the chicken to the skillet, spoon the sauce over each cutlet, and garnish with fresh parsley.


