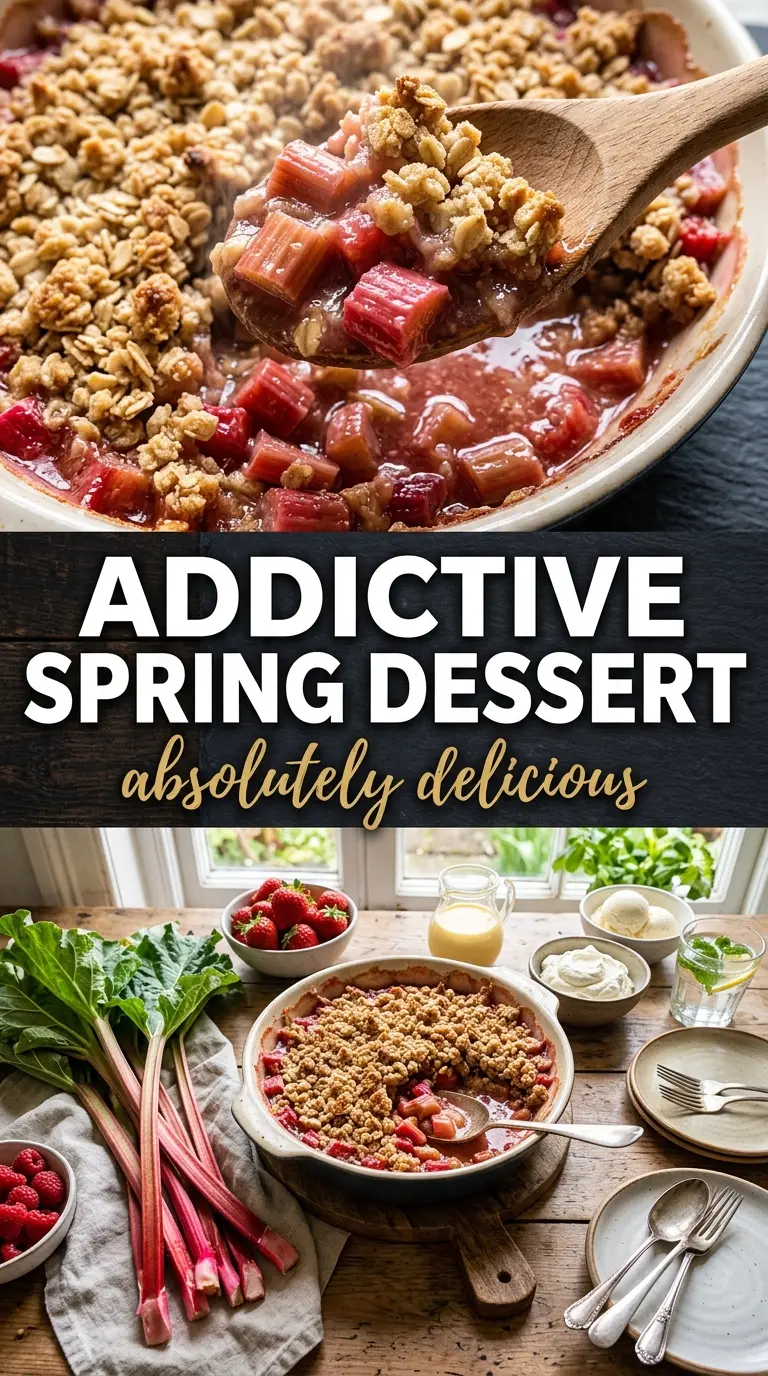
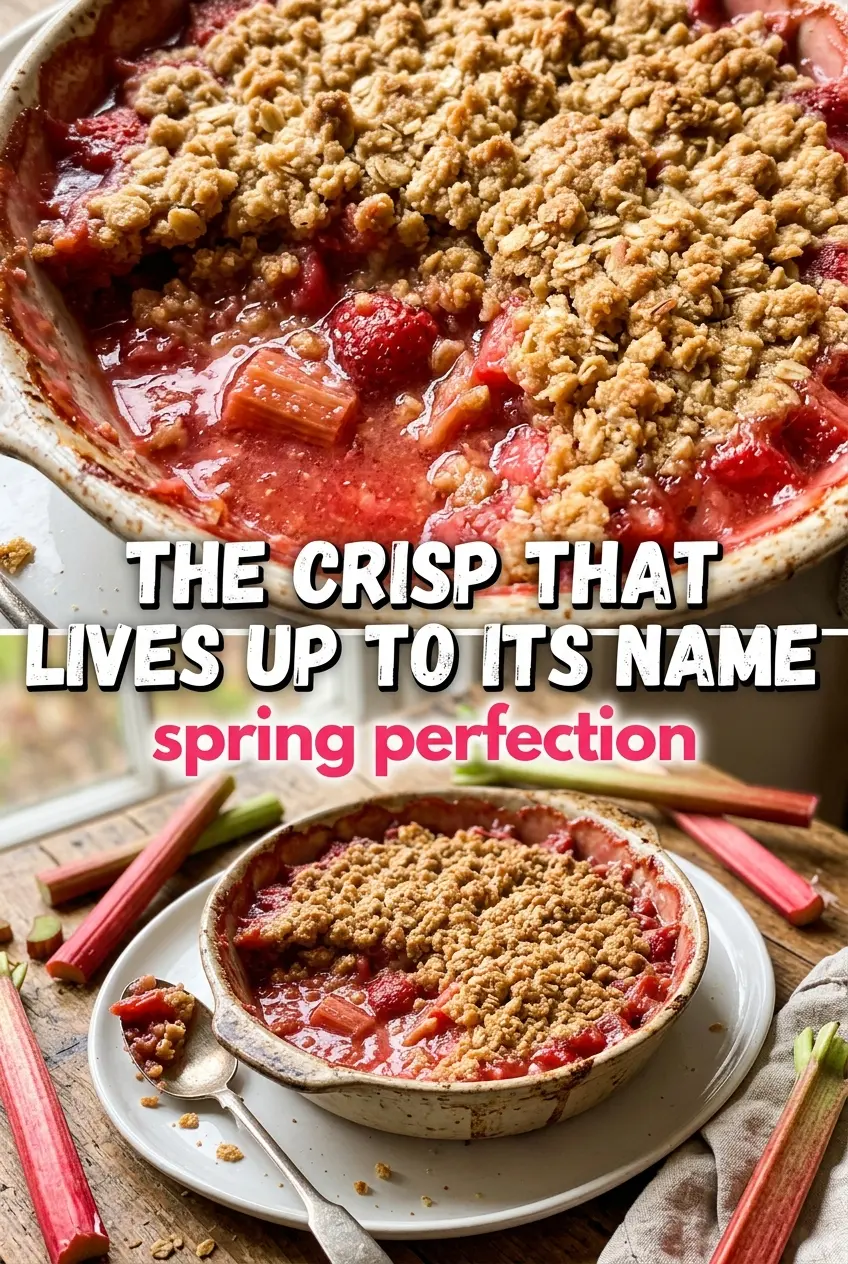
Golden, crunchy topping and tender sweet-tart rhubarb are what make a good crisp worth repeating, and this one lands exactly where it should: buttery, bubbling, and spoonable straight from the pan. The rhubarb softens into a jammy layer underneath while the oat topping bakes into thick crumbles that hold their texture instead of turning sandy or greasy.
The balance matters here. Rhubarb brings a sharp, clean tang, so the filling gets enough sugar to taste rounded without losing that bright edge. The flour in the filling is doing important work too — it thickens the juices as the fruit bakes, which keeps the dessert from collapsing into a puddle the second you scoop it.
Below, I’ll walk through the one step that keeps the topping crisp instead of pasty, plus the small timing cue that tells you the filling is actually done. There’s also a note on using frozen rhubarb if that’s what you have on hand.
The topping baked up thick and crumbly instead of soft, and the rhubarb came out perfectly tender without turning mushy. We had it warm with vanilla ice cream and the pan was scraped clean.
Save this rhubarb crisp for the nights when you want a thick oat topping and a bubbling tart filling under vanilla ice cream.
The Part That Keeps Rhubarb Crisp from Going Watery
Rhubarb gives off a lot of juice as it bakes, and that’s where most crisps go wrong. If you skip the flour in the filling or underbake it, the fruit tastes fine but the bottom turns loose and soupy. The goal is not just soft rhubarb; it’s rhubarb suspended in a lightly thickened syrup that clings to the fruit.
The other thing people miss is texture contrast. A crisp should have a topping that stays craggy and browned on top while the fruit underneath bubbles hard enough to thicken. That means spreading the topping evenly, but not packing it down. Leave some uneven peaks; those edges brown best and give you the crunch that makes each bite feel finished.
What Each Ingredient Is Doing in the Pan
- Fresh rhubarb — This is the whole point of the dessert. Fresh stalks bake into tender pieces with a bright tartness you can’t quite fake. If you use frozen rhubarb, don’t thaw it first; toss it with the sugar and flour while it’s still frozen so it doesn’t dump extra liquid into the dish.
- Sugar in the filling — Rhubarb needs enough sweetness to balance the sharpness, and this amount also helps draw out juice so the flour can thicken it. Cutting the sugar much lower changes the texture as much as the taste, because there won’t be enough syrup to coat the fruit.
- All-purpose flour — There’s flour in both the filling and the topping, and each one has a different job. In the filling, it thickens the bubbling juices; in the topping, it helps the oats bake into loose crumbs instead of turning oily.
- Old-fashioned oats — These give the topping its nubby, hearty crunch. Quick oats make a softer, tighter topping, which is fine in a pinch but not as crisp.
- Melted butter — Melted butter coats the dry ingredients quickly and creates a denser, more clustered topping than softened butter would. That’s what gives you those thick, golden crumbles instead of a sandy layer.
- Brown sugar, cinnamon, and nutmeg — Brown sugar adds depth and a little chew, while the spices round out rhubarb’s sharp edge without covering it up. Don’t overdo the nutmeg; it should sit in the background, not announce itself.
Building the Crunch Before the Fruit Can Soak It
Prep the Dish and Fruit First
Butter the baking dish well so the edges release cleanly after baking. Toss the rhubarb with the sugar, flour, and vanilla until every piece looks lightly coated, then spread it into an even layer. If the fruit sits in clumps, some areas will stew while others stay undercooked.
Mix the Topping Until It Clumps
Stir the oats, flour, brown sugar, melted butter, cinnamon, and nutmeg until the mixture looks evenly moistened and starts forming soft clumps. It should look crumbly, not wet or paste-like. If it seems greasy, the butter was too hot or there’s too much mixing; let it sit for a minute, then stir again so the dry ingredients can absorb it.
Bake Until the Filling Is Truly Bubbling
Spread the topping over the fruit without pressing it down. Bake until the top is deep golden and you can see the filling bubbling vigorously through the center and around the edges; that bubbling is the sign that the flour has thickened the juices. If the top browns before the filling bubbles, tent loosely with foil and keep baking until the fruit looks active and jammy below.
Let It Set Before Scooping
Give the crisp about 10 minutes to cool before serving. That short rest lets the filling settle from loose syrup into a spoonable layer. Scoop too soon and it runs all over the plate; wait a few minutes and you get clean spoonfuls with distinct topping and fruit.
Three Ways to Make This Rhubarb Crisp Fit the Pantry
Use Frozen Rhubarb Without Watering Down the Filling
Frozen rhubarb works, but keep it frozen when you toss it with the sugar and flour. Thawing first releases extra liquid before the thickener can do its job, which makes the filling looser and can soften the topping from underneath.
Make It Gluten-Free with a Simple Flour Swap
Use a 1:1 gluten-free all-purpose blend in both the filling and topping, and check that your oats are certified gluten-free. The texture stays close to the original, though the topping can be a little more delicate and crumbly after baking.
Cut the Sugar a Little, Not a Lot
You can reduce the sugar in the filling by a few tablespoons if your rhubarb is especially red and sweet, but don’t slash it hard. Rhubarb is naturally sharp, and the filling needs enough sugar to balance the tartness and create the syrup that thickens in the oven.
Storage and Reheating
- Refrigerator: Store covered for up to 4 days. The topping softens a little, but the flavor stays good.
- Freezer: Freeze baked crisp in a tightly wrapped pan or airtight container for up to 2 months. Thaw overnight in the refrigerator before reheating.
- Reheating: Warm in a 350°F oven until the filling is hot and the topping crisps back up, about 15 to 20 minutes. The microwave works for speed, but it softens the topping, so use the oven if you want the crumble to stay crisp.
Answers to the Questions Worth Asking
Irresistible Rhubarb Crisp
Ingredients
Equipment
Method
- Preheat the oven to 375°F and butter a 9x13-inch baking dish.
- Toss the fresh rhubarb with sugar, all-purpose flour, and vanilla extract, then spread it evenly in the prepared dish.
- Combine old-fashioned oats, all-purpose flour, brown sugar, melted butter, cinnamon, and nutmeg, stirring until the mixture is well mixed.
- Spread the oat topping evenly over the rhubarb layer, covering it completely.
- Bake at 375°F for 40-45 minutes, until the topping is deep golden and the filling is bubbling vigorously.
- Let the crisp cool for 10 minutes to set slightly, then serve warm.


