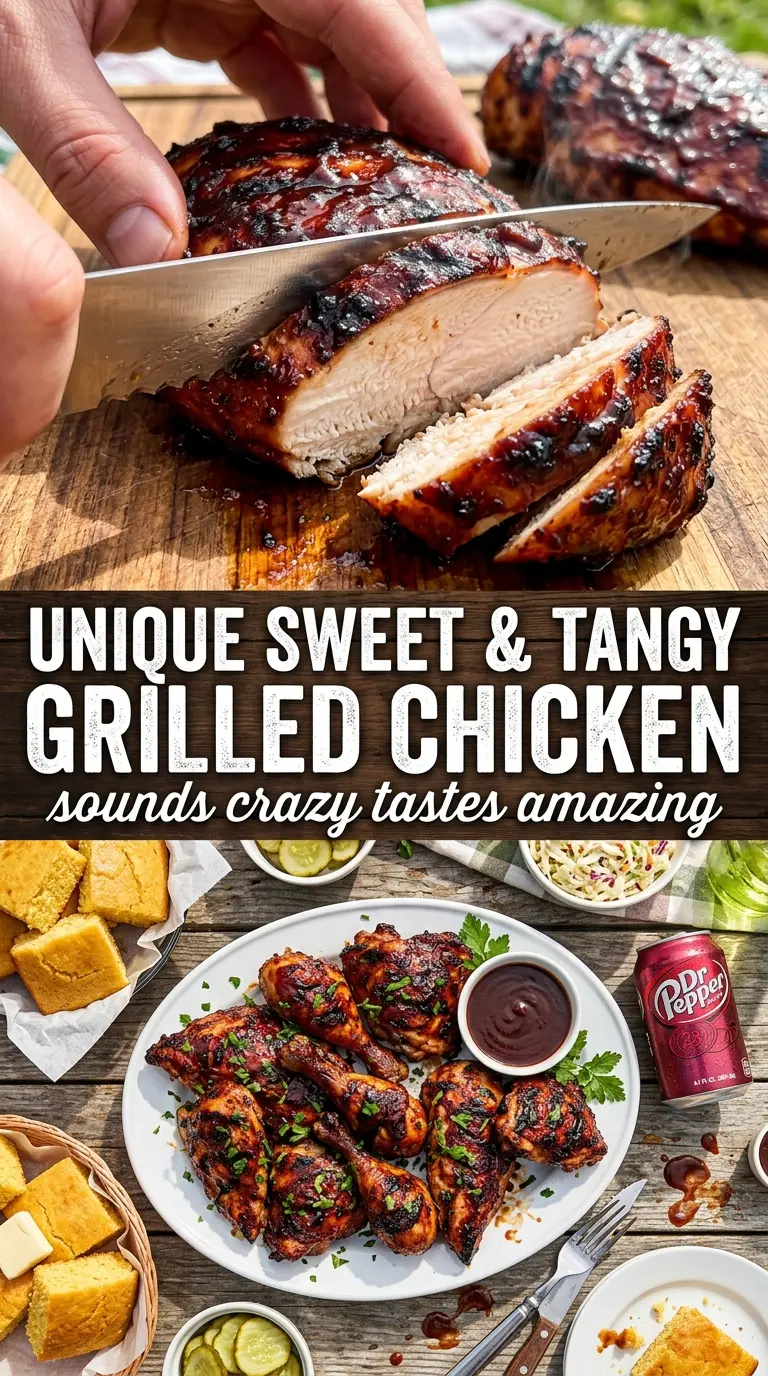
Cherry Dr Pepper BBQ chicken lands in that sweet spot between sticky, smoky, and just a little unexpected. The sauce cooks down into a glossy glaze with deep color and enough cherry flavor to stand out without turning the chicken candy-sweet. When it’s done right, the skin picks up charred edges, the glaze clings in thick layers, and the finished platter looks like something you’d set out for company without any extra fuss.
The trick is giving the sauce time to reduce before it touches the chicken. Dr Pepper brings caramel notes and a little spice, while cherry preserves add body and fruit flavor that help the glaze stay put instead of running off the meat. A splash of vinegar keeps the whole thing from tasting flat, and the reserved sauce at the end gives you that fresh, saucy finish instead of a cooked-down coating only.
Below, I’ll walk through the part that matters most: how to build the glaze so it turns thick and shiny instead of thin and sticky in the wrong way. I’ve also included a few smart swaps and storage notes, because this is the kind of chicken that’s just as good piled into leftovers as it is straight off the grill.
The glaze reduced into this thick, glossy sauce and the chicken came off the grill with the best sticky edges. I used the extra sauce on the side and my kids kept dipping everything in it.
Like this Cherry Dr Pepper BBQ Chicken? Save it to Pinterest for the nights when you want a sticky cherry glaze with smoky grilled edges and almost no extra cleanup.
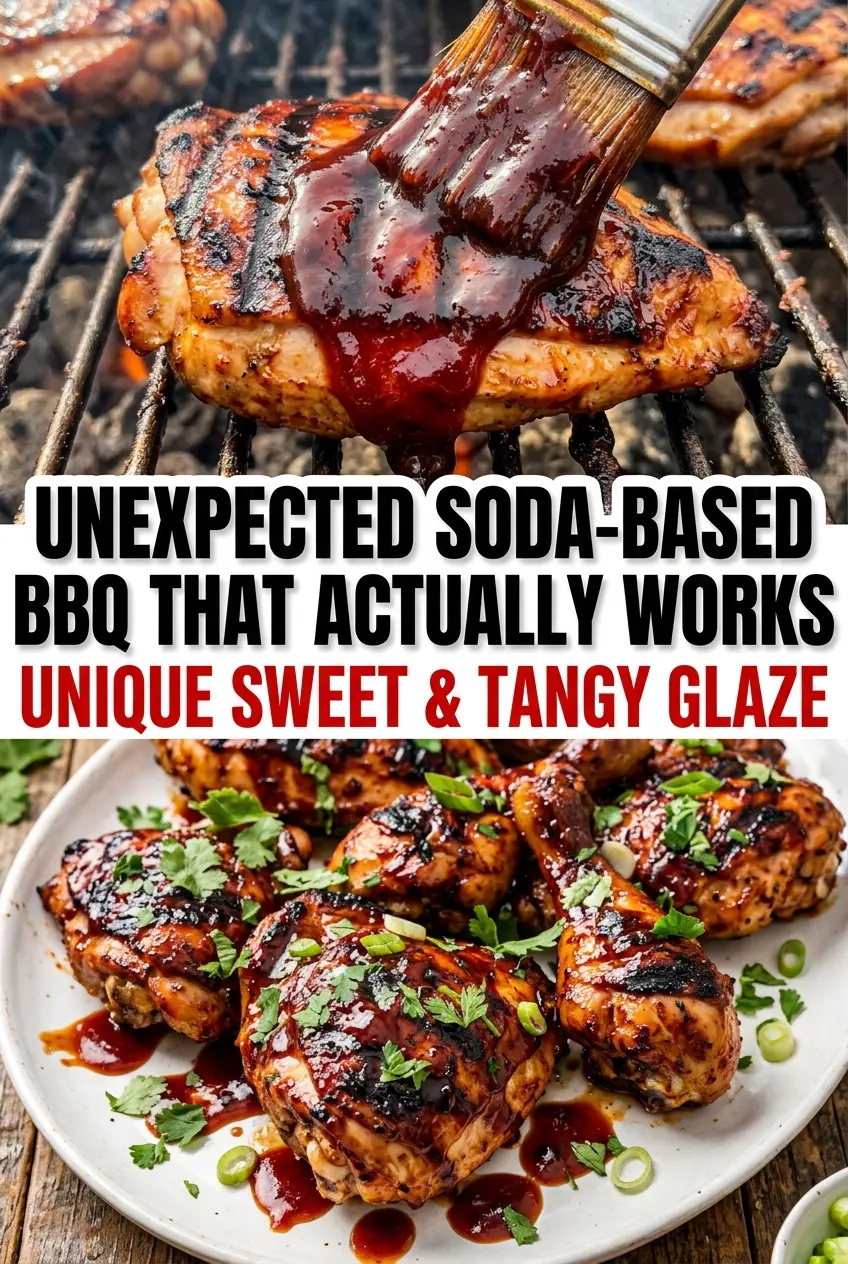
The Part Where the Glaze Stays on the Chicken Instead of Sliding Off
Most soda-based barbecue sauces fail for one simple reason: they’re used too early and too thin. If the sauce goes onto raw chicken before it has time to reduce, it can taste watery and the sugars won’t have enough concentration to cling. Here, the sauce gets a head start in the pan, so the Dr Pepper, cherry preserves, and BBQ sauce can cook into something thicker before the chicken ever sees it.
The other mistake is brushing on too much too soon over high heat. That burns the sugars before the chicken is cooked through. Build the glaze in the last stretch, layer by layer, and let each coat tack up before adding the next. That’s what gives you that deep mahogany finish instead of a scorched, sticky mess.
What Each Ingredient Is Actually Doing in This Sauce
- Dr Pepper — This is the backbone of the glaze. It brings sweetness, caramel notes, and a little spice that plain cola doesn’t quite match. If you need a swap, use another dark soda, but the cherry flavor will be less distinct.
- Cherry preserves — These add body and help the sauce thicken naturally. A smooth preserve works best, but even a rustic jar with fruit pieces is fine because those bits turn into a nice finish on the chicken. Jam can work in a pinch, though it usually sets up a little tighter and sweeter.
- BBQ sauce — Use one you already like eating. This recipe depends on the sauce you choose, so a smoky sauce gives a deeper profile and a sweeter one leans more candy-like. A thin bottled sauce will still work because the preserves and reduction handle the texture.
- Apple cider vinegar — This keeps the glaze from tasting one-note. The acidity cuts through the sugar and helps the sauce taste like barbecue instead of dessert. If you swap in white vinegar, use a touch less because it reads sharper.
- Worcestershire sauce — It adds the savory depth that makes the glaze taste finished. Don’t skip it unless you have to; it helps the sauce taste layered instead of flat.
- Chicken thighs and drumsticks — Dark meat holds up best here because it stays juicy under a sticky glaze and takes well to grilling. Bone-in pieces give you better flavor and more forgiving cook time than boneless cuts.
Building the Cherry Glaze and Grilling in the Right Order
Reducing the Sauce First
Combine the BBQ sauce, Dr Pepper, cherry preserves, vinegar, Worcestershire sauce, and garlic powder in a saucepan and bring it to a steady simmer over medium heat. Let it cook for about 10 minutes until it looks slightly thicker and the bubbles slow down a bit. You’re not looking for a jam texture here, just enough body that it coats a spoon. If it still pours like soda, it’s too thin to glaze well.
Preparing the Chicken for the Grill
Season the chicken pieces with salt and pepper after they’re dry on the outside. Wet chicken steams before it browns, and that means weaker flavor and less color. Arrange the pieces over medium heat and keep the lid situation simple if you’re using a grill; too much heat too fast will char the sugars later when you brush on sauce. You want the chicken close to cooked before the glaze starts going on.
Layering on the Shine
Brush on the sauce during the last 10 minutes of cooking, then turn the chicken and brush again. That second coat matters because it gives you a layered finish instead of one heavy layer that slides off. Keep an eye on flare-ups, since the sugars in the cherry preserves can darken quickly. Pull the chicken once it reaches 165°F at the thickest part, then let the reserved sauce and fresh cherries do the final polish on the plate.
How to Adjust Cherry Dr Pepper BBQ Chicken for Different Kitchens
Make It on the Stovetop Instead of the Grill
Brown the chicken in a hot skillet, then lower the heat, cover, and finish cooking until nearly done before brushing on the glaze. You won’t get the same smoky edges, but you’ll still get sticky sauce and tender meat. A cast-iron pan gives the best color.
Use Boneless Chicken Thighs for Faster Cooking
Boneless thighs cook faster and are easier to serve, but they need less time on the grill and can overcook quickly once the sauce starts caramelizing. Start checking early and pull them as soon as they reach temperature. You’ll lose a little of the slow-roasted look, but the meat stays juicy.
Gluten-Free Version
Choose a gluten-free BBQ sauce and check the Worcestershire label, since some brands contain soy sauce or malt vinegar. The rest of the recipe stays the same. You won’t lose texture, but you do need to verify the bottled sauces because that’s where gluten usually hides.
Dairy-Free by Default
This recipe is already dairy-free as written, which makes it an easy option when you need a rich sauce without cream or butter. Just keep an eye on the BBQ sauce brand, since some sweeter varieties use unexpected dairy ingredients. The chicken and glaze don’t need any changes.
Storage and Reheating
- Refrigerator: Store leftovers in an airtight container for up to 4 days. The glaze will thicken as it chills, which helps the flavor stay bold.
- Freezer: This freezes well for up to 2 months. Freeze the chicken with a little extra sauce in a sealed container so it doesn’t dry out when thawed.
- Reheating: Warm gently in a covered skillet over low heat with a spoonful of reserved sauce or a splash of water. High heat can make the sugar in the glaze tighten and scorch before the chicken is warmed through.
Questions I Get Asked About This Recipe
Cherry Dr Pepper BBQ Chicken
Ingredients
Equipment
Method
- Combine BBQ sauce, Dr Pepper, cherry preserves, apple cider vinegar, Worcestershire sauce, and garlic powder in a saucepan and stir to mix. Simmer over medium heat for 10 minutes until slightly thickened, then visually check that it coats the spoon.
- Reserve half of the simmered sauce for serving. Pour the reserved portion into a separate heat-safe container while the remaining sauce stays warm for glazing.
- Season chicken pieces with salt and pepper, then place on a grill over medium heat. Grill for 20-25 minutes, turning occasionally, until the surface is browning and the chicken releases easily from the grates.
- Brush chicken generously with the reserved glaze during the last 10 minutes and build up layers as it caramelizes. Continue glazing until the coating looks glossy and deep mahogany.
- Remove chicken when the thickest piece reaches an internal temperature of 165°F. Serve immediately with the remaining reserved sauce and top with fresh cherries for garnish.


