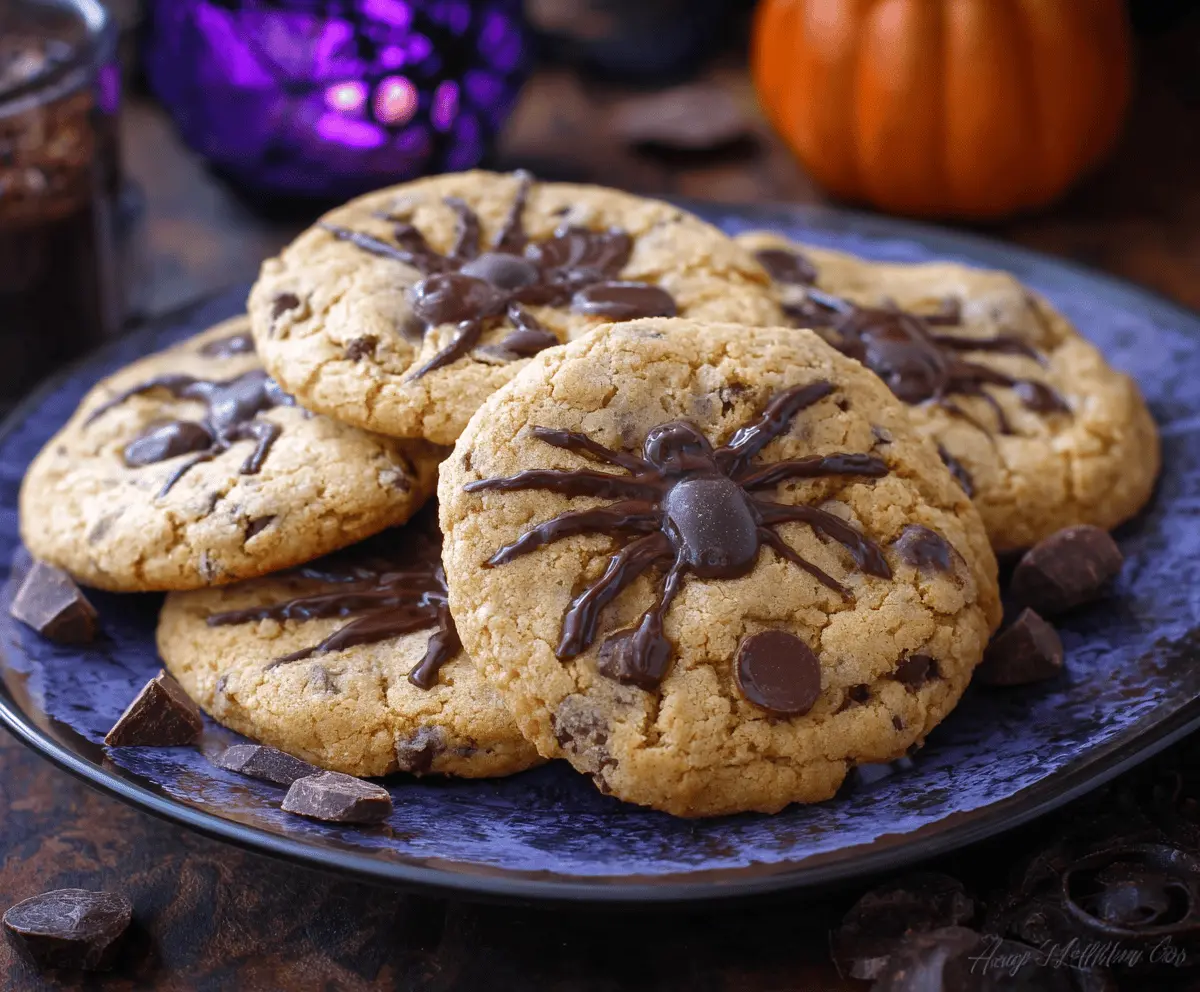
These Halloween Chocolate Chip Cookies are a spooky twist on a classic treat! With gooey chocolate chips and a fun, festive look, they are sure to delight everyone.
Making these cookies is a blast! I love adding some colorful sprinkles for extra fun. Nothing beats the smell of fresh cookies baking on a chilly fall afternoon! 🎃
Key Ingredients & Substitutions
All-Purpose Flour: This is essential for the structure of the cookies. You can use a gluten-free flour blend if you want to make them gluten-free. Just make sure it’s a 1:1 substitute.
Unsalted Butter: I recommend using unsalted butter for better control over the saltiness. If you’re short on butter, going half-and-half with coconut oil or another neutral oil works well too.
Granulated & Brown Sugar: Both sugars add depth to the flavor and texture. You can swap out brown sugar for coconut sugar for a healthier alternative. Just remember, coconut sugar may make the cookies a little darker.
Semisweet Chocolate Chips: These are classic for chocolate chip cookies, but feel free to mix in dark chocolate, white chocolate, or even butterscotch chips for variety!
Dark Chocolate for Decoration: If you want a different flavor, milk chocolate works just as well for the spiders! Alternatively, melted candy melts can also be used for colorful decorations.
How Do I Get the Perfect Cookie Texture?
Cookie texture can make or break your baking experience! Here are some tips to ensure your cookies come out just right:
- Don’t Overmix: When combining the dry ingredients with the wet, mix just until incorporated. Overmixing can lead to tougher cookies.
- Scoop Evenly: Use a tablespoon or a cookie scoop for uniform cookie sizes. This helps them bake evenly.
- Watch the Baking Time: Bake until the edges are light golden and the center looks a bit underbaked. They’ll firm up as they cool!
- Cool on Pans: Let them cool on the baking sheet for a few minutes before transferring to a wire rack. This helps prevent crumbling.
With these tips and ingredient insights, your Halloween Chocolate Chip Cookies will be a treat everyone loves! Enjoy baking!
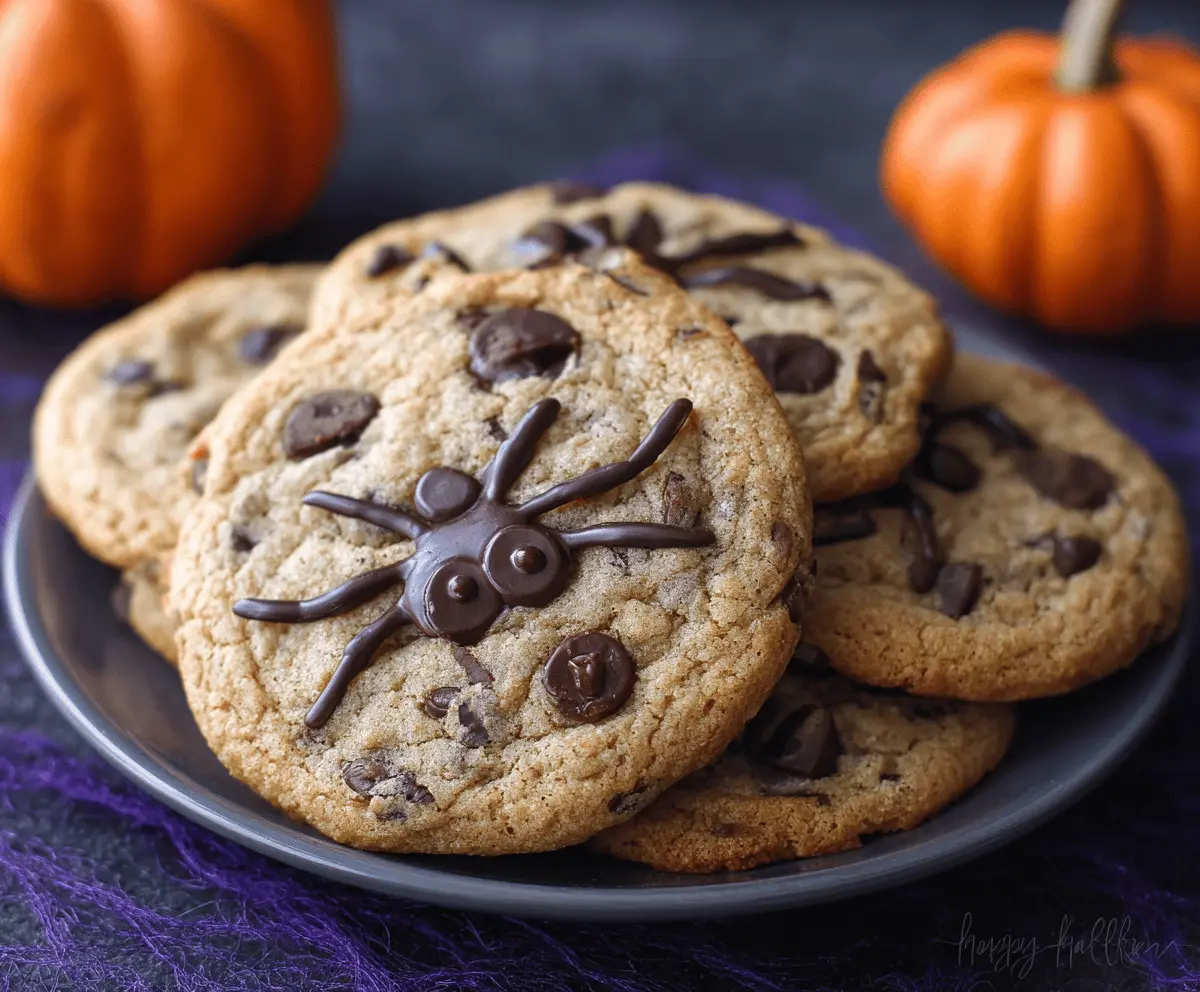
Halloween Chocolate Chip Cookies with Chocolate Spider Decoration
Ingredients You’ll Need:
Cookie Base:
- 2 1/4 cups all-purpose flour
- 1/2 teaspoon baking soda
- 1 cup unsalted butter, room temperature
- 1/2 cup granulated sugar
- 1 cup brown sugar, packed
- 1 teaspoon salt
- 2 teaspoons vanilla extract
- 2 large eggs
- 2 cups semisweet chocolate chips
For Decorating:
- 6 oz dark chocolate or chocolate chips
How Much Time Will You Need?
This recipe takes about 15 minutes to prep and around 10 minutes to bake, plus some additional time for decorating. Overall, set aside about 45 minutes to an hour for a fun baking experience and to enjoy your spooky treats!
Step-by-Step Instructions:
1. Preheat Oven:
First, get your oven ready! Preheat it to 375°F (190°C) and line your baking sheets with parchment paper to prevent sticking.
2. Mix Dry Ingredients:
In a medium bowl, whisk together the all-purpose flour and baking soda. This step adds air to your flour and mixes in the leavening agent evenly. Set it aside.
3. Cream Butter and Sugars:
In a large bowl, use an electric mixer to beat the unsalted butter, granulated sugar, brown sugar, and salt together until the mixture is light and fluffy. This usually takes about 2-3 minutes.
4. Add Eggs and Vanilla:
Now, add the eggs, one at a time, mixing well after each addition. Then, mix in the vanilla extract. The mixture should look smooth and creamy at this point.
5. Combine Flour Mixture:
Gradually mix the dry flour mixture with the wet ingredients. Be careful not to overmix—just mix until combined!
6. Fold in Chocolate Chips:
Gently stir in the semisweet chocolate chips. Make sure they are evenly distributed throughout the dough.
7. Shape Cookies:
Using a tablespoon or cookie scoop, drop rounded tablespoonfuls of dough onto your prepared baking sheets. Make sure to space them about 2 inches apart to allow for spreading.
8. Bake:
Pop the trays into the oven and bake for 9 to 11 minutes. You want the edges to turn a nice golden brown while the centers still look slightly soft.
9. Prepare Spider Decorations:
While the cookies are baking, melt the dark chocolate (or chocolate chips) in a microwave-safe bowl. Heat it in 30-second intervals, stirring in between, until fully melted and smooth.
10. Decorate Cookies:
Once the cookies have cooled for about 5 minutes on the baking sheet, transfer them to wire racks. Now, take the melted chocolate and put it in a piping bag or a small plastic bag with a corner snipped off. Pipe a small oval for the spider’s body in the center of each cookie, then add a smaller oval for the head. Don’t forget the 8 legs!
11. Set Chocolate:
Let the chocolate spider decorations set at room temperature or pop them in the fridge for a few minutes to firm up.
12. Serve and Enjoy:
Once the chocolate is set, arrange your spider-decorated cookies on a spooky platter. These treats are perfect for Halloween celebrations—enjoy your delicious creations!
Can I Use Different Types of Chocolate Chips?
Absolutely! You can mix and match chocolate chips to your liking. Feel free to use dark chocolate, milk chocolate, white chocolate, or even butterscotch chips for a fun twist!
How Should I Store These Cookies?
Store any leftovers in an airtight container at room temperature for up to a week. To keep them fresh, you can also refrigerate them for a longer shelf life, although they may lose some of their original texture.
Can I Make the Dough Ahead of Time?
Yes, you can prepare the cookie dough in advance! Wrap it tightly in plastic wrap and refrigerate it for up to 3 days or freeze it for up to 2 months. When you’re ready to bake, just thaw the dough in the fridge overnight before shaping and baking your cookies.
What If I Don’t Have a Piping Bag for the Chocolate Decorations?
No worries! If you don’t have a piping bag, simply use a resealable plastic bag. Fill it with melted chocolate and snip off a tiny corner to create your own piping tool. This works perfectly for decorating your cookies!