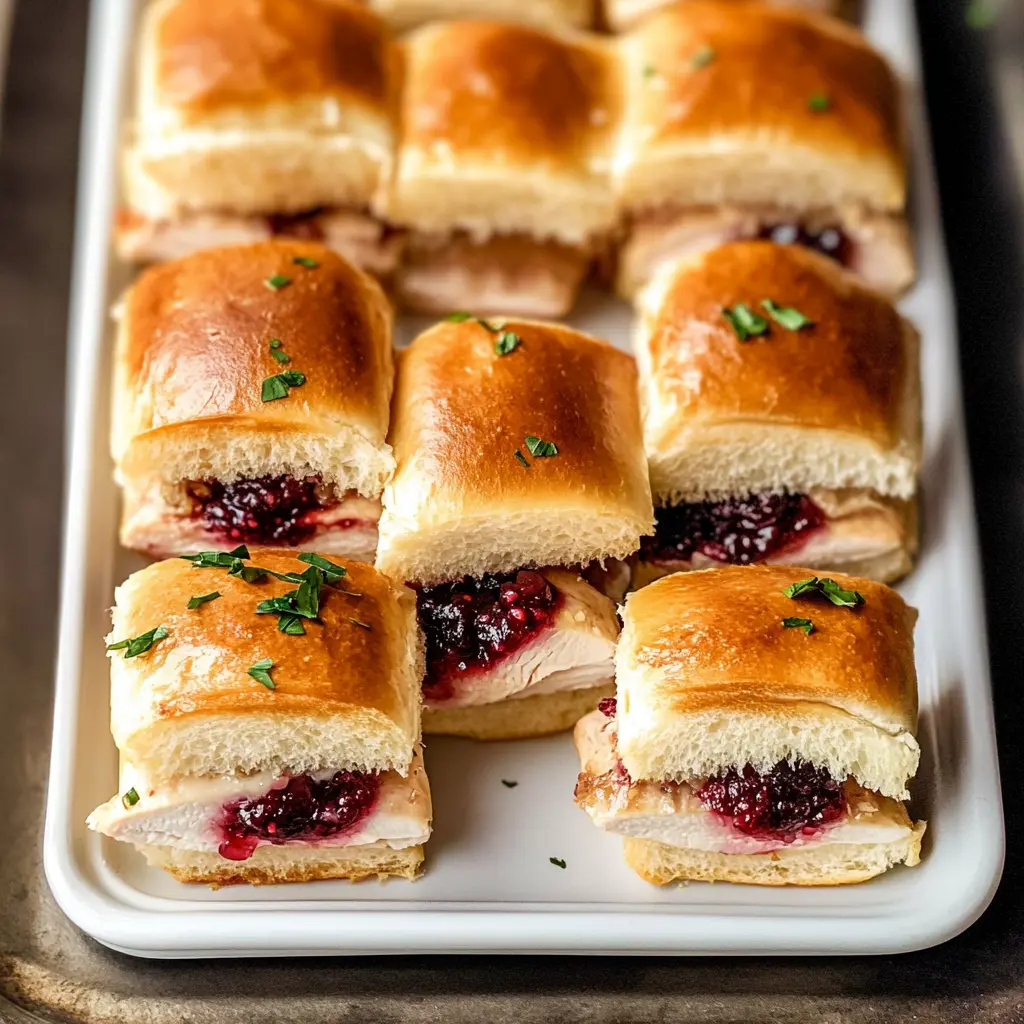
These Turkey Cranberry Sliders are mini sandwiches packed with juicy turkey and a tangy cranberry sauce. They make a perfect bite-sized treat for any gathering!
Making these sliders is a fun way to use up leftover turkey, and kids love them too! Serve with a side of chips for a quick lunch or snack, and enjoy the smiles all around. 😊
I often whip these up as a game-day snack. They’re super easy to make and taste amazing warm or cold. You won’t believe how quickly they disappear! Yum!
Key Ingredients & Substitutions
Slider Buns: Sweet Hawaiian rolls are perfect for these sliders as they add a touch of sweetness. If you can’t find them, try using brioche or any soft dinner rolls. Whole wheat rolls can also work for a healthier twist.
Deli Turkey: While deli turkey breast is convenient, roast turkey or leftover turkey from a holiday meal can elevate the flavor. For vegetarians, consider using roasted vegetables or a hearty mushroom mix instead.
Cranberry Sauce: You can use homemade cranberry sauce if you have the time. If you prefer a simpler option, canned cranberry sauce works just fine and gives a nice, sweet-tart kick. Mix in some orange zest for added flavor!
Cream Cheese: I love cream cheese for its creamy consistency, but you can substitute with goat cheese or even ricotta for a different texture. If you want a dairy-free option, try vegan cream cheese.
Swiss Cheese: Swiss adds a nice melty texture. If you need a lactose-free option, try vegan cheese or replace it with provolone or gouda for a different flavor profile.
How Do I Ensure My Sliders Are Perfectly Layered?
Getting the layering right makes a big difference in texture and taste. Here’s how to do it:
- Spread Cream Cheese Evenly: This doesn’t just add flavor; it also creates a barrier that keeps the buns from getting soggy.
- Even Distribution: Make sure to layer turkey and cranberry sauce evenly. This helps each bite to have a balanced taste.
- Final Layer Coverage: Use slices of Swiss cheese that cover the cranberry. This melting layer is essential for gooey goodness!
This layered approach helps create a delicious slider that stays intact and holds all the flavors beautifully. Enjoy preparing these tasty sliders!

How to Make Turkey Cranberry Sliders
Ingredients You’ll Need:
For The Sliders:
- 12 slider buns (sweet Hawaiian rolls work well)
- 1 pound deli turkey breast, sliced
- 1 cup cranberry sauce (homemade or canned)
- 6 ounces cream cheese, softened
- 4 ounces Swiss cheese, sliced
For The Topping:
- 2 tablespoons unsalted butter, melted
- 1 teaspoon garlic powder
- 1 teaspoon onion powder
- Salt and pepper to taste
- Sesame seeds or poppy seeds for garnish (optional)
How Much Time Will You Need?
You’ll need about 10 minutes to prepare these sliders, plus 25 minutes of baking time. So, in total, you’re looking at around 35 minutes from start to finish—perfect for a quick and tasty meal!
Step-by-Step Instructions:
1. Preheat the Oven:
First things first! Preheat your oven to 350°F (175°C). This way, it will be nice and hot when your sliders are ready to bake.
2. Prepare the Slider Buns:
Take the slider buns and slice them in half horizontally, keeping the tops and bottoms connected. This will make assembling the sliders super easy.
3. Spread the Cream Cheese:
Grab your softened cream cheese and spread a generous layer over the bottom half of the slider buns. Ensure it’s nice and even for a creamy taste in every bite.
4. Layer with Turkey:
Now, it’s time to add that delicious turkey! Layer the sliced turkey evenly over the cream cheese. Make sure to cover it all for a tasty filling.
5. Add Cranberry Sauce:
Spoon the cranberry sauce over the turkey and spread it out evenly. This will add that perfect sweet-tart flavor that complements the turkey.
6. Top with Swiss Cheese:
Now, add slices of Swiss cheese on top of the cranberry sauce. This melty cheese will be a delightful final layer before putting the buns together.
7. Replace the Top Buns:
Carefully place the top halves of the buns back over the assembled layers. You want to keep everything cozy inside!
8. Prepare the Butter Mixture:
In a small bowl, mix together the melted butter, garlic powder, onion powder, and a pinch of salt and pepper. This will add a delicious flavor to the top of your sliders.
9. Brush the Mixture:
Use a brush to apply the butter mixture over the tops of the slider buns. If you like, sprinkle sesame seeds or poppy seeds on top for an extra touch.
10. Bake the Sliders:
Cover the sliders with aluminum foil and place them in the preheated oven for 15 minutes. This helps keep them moist and warm.
11. Finish Baking:
After 15 minutes, carefully remove the foil and bake for an additional 10 minutes. You want the tops to be golden brown and the cheese melted. Yum!
12. Serve and Enjoy:
Once done, let the sliders cool slightly. Then, cut them into individual sliders and serve them warm. Enjoy this delightful treat as an appetizer or a fun lunch option!

Can I Use Leftover Turkey Instead of Deli Turkey?
Absolutely! Leftover turkey works great in this recipe. Just shred or slice your cooked turkey and use it in place of the deli turkey breast. It’s a perfect way to use up Thanksgiving leftovers!
What Can I Use Instead of Swiss Cheese?
If you’re not a fan of Swiss cheese, feel free to substitute with mozzarella, provolone, or cheddar cheese. Each will give a slightly different flavor, but all will melt beautifully and complement the other ingredients!
How Should I Store Leftover Sliders?
Store any leftovers in an airtight container in the refrigerator for up to 3 days. To reheat, place the sliders in the oven at 350°F (175°C) covered with foil for about 10 minutes, or until warmed through.
Can I Assemble These Sliders Ahead of Time?
Yes, you can assemble the sliders ahead of time. Prepare them up to step 8, cover tightly with plastic wrap or foil, and refrigerate for up to 24 hours. When you’re ready to bake, just follow the remaining steps, adding a few extra minutes to the baking time if they are cold from the fridge.


