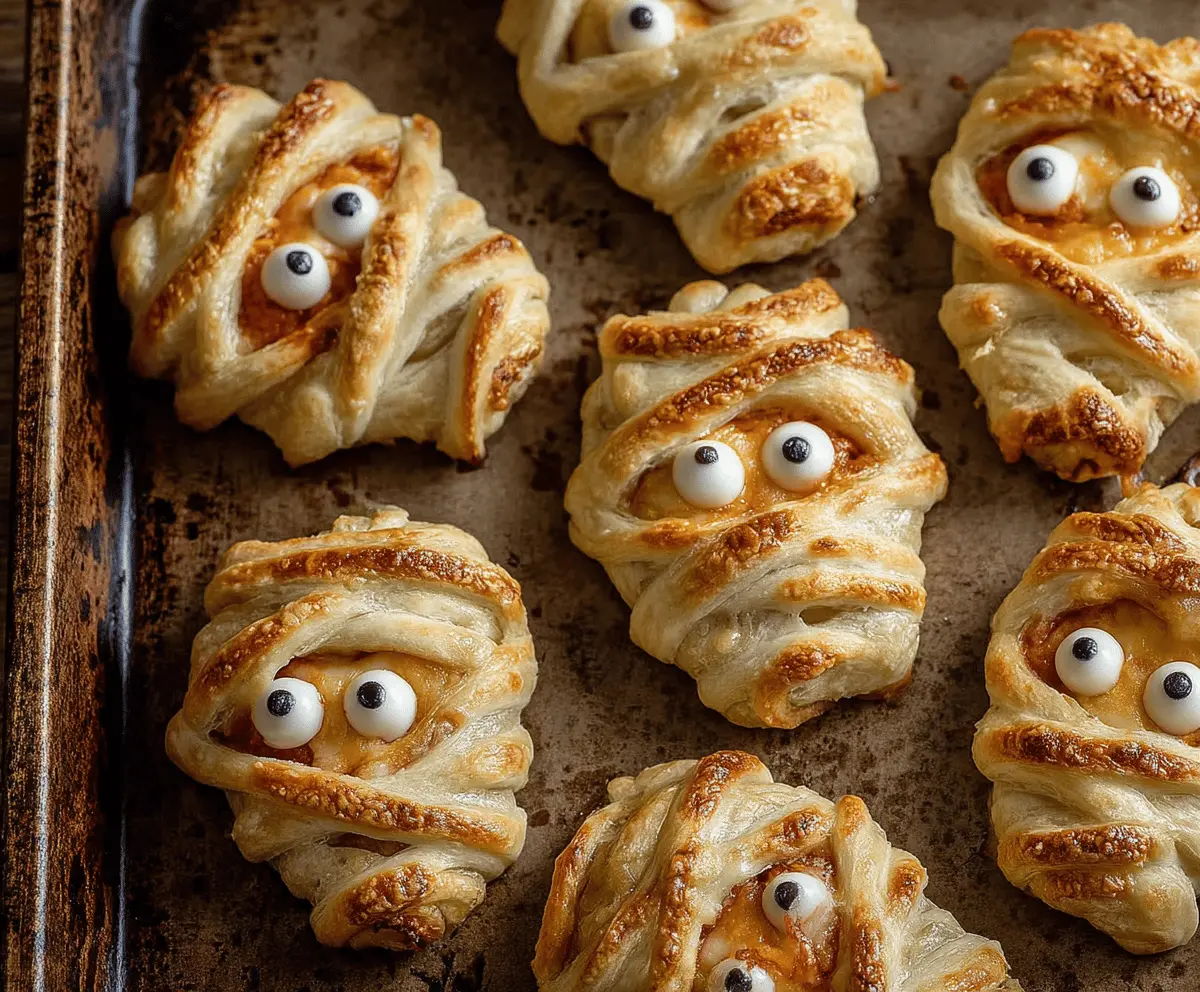
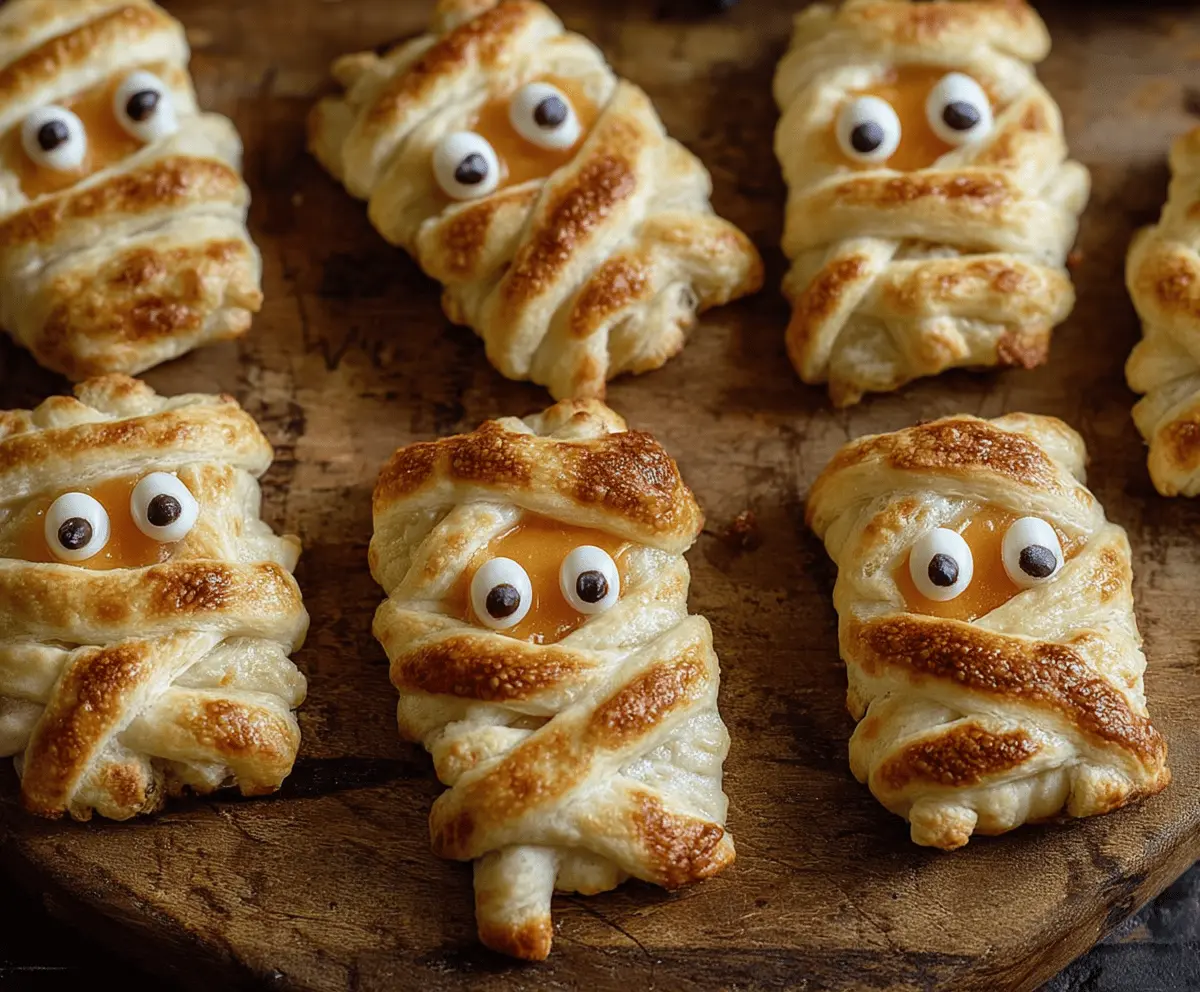
Baked Cheese Mummies are a fun and cheesy treat perfect for any spooky occasion! With flaky pastry wrapped around gooey cheese, they’re both cute and tasty.
Making these little mummies is almost as fun as eating them! I love to serve them with marinara sauce for dipping—so good, you’ll want a whole plate to yourself! 🎃
Key Ingredients & Substitutions
Puff Pastry: The star of this dish, puff pastry, gives that lovely flaky texture. If you’re short on time, you can use pre-rolled sheets. For a gluten-free option, look for gluten-free puff pastry available in stores.
Cream Cheese: This gives a rich, creamy filling. If you’re looking for a lighter version, consider using ricotta cheese, though the flavor will change a bit.
Shredded Cheddar: Sharp cheddar adds great flavor. You could substitute it with mozzarella for a mild taste or pepper jack for a kick. Just keep in mind the melting qualities as they can differ.
Egg Wash: The egg wash helps achieve that golden color. If you prefer a vegan option, brush with a bit of almond milk or use aquafaba (the liquid from chickpeas) for a similar glossy finish.
How Do You Wrap the Cheese Mixture Like a Mummy?
Wrapping the dough can feel tricky, but it’s pretty straightforward! Start by placing your cheese filling at one end of the puff pastry rectangle. Cut strips from the extra pastry for wrapping. The key here is to wrap them loosely—overlap the strips but leave gaps to mimic mummy bandages.
- Cut strips about 1/2 inch wide for accurate bandage looks.
- Don’t stress about perfection; uneven wrapping adds character!
- Leave a little space at the top for the eyes—this gives your mummies personality.
With these simple tips, your Baked Cheese Mummies will be a hit at any gathering! Happy baking!
Baked Cheese Mummies
Ingredients You’ll Need:
- 1 sheet puff pastry, thawed
- 4 oz cream cheese, softened
- 4 oz shredded cheddar cheese
- 1/2 tsp garlic powder
- 1/4 tsp paprika (optional for color and mild flavor)
- 1 egg, beaten (for egg wash)
- Edible candy eyes or small black olives/peppercorns for eyes
- Optional: marinara sauce for dipping
How Much Time Will You Need?
This fun recipe takes about 15 minutes for prep and 12-15 minutes for baking. So, in total, you’ll need around 30 minutes to get these spooky treats ready to serve—perfect for a last-minute Halloween party snack!
Step-by-Step Instructions:
1. Preheat the Oven:
Start by preheating your oven to 400°F (200°C). While it heats up, line a baking sheet with parchment paper or lightly grease it so the mummies don’t stick.
2. Make the Cheese Filling:
In a small bowl, combine the softened cream cheese, shredded cheddar cheese, garlic powder, and paprika. Mix well until everything is nicely blended. This cheesy mixture will be the delicious filling for our mummies!
3. Prepare the Puff Pastry:
On a lightly floured surface, roll out the puff pastry sheet and cut it into rectangles about 3×4 inches. These will be the bodies of your mummies.
4. Fill the Mummies:
At one end of each pastry rectangle, place about 1-2 tablespoons of the cheese mixture. Don’t overfill, or it might ooze out while baking!
5. Create the ‘Bandages’:
Using the remaining pastry, cut thin strips to create the mummy bandages. This is where the fun begins! Wrap the strips loosely around the cheese-filled end, leaving some parts exposed at the top for the eyes. It does not have to be perfect—mummies are a bit messy!
6. Get Ready to Bake:
Place the wrapped mummies on your prepared baking sheet. Then, brush them generously with the beaten egg; this will give them a beautiful golden color once baked.
7. Bake and Add Eyes:
Put the baking sheet in the preheated oven and bake for 12-15 minutes or until the pastry is puffed and golden brown. When you take them out, press two edible candy eyes into the exposed area of each mummy—this is where they’ll turn into cute little creatures!
8. Cool and Serve:
Let your Baked Cheese Mummies cool for a few minutes, then serve them warm. Pair with marinara sauce for a spooky and delicious dipping option!
Enjoy your spooky, cheesy Baked Cheese Mummies! Perfect for Halloween or any fun get-together!
Can I Use Different Cheeses for the Filling?
Absolutely! While cream cheese and cheddar work great together, feel free to experiment with other cheeses like mozzarella for a milder flavor, or pepper jack if you want some heat. Just ensure that the cheese you choose melts well.
Can I Make Baked Cheese Mummies Ahead of Time?
Yes! You can prepare the mummies in advance and keep them wrapped in plastic wrap in the fridge for up to a day before baking. Just add a few extra minutes to the baking time if they are chilled when you put them in the oven.
How Do I Store Leftovers?
Store any leftovers in an airtight container in the fridge for up to 3 days. You can reheat them in the oven at 350°F (175°C) for about 10 minutes to maintain the pastry’s crispiness.
Can I Use Store-Bought Cheese Sauce Instead of Cheese Filling?
While store-bought cheese sauce can work, it might make the mummies too soggy since it’s more liquid than a cheese mixture. If you want to use a sauce, consider mixing it with shredded cheese to thicken it up a bit before filling the pastry!