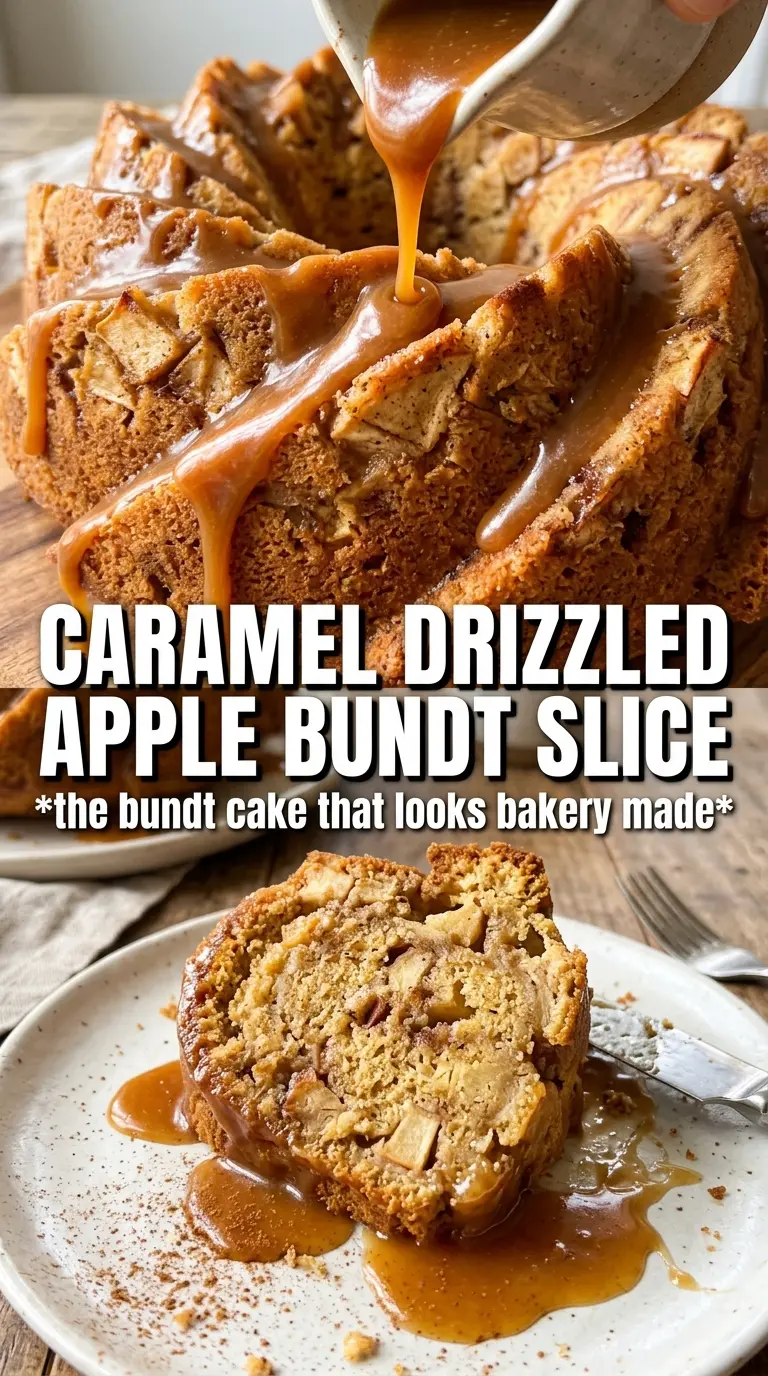
Caramel apple cake lands with the kind of soft, sticky crumb that makes people stop talking for a second. The layers bake up tender and fragrant, with little pockets of apple that keep each slice moist, while the caramel cream cheese frosting brings just enough tang to keep the sweetness in check. It’s the sort of cake that looks like it took all afternoon, then disappears faster than anything else on the table.
What makes this version work is the balance. Brown sugar and sour cream keep the cake rich and plush, but the apples are diced small enough that they melt into the batter instead of sinking or turning the crumb soggy. The frosting stays smooth because the cream cheese and butter are beaten first until completely free of lumps, then the caramel goes in for flavor, not structure. That keeps it spreadable instead of runny.
Below, I’ve included the one thing that matters most when you’re baking apple cake: how to keep the layers from baking up heavy in the center. There’s also a quick breakdown of the best apples to use and a few ways to adjust the cake for different occasions without losing that caramel-cider kind of comfort.
The cake stayed incredibly moist for three days, and the caramel frosting set up enough to slice cleanly without sliding off the layers. I also liked that the apples didn’t sink to the bottom.
Save this caramel apple cake for the kind of dessert that needs tall layers, a tangy frosting, and plenty of caramel drizzle.
The Secret to Apples That Stay in the Cake Instead of Turning It Heavy
The biggest mistake with apple layer cake is treating the fruit like a bonus ingredient instead of part of the batter. Large chunks create air pockets, weigh down the crumb, and can leave the center gummy even when the edges look done. Finely diced apples distribute more evenly, which means you get little bursts of apple in every slice without collapsing the structure.
The other thing that matters here is the sour cream. It adds moisture and a little acidity, which keeps the cake tender and helps the baking soda do its job. If you swap it for thin yogurt or milk, the batter loses body and the cake can bake up looser and less plush. Stick with full-fat sour cream if you can.
- All-purpose flour — Gives the cake enough structure to support the apples and frosting without feeling dense. Cake flour makes the crumb softer, but it also makes this style of layer cake a little too delicate for the fruit.
- Brown sugar — Brings moisture and a deeper caramel note that ties into the frosting. Granulated sugar will work in a pinch, but the cake won’t have the same rich warmth.
- Sour cream — This is what keeps the crumb plush and moist. Full-fat sour cream works best; plain Greek yogurt is the closest substitute, though it adds a slightly tangier finish.
- Apples — Peel and dice them finely so they soften into the cake instead of staying crunchy and sinking. Granny Smith gives a sharper contrast to the sweet frosting, while Honeycrisp or Pink Lady lean sweeter and a little juicier.
- Cream cheese — The tang keeps the frosting from reading as plain caramel buttercream. It has to be softened fully, or you’ll end up with tiny lumps that never beat out.
- Caramel sauce — Use a thick sauce, not a thin ice cream topping. If it’s too loose, the frosting gets slack and won’t hold clean edges between the layers.
What Each Ingredient Is Actually Doing in This Recipe
- Primary ingredient (the star) — Quality matters most. Choose the best you can find.
- Cooking medium (oil, butter, or broth) — This carries flavors and prevents dryness.
- Seasonings (salt, pepper, spices, herbs) — Layer flavors so nothing overpowers. Build depth gradually.
- Aromatics (garlic, onion, herbs) — Cook with fat to bloom flavors. Become the foundation.
- Supporting ingredients — Complement the main ingredient without overpowering it.
- Sauce or liquid (if applicable) — Brings flavors together. Balance richness with acid.
- Acid (lemon, vinegar, wine, or other) — Brightens and prevents flat-tasting results.
- Final finish (garnish, glaze, or sauce) — Prevents one-dimensional taste and adds visual appeal.
Building the Layers So the Cake Stays Tender and Tall
Mixing the Dry Ingredients First
Whisk the flour, baking powder, baking soda, spices, and salt together before anything else. That step matters because the cinnamon and nutmeg need to be evenly distributed, or one slice can taste heavily spiced while another tastes flat. The baking powder and baking soda should disappear into the flour completely so the cake rises evenly instead of doming hard in one spot.
Whipping the Butter and Sugar Until Fluffy
Beat the butter and brown sugar until the mixture looks pale, thick, and a little satin-smooth. That air you whip in here is part of the cake’s lift, especially since the apples add weight later. If the butter is too cold, the mixture stays grainy and you lose volume, so soften it just enough that your mixer can beat it without tearing the mixture apart.
Adding the Apples Without Deflating the Batter
Alternate the flour mixture and sour cream, then fold in the diced apples at the end. That order keeps the batter from tightening up too soon and gives you a smoother, more even texture. Stop mixing as soon as the flour disappears; if you beat it hard after the apples go in, the cake can turn dense and the fruit can bleed too much moisture into the crumb.
Baking Until the Center Springs Back
Divide the batter evenly between the pans and bake until a toothpick comes out clean from the center. The tops should be lightly domed and set, with the edges just beginning to pull from the pan. If the middle still looks wet but the tops are deep brown, the oven is running hot; cover loosely with foil for the last part of baking instead of pulling the cake early.
Frosting and Drizzling for a Clean Finish
Cool the layers completely before you frost them. If the cake is even a little warm, the cream cheese frosting softens and slides. Beat the frosting until smooth before adding the caramel, then spread it in a thick layer between the cakes and over the top. Finish with extra caramel once the frosting is in place so the drizzle stays visible instead of sinking in.
Ways to Change the Cake Without Losing the Caramel-Apple Balance
Gluten-Free Version
Use a cup-for-cup gluten-free flour blend that includes xanthan gum. The cake will still be moist, but it may bake up a little more delicate, so let the layers cool fully before lifting them from the pans. Don’t swap in almond flour alone; it won’t give the cake enough structure to hold the apples and frosting.
Dairy-Free Adjustment
Use plant-based butter for the cake and a thick dairy-free yogurt in place of the sour cream. For the frosting, use dairy-free cream cheese and a caramel sauce made without cream. The texture stays close, but the frosting will usually be a little softer, so chill it briefly before spreading.
One-Layer Snack Cake
Bake the batter in a 9×13-inch pan instead of two round pans and spread the frosting over the top only. You’ll lose the tall layer-cake look, but the cake gets easier to serve and holds up well for potlucks. Start checking a little earlier, since a larger pan usually finishes faster than two stacked layers.
Storage and Reheating
- Refrigerator: Store covered for up to 4 days. The frosting will firm up, but the cake stays moist.
- Freezer: Freeze unfrosted layers tightly wrapped for up to 2 months. Thaw overnight in the fridge before frosting; the frosted cake can freeze, but the texture of the cream cheese frosting softens a bit after thawing.
- Reheating: Serve slices at room temperature for the best texture. If you want it slightly warm, microwave an individual slice for 10 to 15 seconds, just enough to loosen the caramel without melting the frosting into the crumb.
Questions I Get Asked About This Recipe
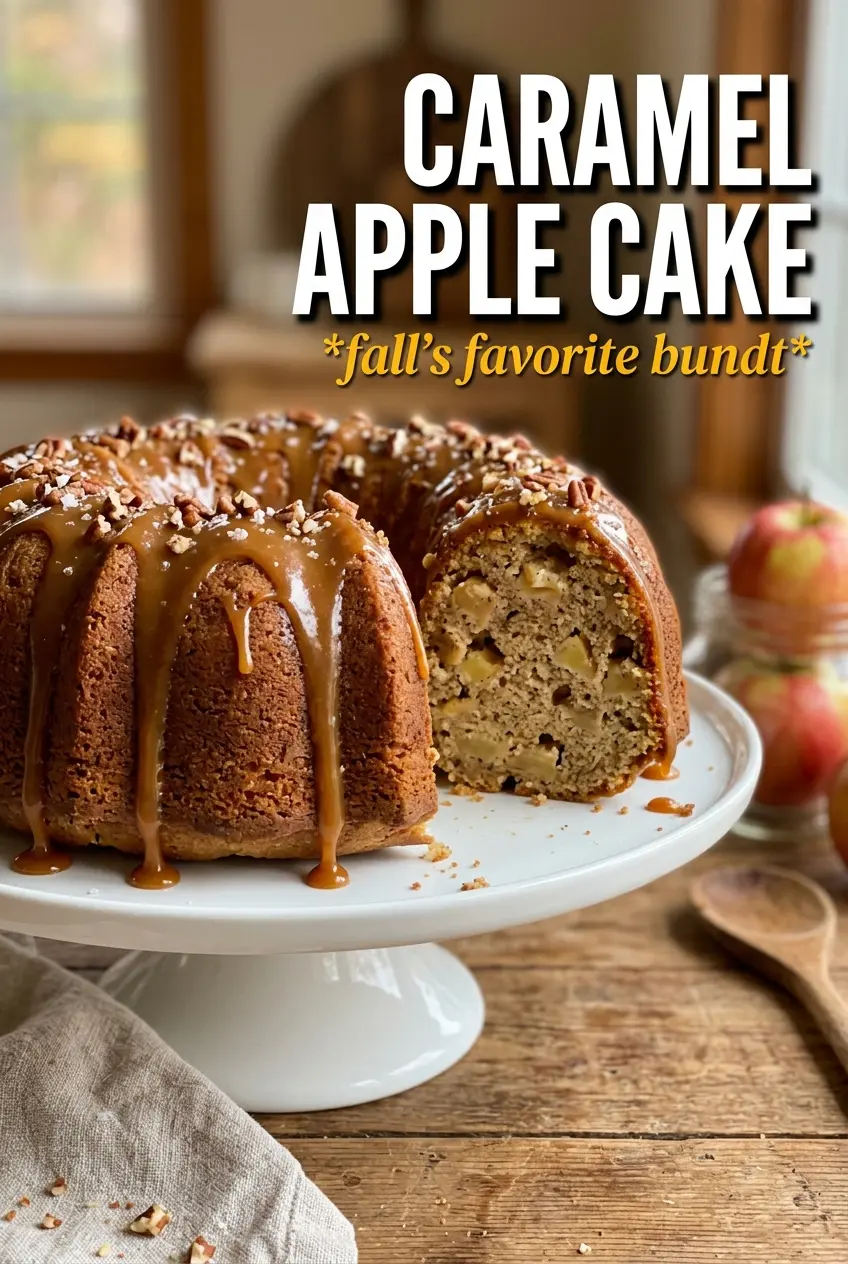
Caramel Apple Cake
Ingredients
Equipment
Method
- Preheat oven to 350F and grease two 9-inch round pans. This prevents sticking and helps the cakes release cleanly after baking.
- Whisk all-purpose flour, baking powder, baking soda, cinnamon, nutmeg, and salt until evenly combined. The mixture should look uniformly speckled with spices.
- Beat butter and brown sugar until very fluffy, then mix in eggs and vanilla. Stop when the batter is lighter in color and smooth.
- Alternate adding the flour mixture and sour cream, then fold in the diced apples. Fold until no dry streaks remain and the apples are evenly distributed.
- Divide batter between the two pans and bake for 50-55 minutes at 350F. The top should be golden and a toothpick inserted in the center should come out clean.
- Cool completely on a rack before frosting. Letting the layers cool prevents the frosting from melting and sliding.
- Beat cream cheese, butter, caramel sauce, powdered sugar, and vanilla until smooth. The frosting should be thick and spreadable with no lumps.
- Frost between layers and over the top with the caramel cream cheese frosting. Spread to the edges so the layers are fully sealed.
- Drizzle extra caramel over the top. Finish with visible caramel streaks that pool slightly into the frosting.