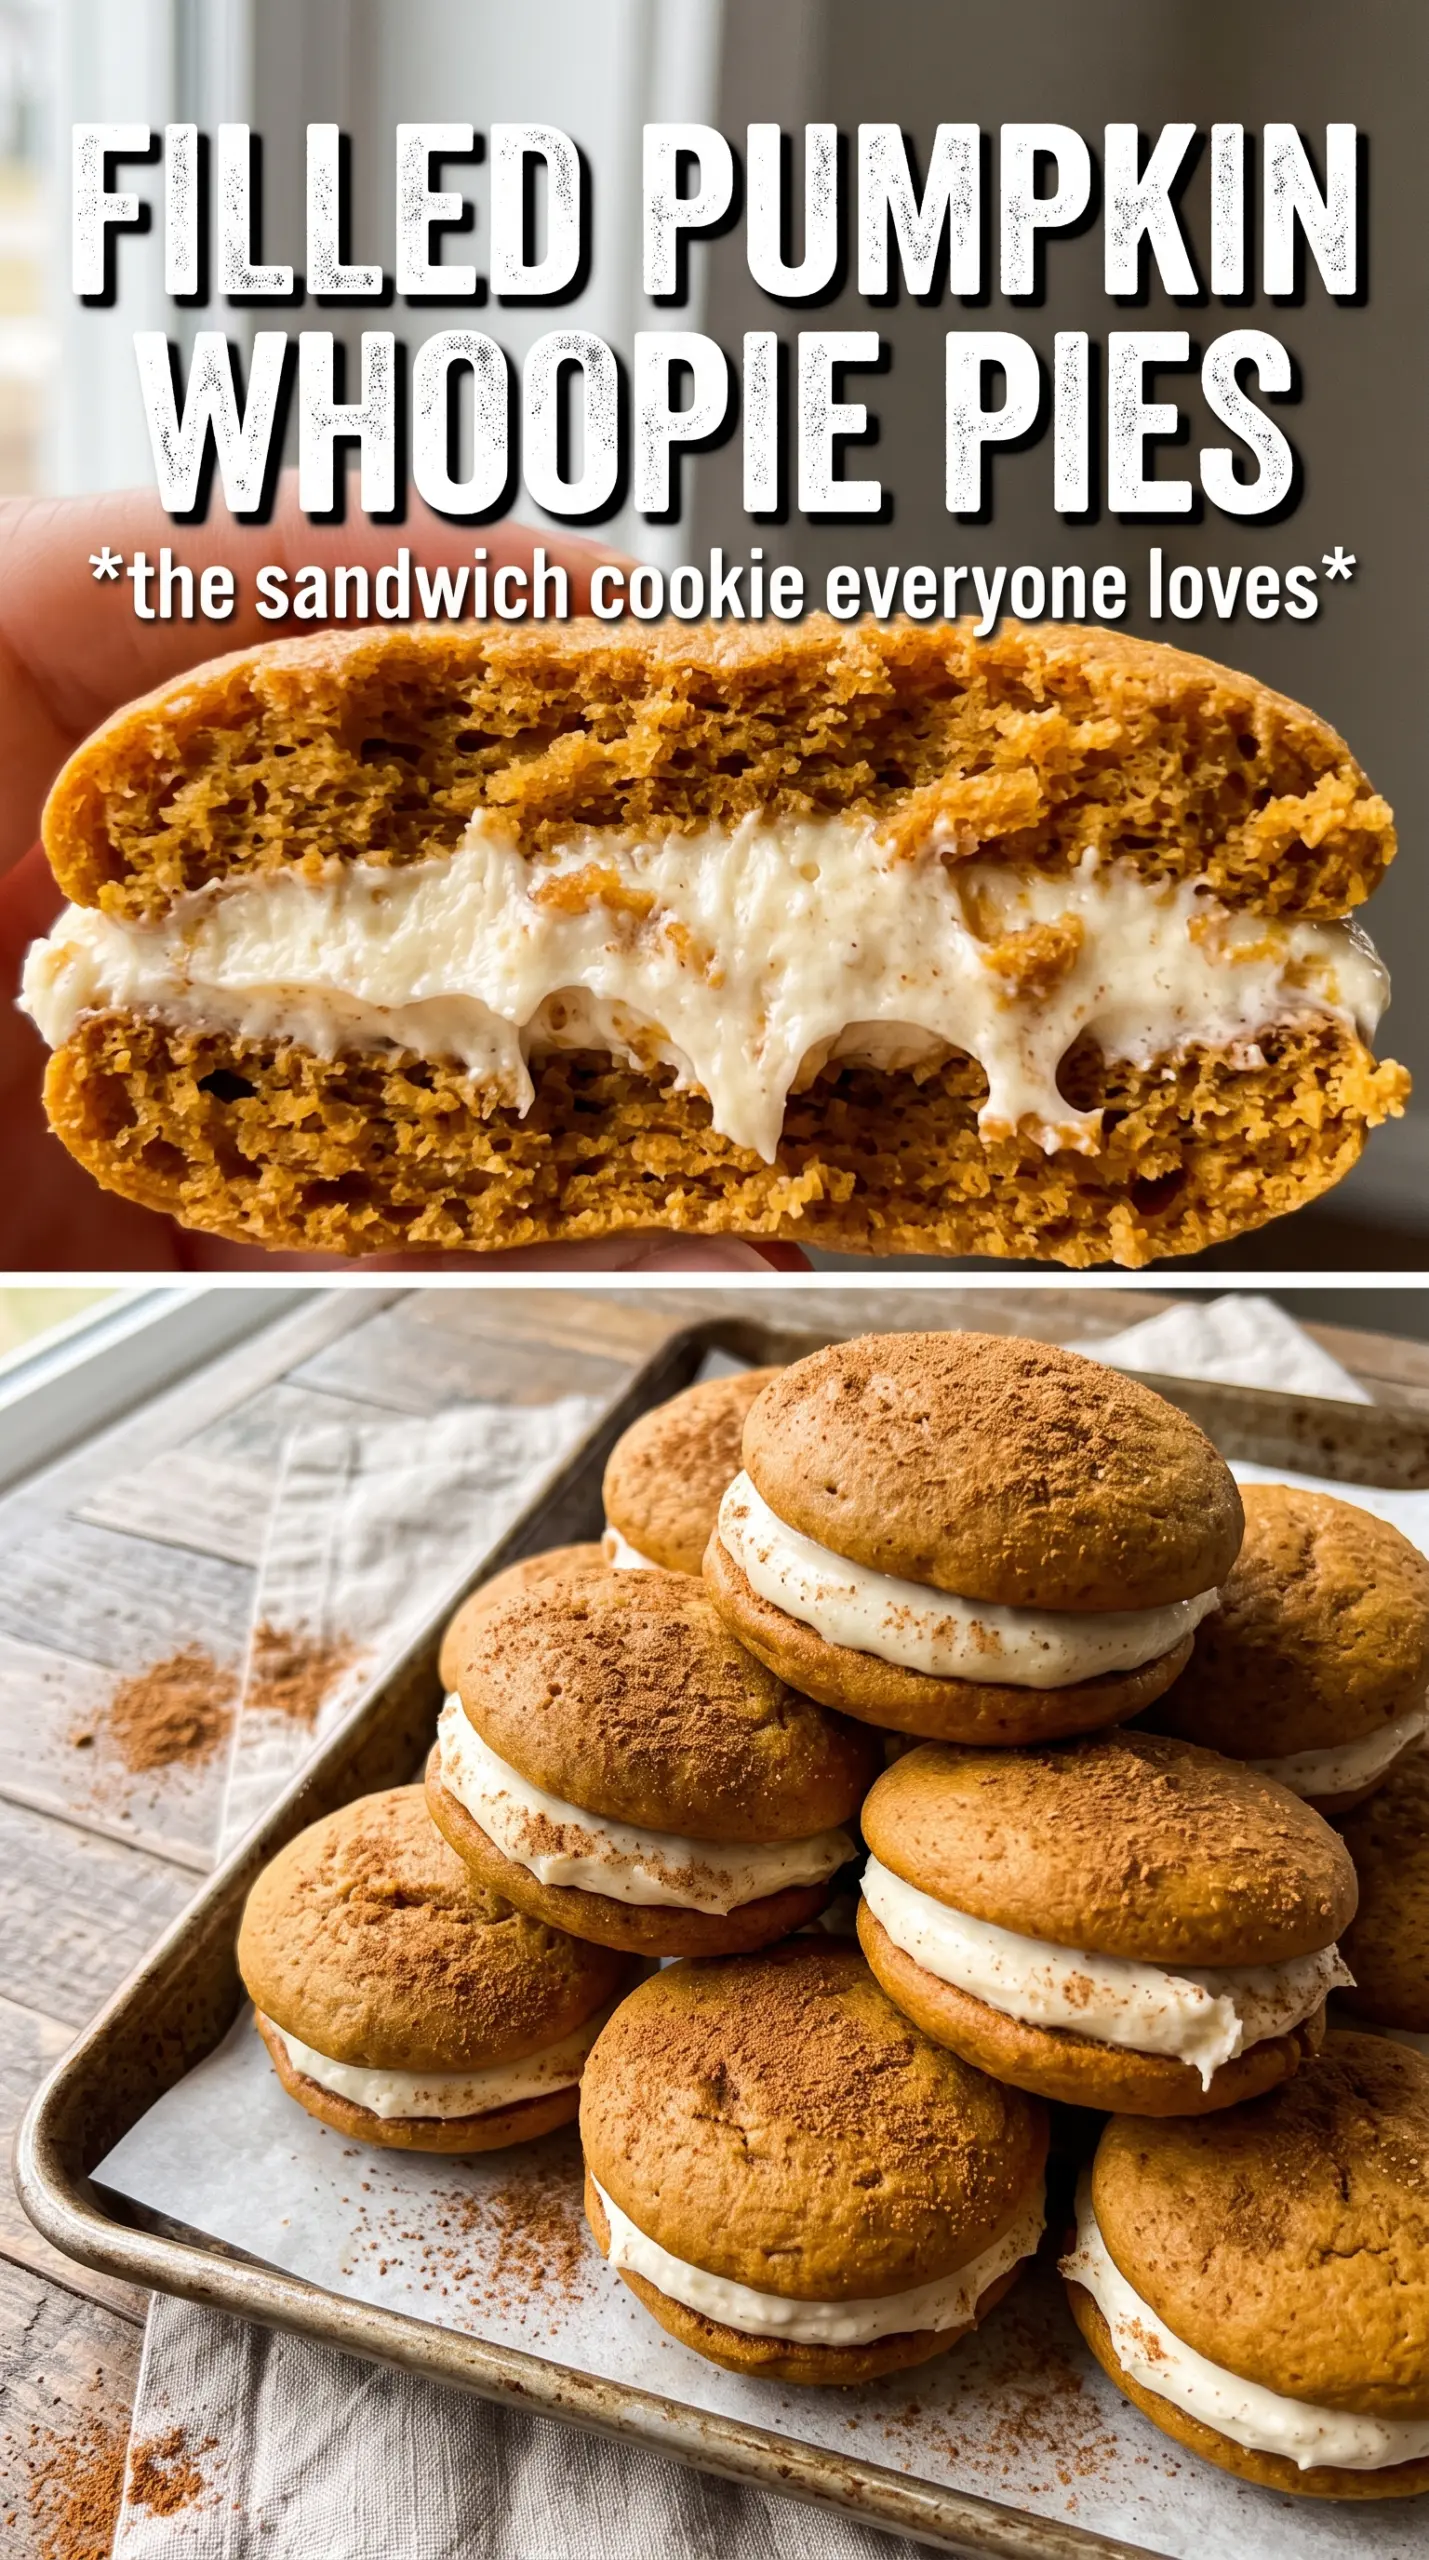
Pumpkin whoopie pies hit that perfect middle ground between cake and cookie: soft, warmly spiced, and just sturdy enough to hold a thick layer of cream cheese filling without falling apart. The edges set up gently while the centers stay tender, so every bite feels plush instead of dry or crumbly. That balance is what makes them disappear fast on a dessert tray.
The trick is keeping the pumpkin cake batter thick enough to scoop cleanly, then baking just until the tops spring back and the centers no longer look wet. Pumpkin puree adds a lot of moisture, so the flour and leaveners have to be balanced carefully or the cakes spread too much and turn gummy. The filling matters just as much: beat it until smooth and pipeable, then stop before it gets loose.
Below you’ll find the small details that keep these neat, soft, and bakery-style, plus a few useful swaps if you need to work around what’s in your kitchen.
The cakes baked up soft and cakey, and the filling held its shape without squishing out the sides. I chilled them for 20 minutes and they sliced cleanly, which made them easy to pack for my kid’s school fall party.
Love these pumpkin whoopie pies? Save them to Pinterest for the soft pumpkin cakes and thick cream cheese filling you’ll want all season long.
The Secret to Soft Whoopie Pies That Don’t Spread Too Thin
Whoopie pies go wrong when the batter is too loose or the oven runs hot. Pumpkin puree brings a lot of moisture, and if the butter and sugar are beaten until fluffy but not overdone, the mixture stays light without turning runny. The goal is a batter that drops in rounded mounds and holds its shape on the pan for a few seconds before settling.
Another common miss is baking them until they look dry all over. Pull them when the tops spring back and the centers are set but still soft. They finish as they cool, and that carryover keeps the cakes tender instead of making them bready.
- Pumpkin puree — Use plain canned pumpkin, not pumpkin pie filling. Pie filling already has sugar and spices mixed in, which throws off both texture and seasoning.
- Brown sugar — This gives the cakes their deep caramel note and helps keep them moist. Light or dark both work; dark brown sugar gives a slightly richer finish.
- Baking soda and baking powder — The two leaveners do different jobs here. Soda helps with spread and browning, while baking powder gives the lift that keeps the cakes soft and rounded.
- Cream cheese — Full-fat cream cheese gives the filling its tang and structure. Neufchâtel works in a pinch, but the filling will be a little softer.
What Each Ingredient Is Really Doing in the Batter and Filling
- All-purpose flour — This gives the cakes enough structure to sandwich cleanly. Too little and they collapse; too much and they turn dry.
- Softened butter — In both the cakes and filling, softened butter blends smoothly and traps air. If it’s melted, the batter gets greasy and the filling won’t hold.
- Eggs — They bind the batter and help the cakes rise evenly. Add them one at a time so the mixture stays emulsified instead of looking curdled.
- Pumpkin pie spice and cinnamon — The pumpkin pie spice gives the familiar warm backbone, while the extra cinnamon keeps the flavor clear and present after baking. If you only have pumpkin pie spice, use it for both and skip the extra cinnamon in the cakes.
- Powdered sugar — This makes the filling smooth and spreadable. Add it gradually or you’ll end up with a cloud of sugar on the counter and a gritty filling.
Building the Batter and Filling So They Stay Light
Mix the base until it looks creamy, not fluffy
Beat the softened butter and brown sugar until the mixture looks smooth and a little lighter in color. You don’t need a super-fluffy cake batter here; too much air can make the cookies puff and then sink. Once the eggs, pumpkin, and vanilla go in, the batter should look thick and glossy, with no streaks of butter showing.
Fold the dry ingredients in just until the flour disappears
Whisk the flour, baking soda, baking powder, spices, and salt together first, then fold them into the wet mixture in batches. Stop as soon as the last dry streaks are gone. If you keep stirring, the batter tightens up and the finished pies bake up tougher than they should.
Portion small mounds and give them room
Use a 2-tablespoon scoop or a spoon to drop even rounds onto lined baking sheets. Leave space between them because they spread a little as they bake. If your mounds look flat before they go into the oven, the batter is too thin; chill it for 10 to 15 minutes before scooping the rest.
Beat the filling until it spreads cleanly
Start with softened cream cheese and butter, then beat in the powdered sugar, cinnamon, and vanilla until the filling is smooth and thick. It should hold a swoop from the spoon but still spread easily on a cooled cake. If it looks loose, add a little more powdered sugar; if it turns stiff, beat in a teaspoon of milk only if absolutely needed.
How to Adapt These Pumpkin Whoopie Pies Without Losing the Soft Center
Gluten-Free Pumpkin Whoopie Pies
Use a 1:1 gluten-free baking blend that includes xanthan gum. The cakes will be a touch more delicate, so let them cool completely before moving them. That extra cooling time keeps them from tearing when you fill them.
Dairy-Free Filling
Swap the cream cheese and butter for plant-based versions with a firm texture. The filling will be a little softer and less tangy, so chill it before sandwiching the cakes. If the brand you use is loose at room temperature, add powdered sugar slowly until it firms up.
Extra-Spiced Version
Add a pinch of cloves or ginger to the batter if you want a sharper spice note. Don’t overdo it; pumpkin whoopie pies should taste warm and balanced, not like a spice cabinet. A small amount deepens the flavor without muddying the pumpkin.
Storage and Reheating
- Refrigerator: Store in an airtight container for up to 4 days. The filling firms up in the fridge, which actually makes the pies easier to eat neatly.
- Freezer: Freeze assembled whoopie pies in a single layer, then move to a freezer bag for up to 2 months. Wrap them well so the filling doesn’t pick up freezer odors.
- Reheating: These are best served at room temperature. If they’ve been chilled, let them sit out for 20 to 30 minutes so the filling softens again; microwaving makes the cakes rubbery and the filling runny.
Questions I Get Asked About This Recipe

Pumpkin Whoopie Pies
Ingredients
Equipment
Method
- Preheat the oven to 350F and line baking sheets for easy release. You should be ready to bake as soon as the dough is portioned.
- Beat the softened unsalted butter with the packed brown sugar until smooth. The mixture should look creamy and evenly combined.
- Add the eggs, then mix in the pumpkin puree and vanilla. Stop when the batter looks thick and cohesive with no streaks.
- Whisk the all-purpose flour, baking soda, baking powder, pumpkin pie spice, cinnamon, and salt together. Stir until the dry ingredients are evenly speckled.
- Fold the whisked dry ingredients into the wet mixture. Mix just until no dry pockets remain.
- Drop 2-tablespoon rounds of dough onto the lined baking sheets. Space them evenly so they spread slightly while baking.
- Bake for 10-12 minutes at 350F until the rounds look set. The centers should no longer look wet.
- Cool the cakes completely. Use a visible room-temperature cue—no warmth should remain—before filling.
- Beat the softened cream cheese until smooth. The texture should be lump-free and spreadable.
- Beat in the softened unsalted butter, then add the powdered sugar gradually. Mix until the filling is thick, smooth, and easy to spoon.
- Mix in cinnamon and vanilla for flavor. The filling should look uniformly colored with no cinnamon clumps.
- Sandwich a generous spoonful of cream cheese filling between two cooled pumpkin cakes. Press lightly so the filling reaches the edges without squeezing out.